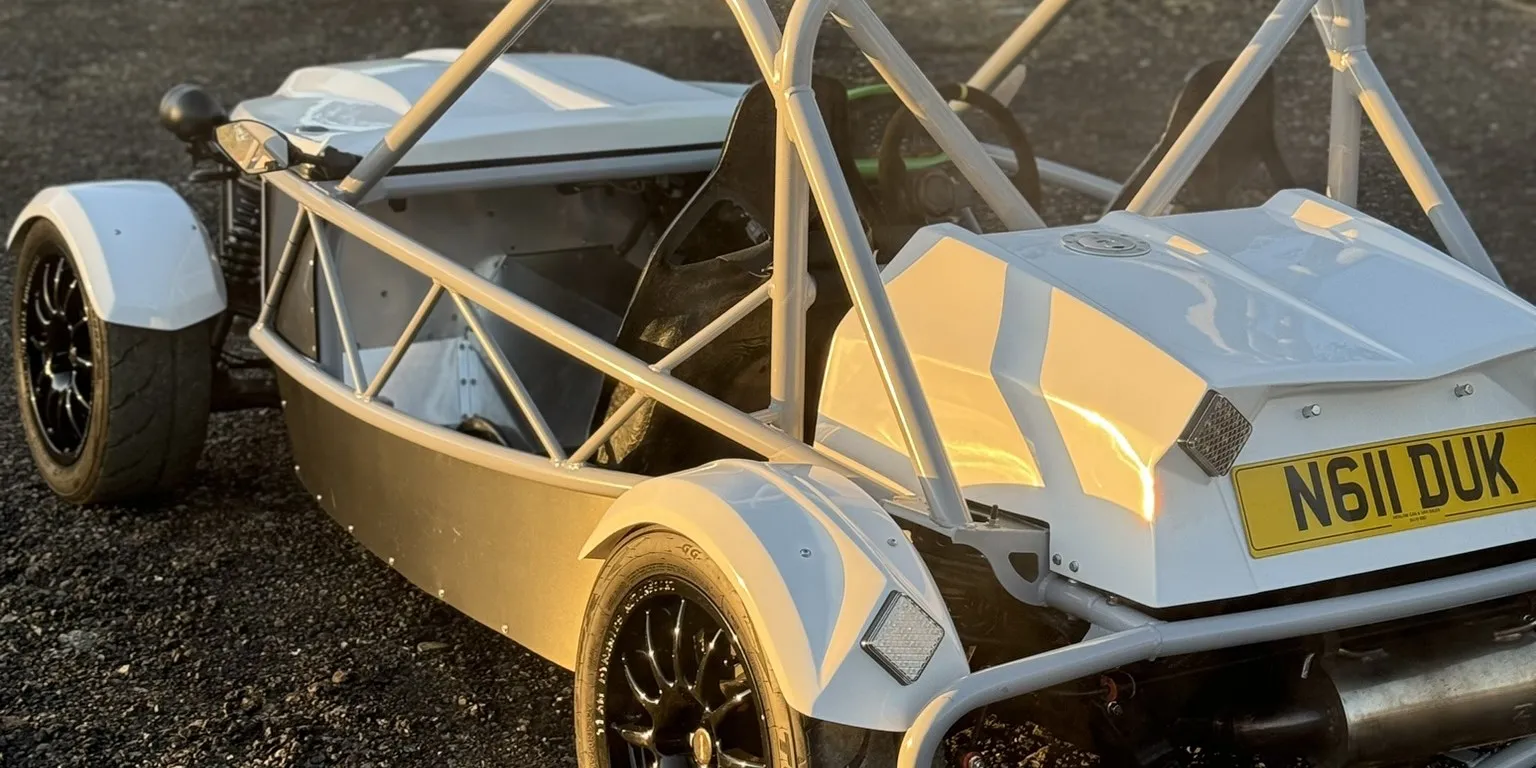
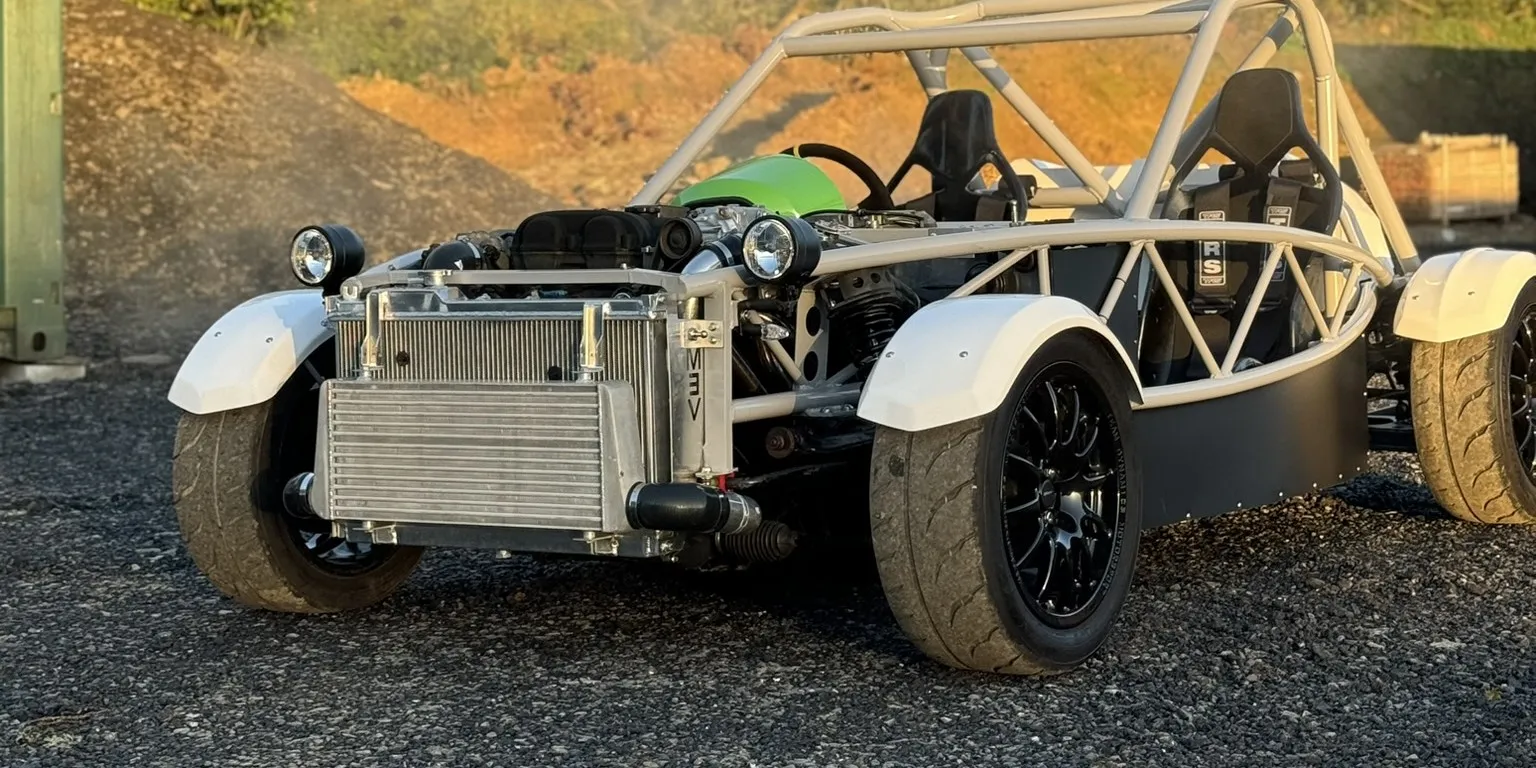
The MEV Exocet is a kit car built on Mazda MX-5 running gear. This one is on Mk1 1.8 BP running gear, and it is supercharged. It came to us first in 2022 for a supercharger conversion and a few other improvements, then for wiring and brakes, then with a bent front end. By 2023 the chassis was tired, and the owner chose to keep the car he knew and put a new chassis under it.
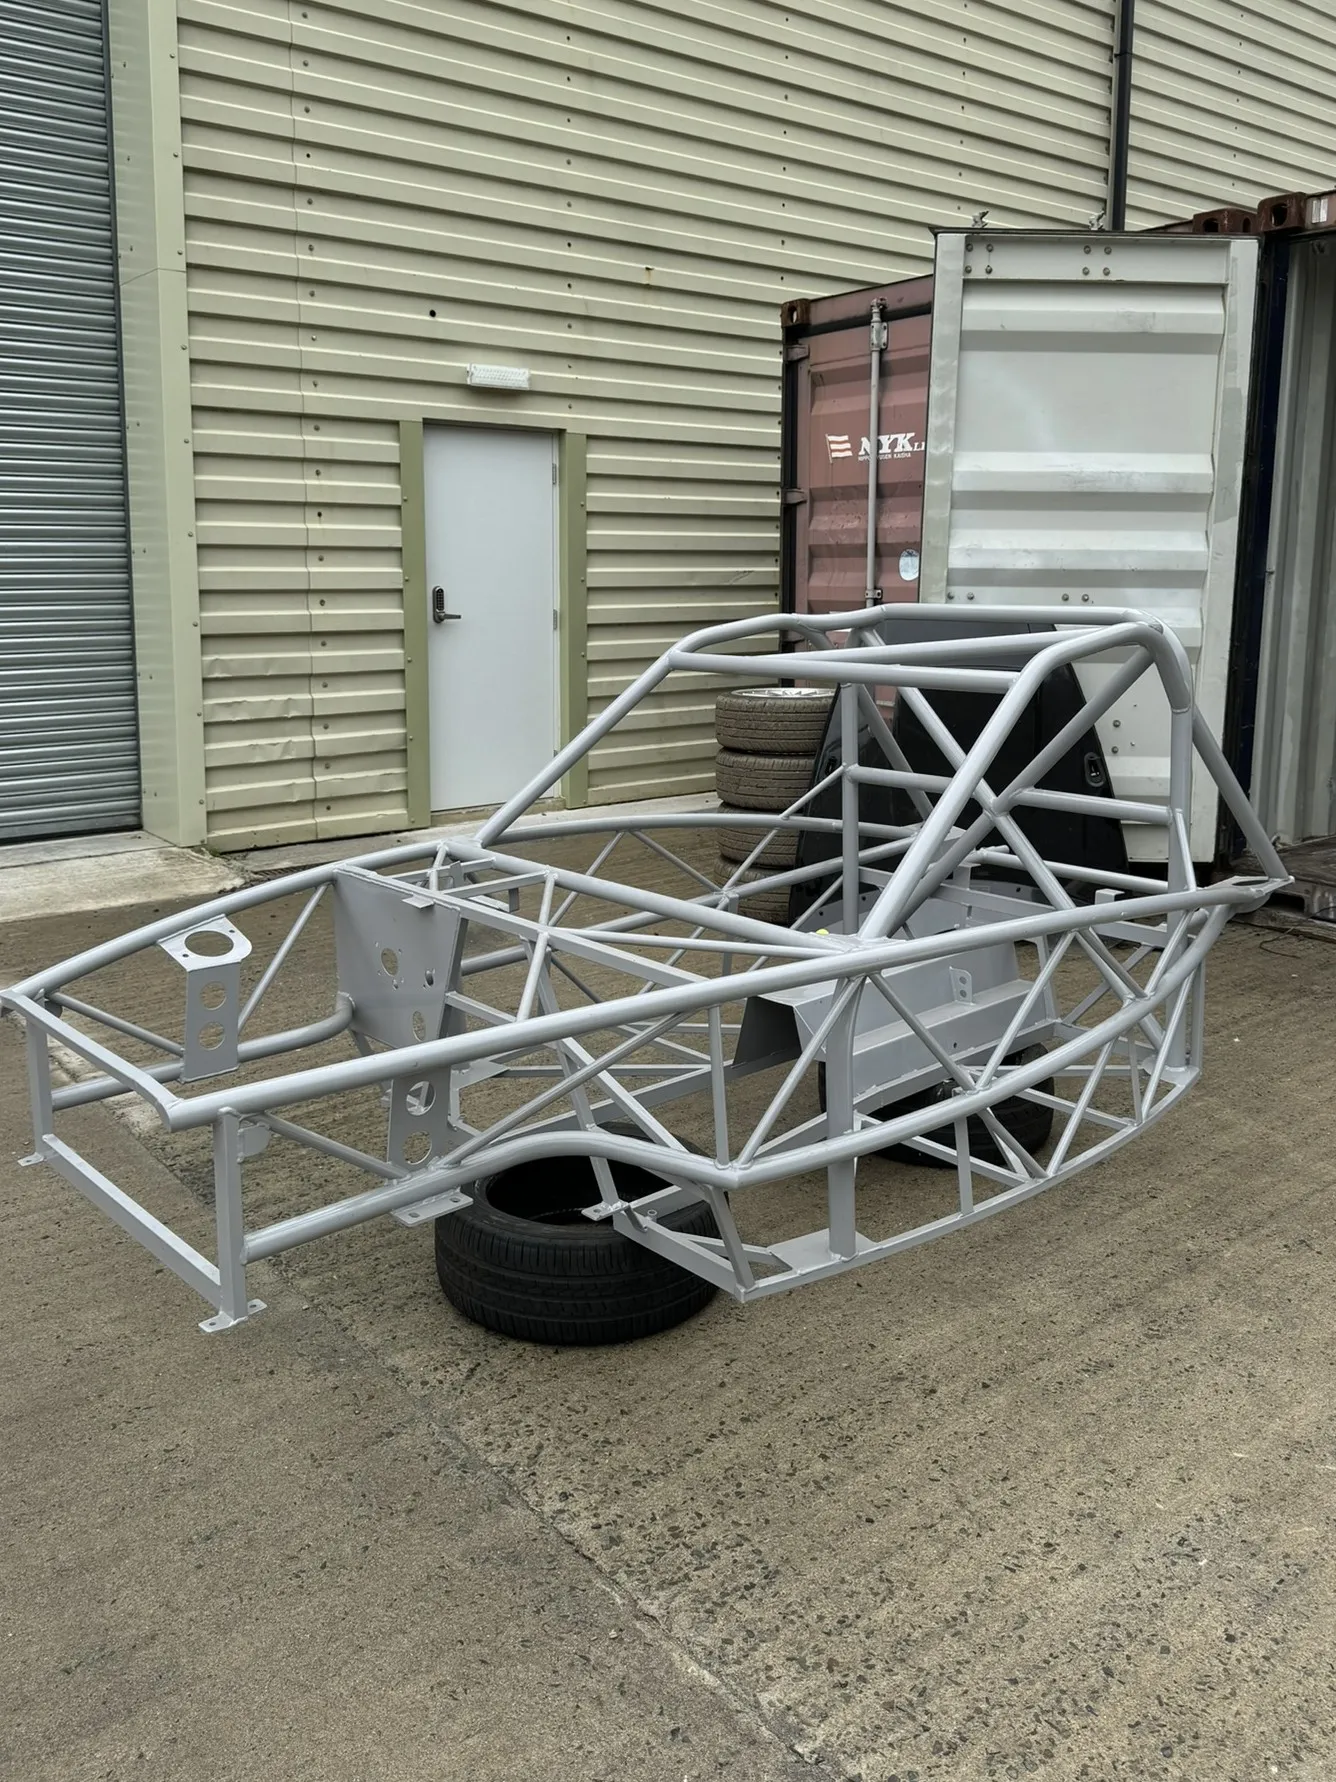
MEV supplied a race chassis, with the over hoop and roll cage the old one did not have. Everything that could be kept was kept, cleaned, repaired and refitted. Anything worn or corroded was replaced or made new, and anything from when the car was first put together on the old chassis that needed sorting was sorted. A reshell, from the strip down in November 2023 to the MOT in October 2024. Here is what went into it.
The Build List
The parts that define the car. Service items and hardware are not listed.
Chassis and body
- MEV race chassis, over hoop and roll cage
- MEV floor pans, bulkhead and tunnel panels, side pods and rear tub
- Fibreglass arches, front and rear
- FOJI Raceworks rear arch brackets and rear subframe mounting brackets
Fuel and brakes
- Existing fuel tank on FOJI Raceworks mounts
- FOJI Raceworks hard fuel lines, feed and return, AN6 fittings
- Wilwood brakes and bias valve
- Proline braided brake lines, HEL rear lines
- FOJI Raceworks stainless brake line brackets
Suspension
- Existing Gaz Gold coilovers
- FOJI Raceworks depowered steering rack
- Rear subframe brace and bottom front subframe brace
Engine and electrical
- Existing Eaton M45 supercharger with new bypass valve
- FOJI Raceworks supercharger inlet with throttle body flange
- FOJI Raceworks bypass valve relocation pipe
- FOJI Raceworks hard boost pipes
- MS3 Mini ECU
- AEM wideband
- Dominator front lights
Before The Reshell
The car first came to us in 2022 for the supercharger conversion. We fitted the kit and everything that went with it, made the hard boost pipes, and tuned it to 216 bhp. Later that year we rewired the rear end, replaced the alternator and fitted a Wilwood brake set up with a handbrake made to suit it.
The owner had the car and enjoyed it, then crashed it. In 2023 it came back with front end damage. We cut out the bent tubes, built a new front support area, welded it out and painted it. The suspension came off, the upper arms were modified to clear the new shocks and springs, and Whiteline anti roll bars went on front and rear with a braided line kit and a Wilwood bias valve.
Stripping The Old Chassis
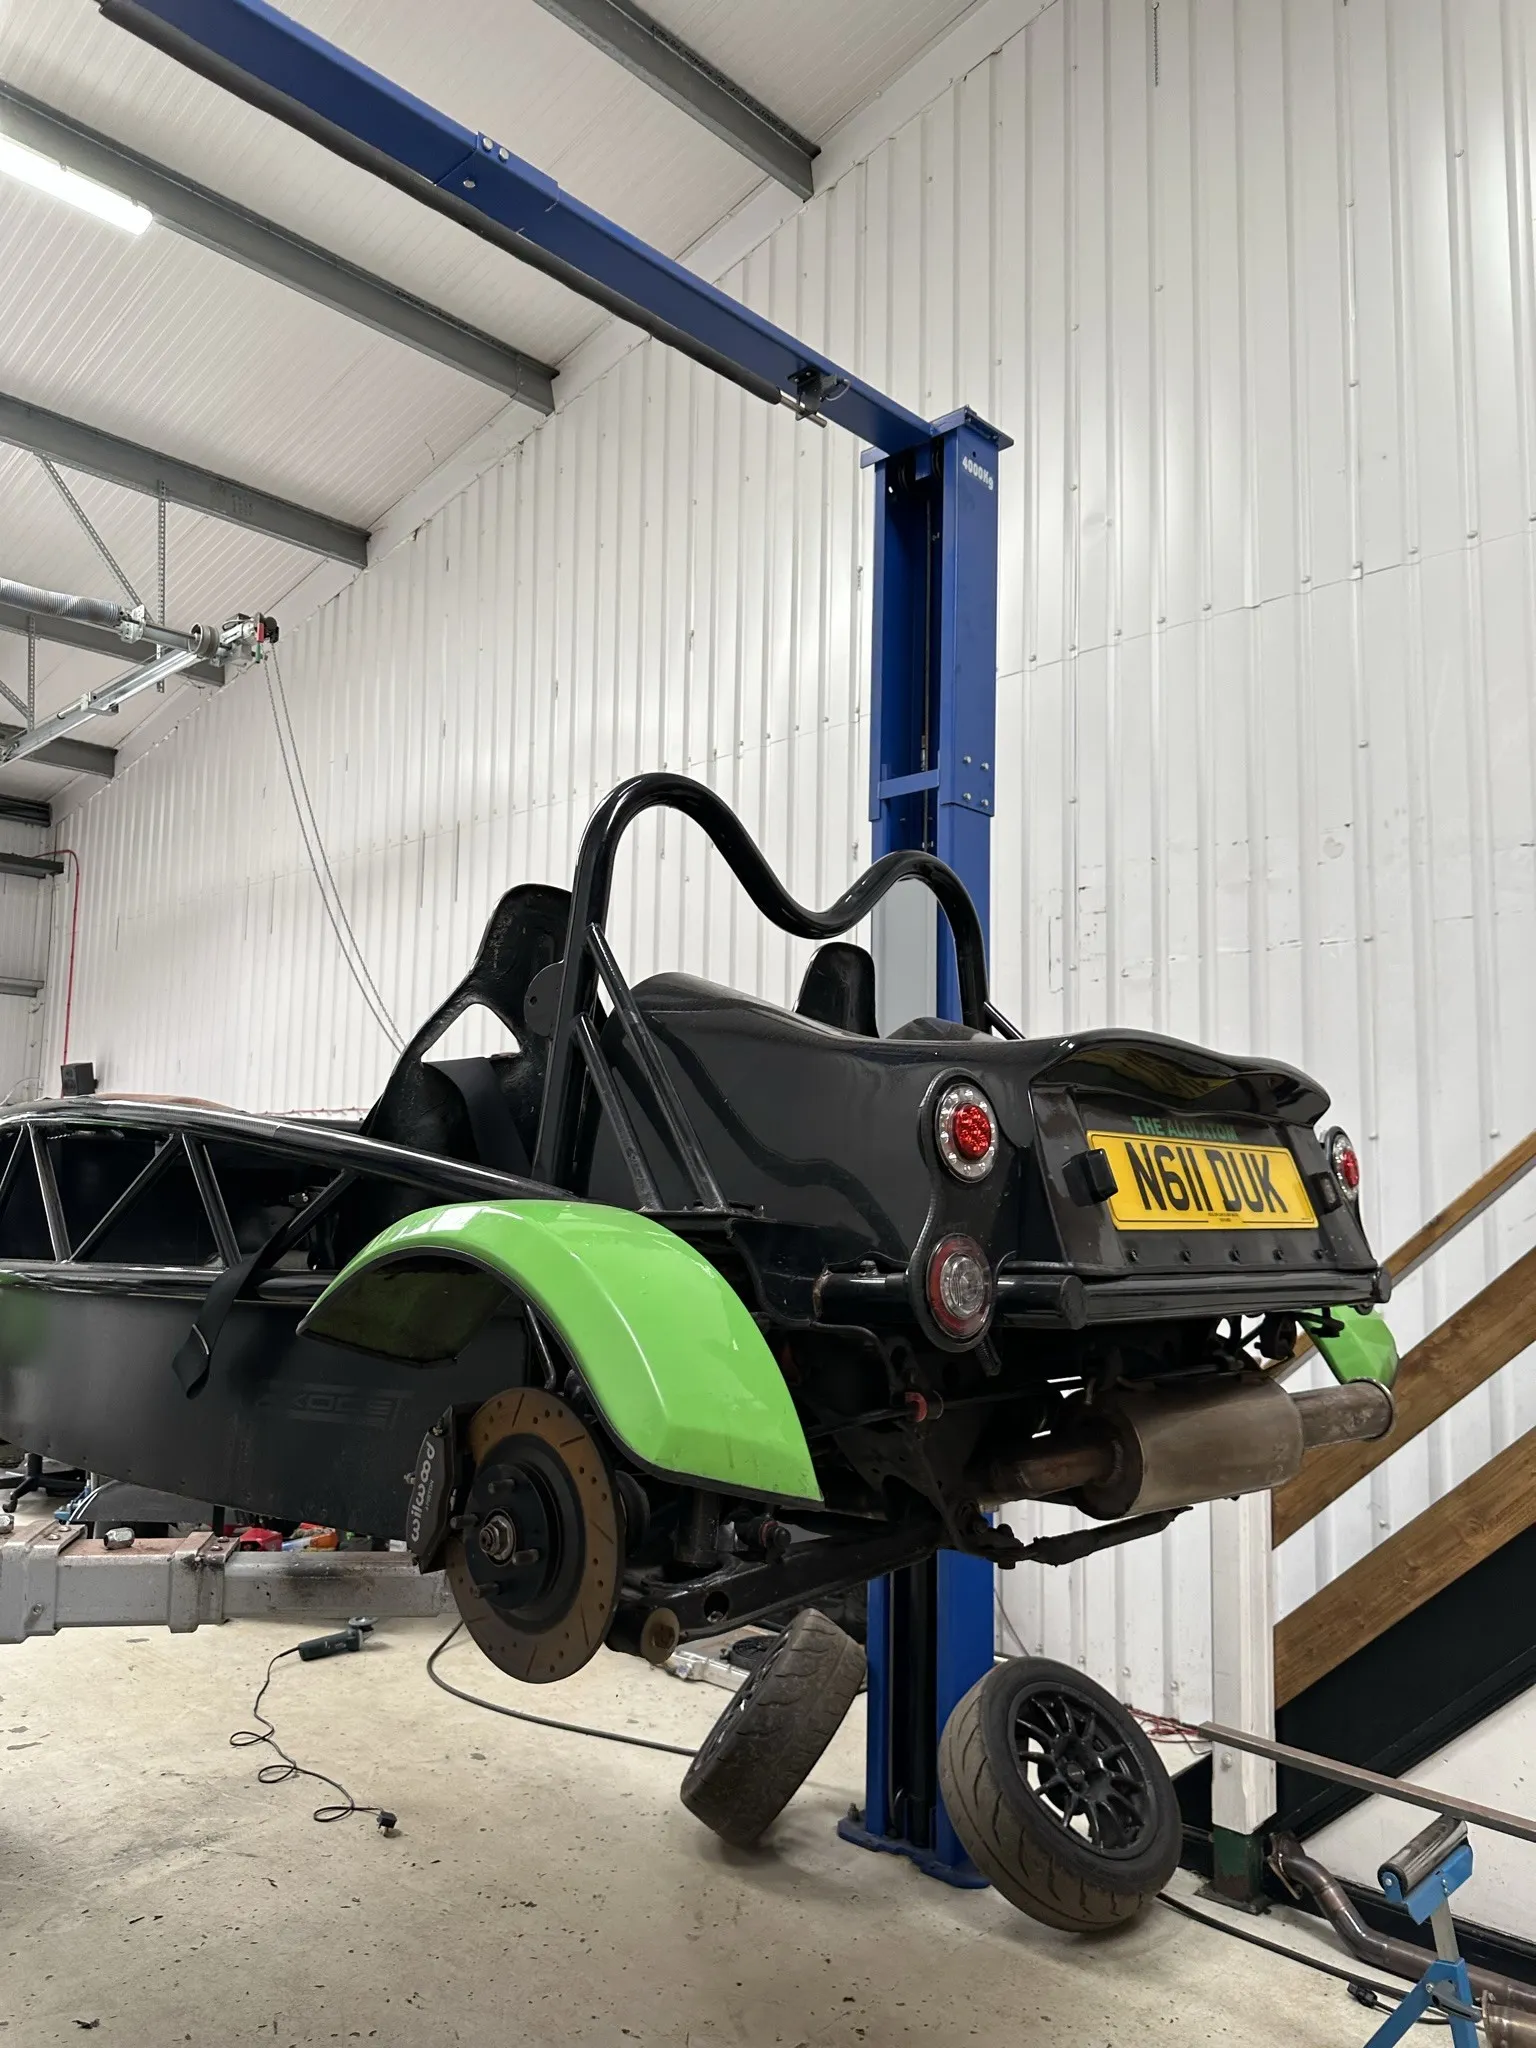
The existing chassis was ropey. Rust everywhere, in need of a repaint, and it had had its day. The owner changed direction. Rather than repaint a chassis that had already been repaired once, he ordered the race chassis from MEV.
In November 2023 the old chassis was stripped ready for the new one. The engine, gearbox and both subframes came out together as one unit, with the suspension still on the subframes. Then everything came apart and was greased up again. Interior, loom, ECU and lights out. All of it stored. The old hardware was too corroded and worn to go back in, so every fixing on the rebuild would be new, stainless where it mattered.
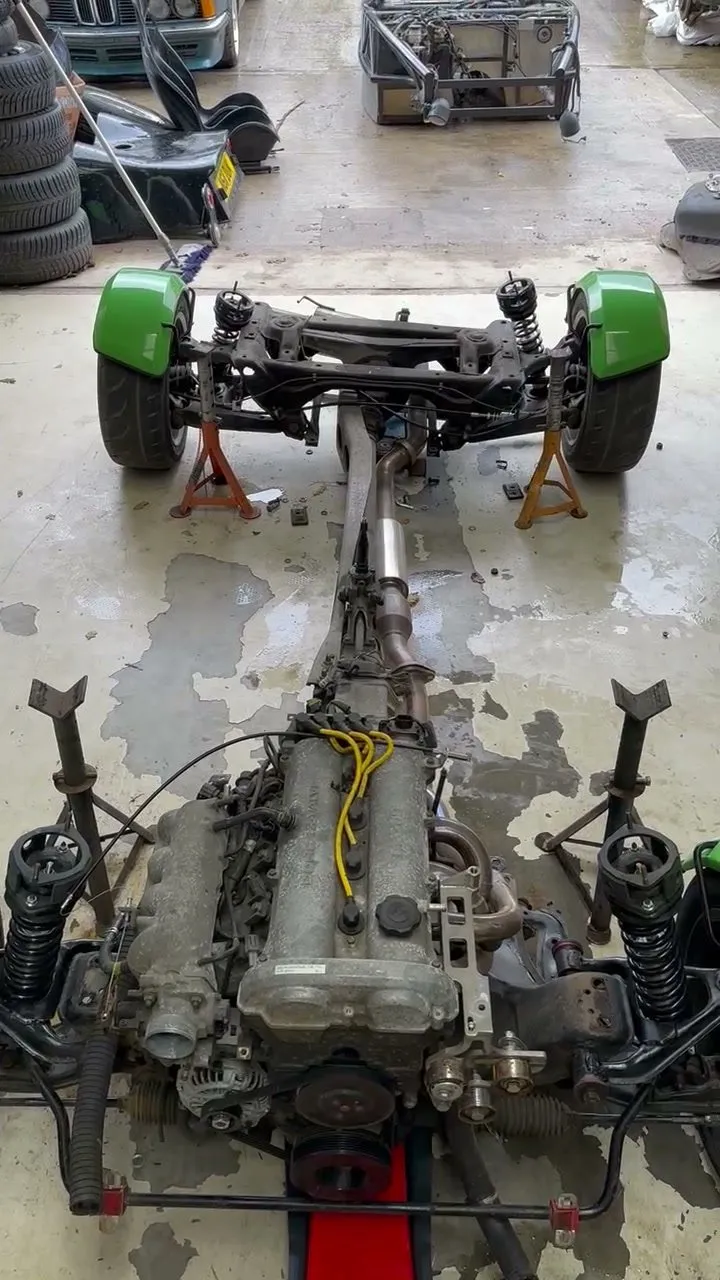
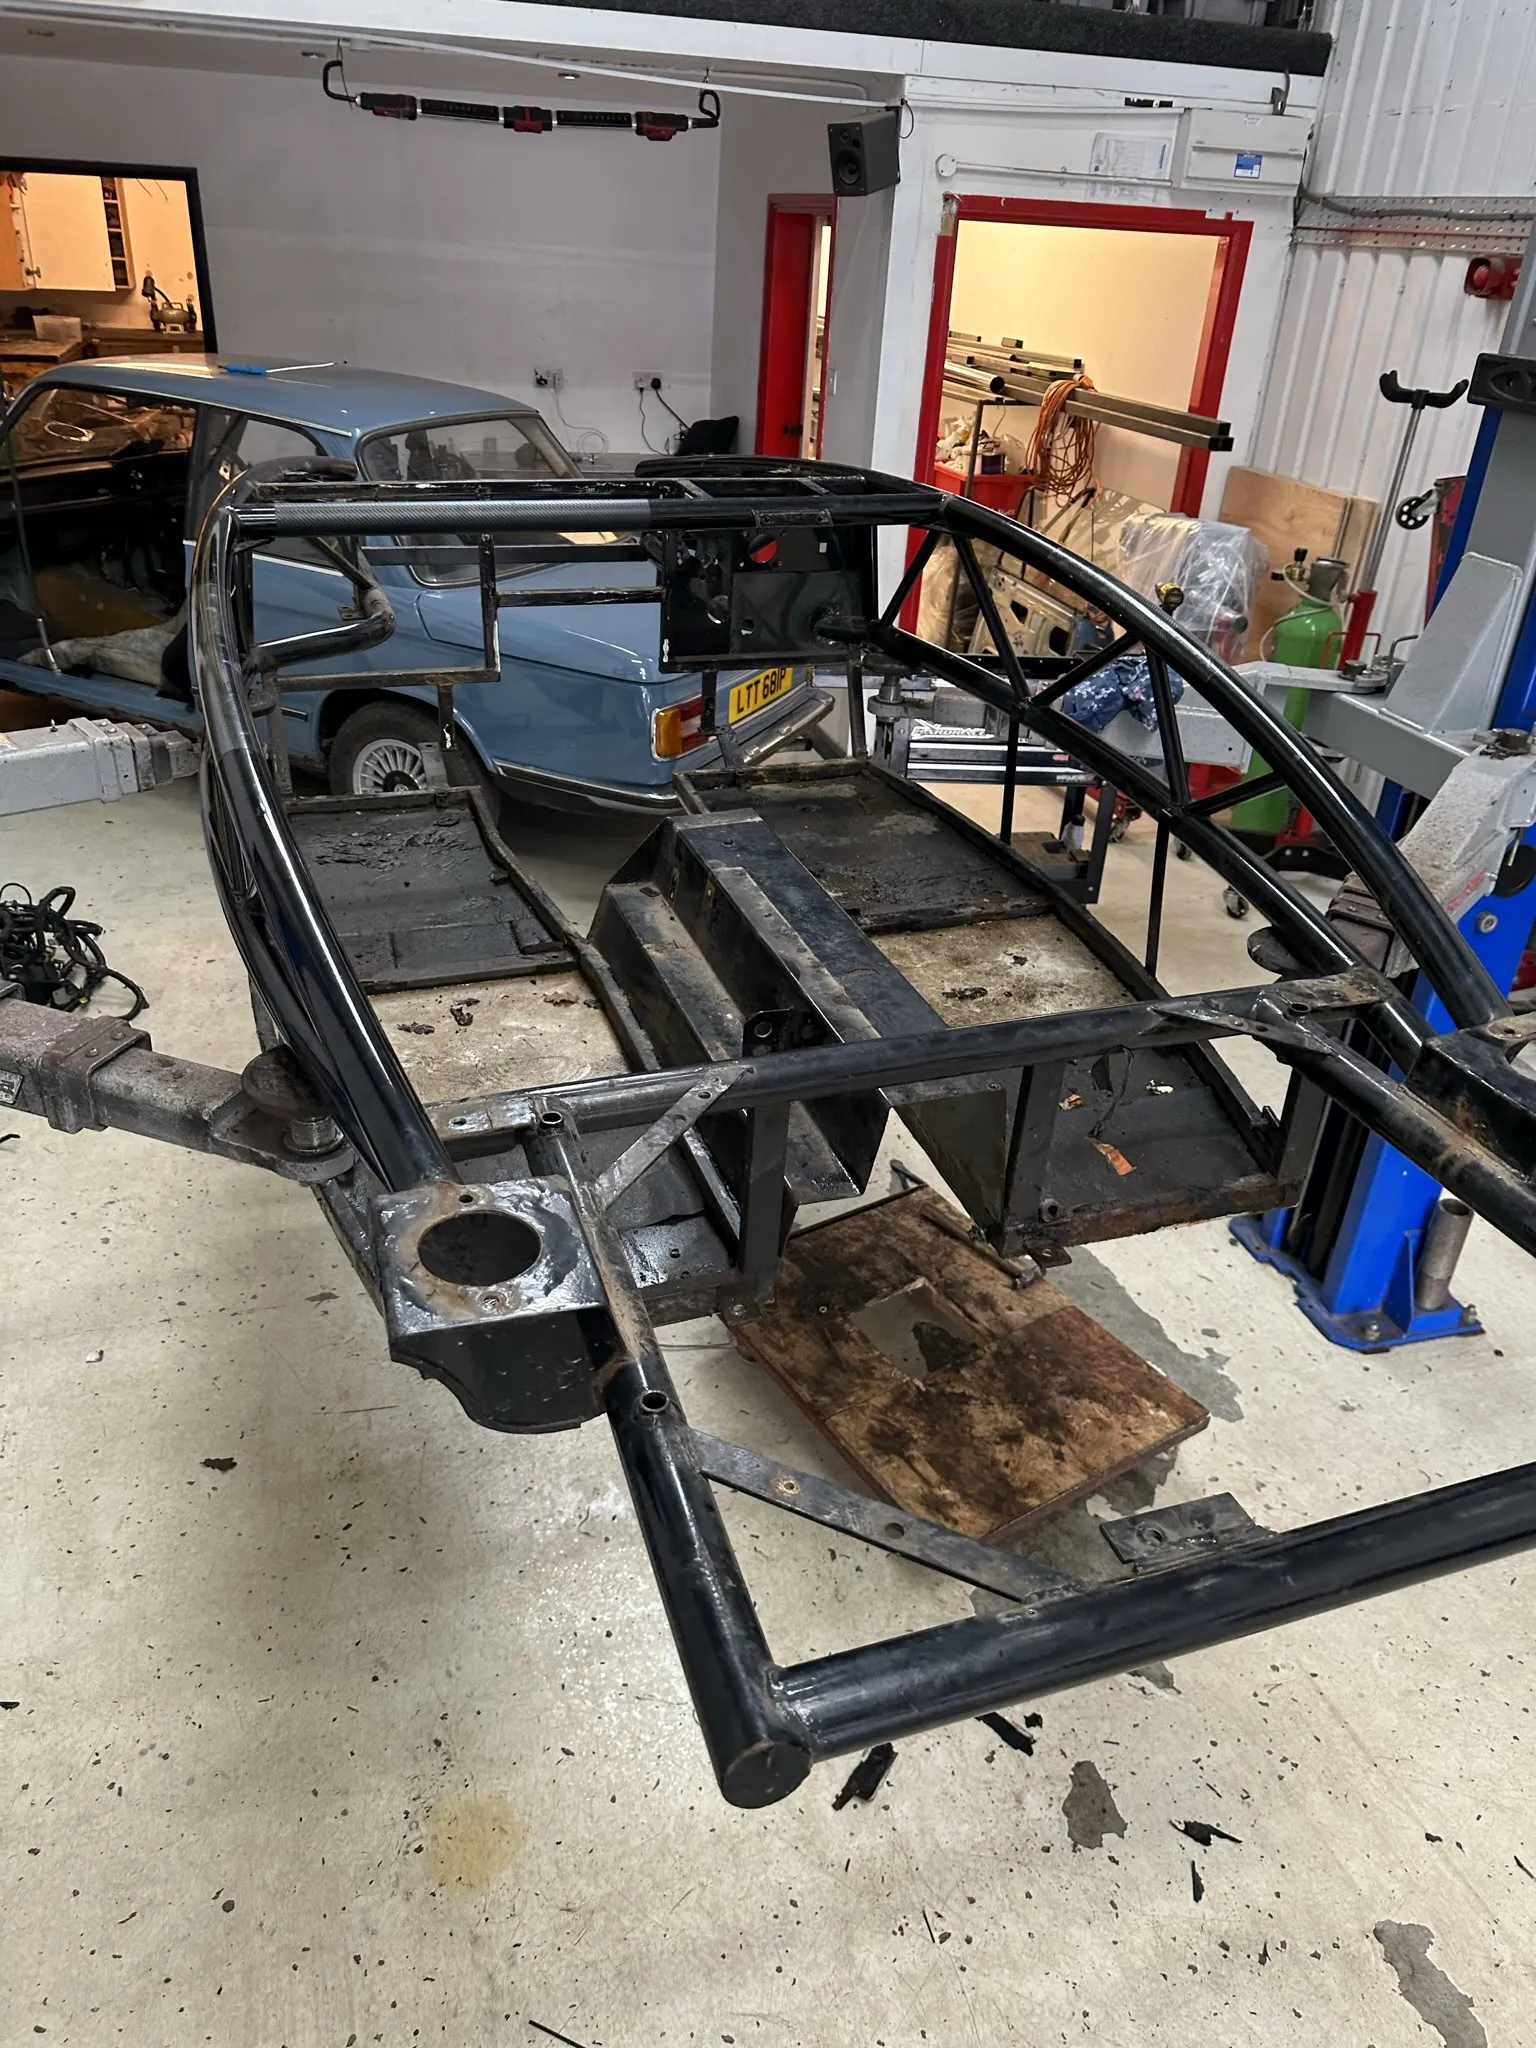
The new chassis arrived at the end of that month and went into storage until the summer.
The MEV Race Chassis
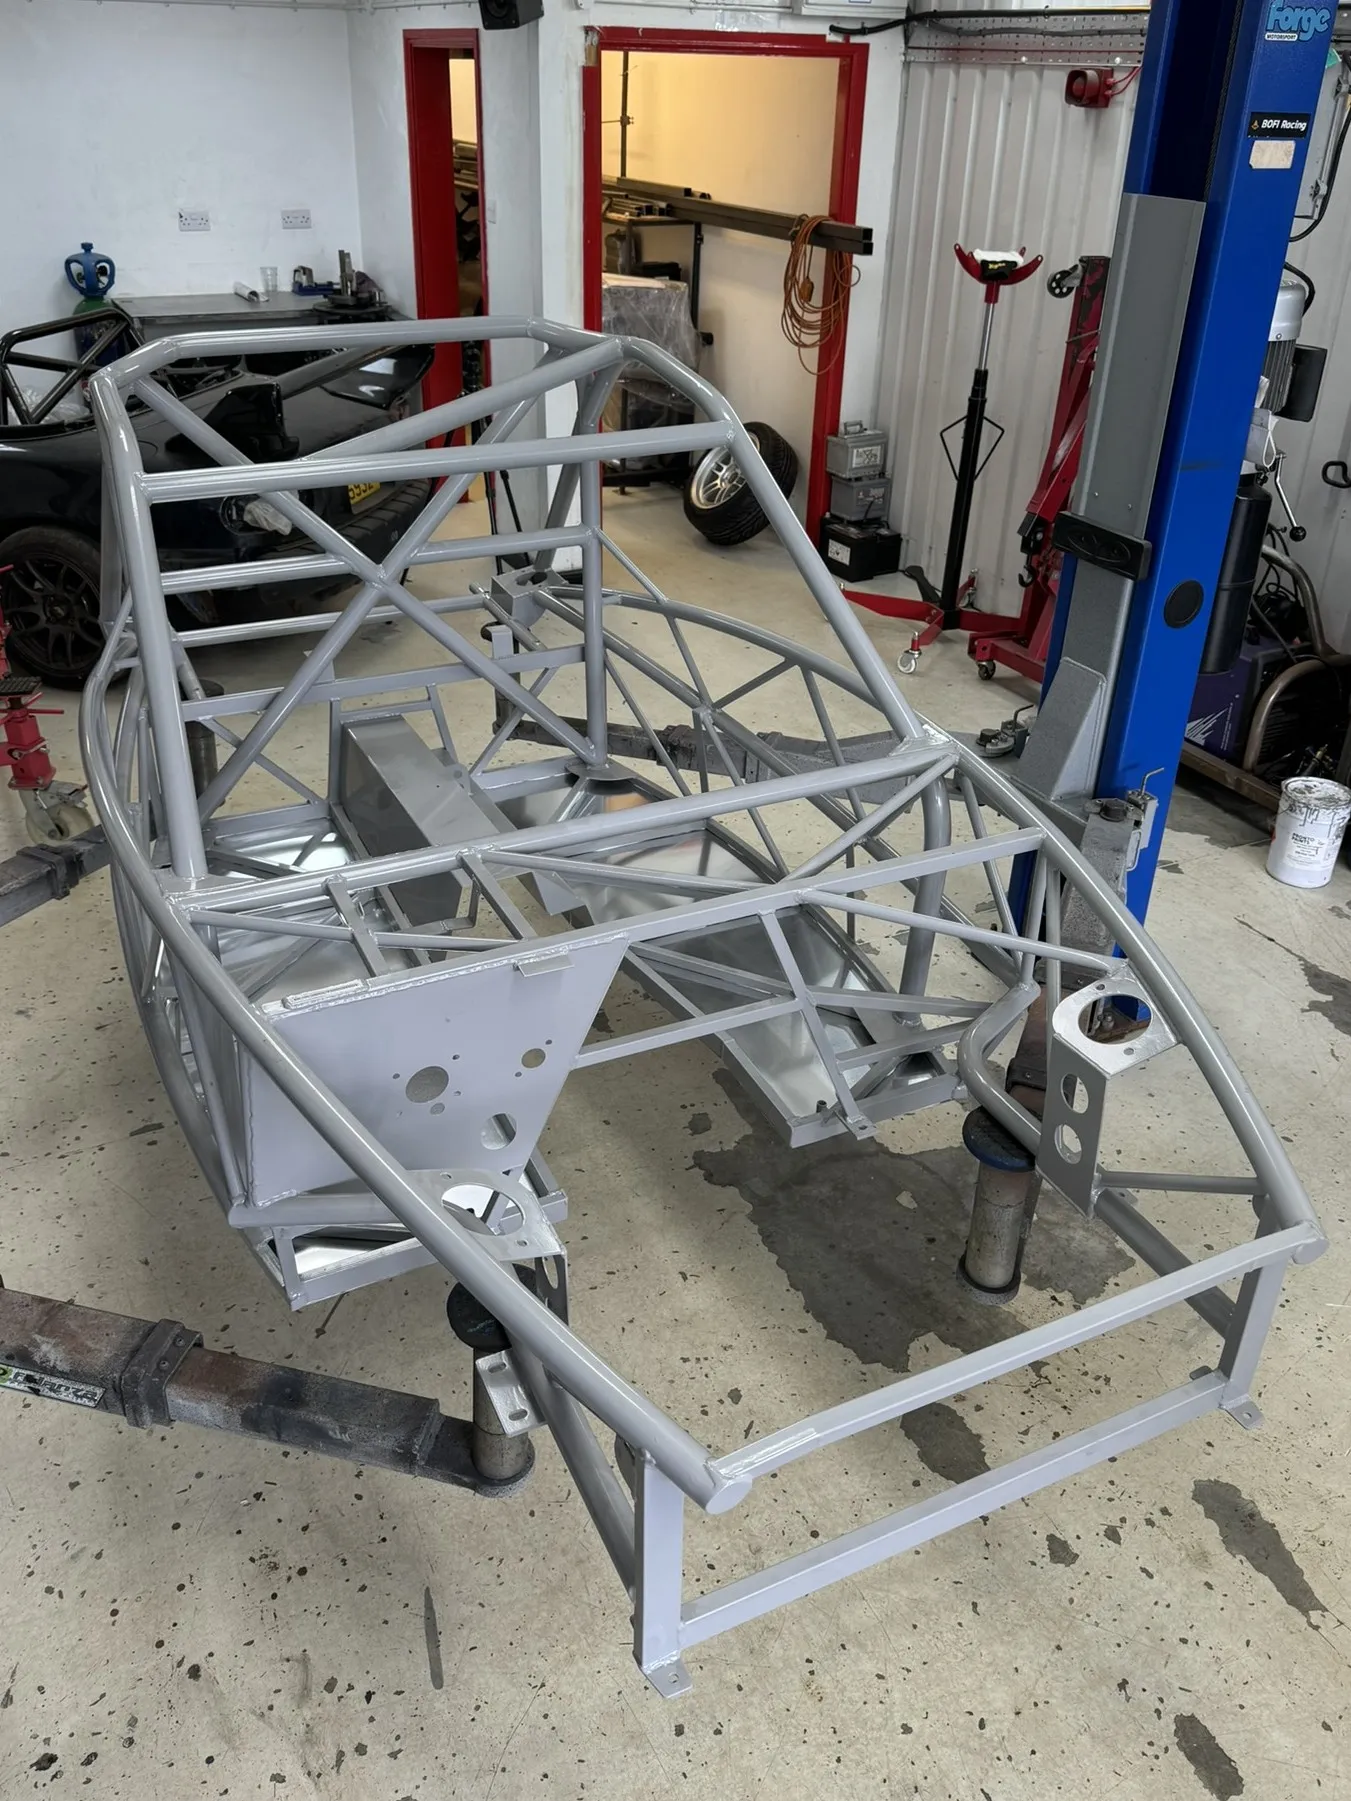
It is the MEV race chassis, so it carries the over hoop and cage the old car did not. It also differs from the old one in small ways that mattered. A tank bracket in the wrong place for this tank, and a chassis bar where the supercharger’s second throttle body used to sit. Each became a job.
Floors, Subframes And Suspension
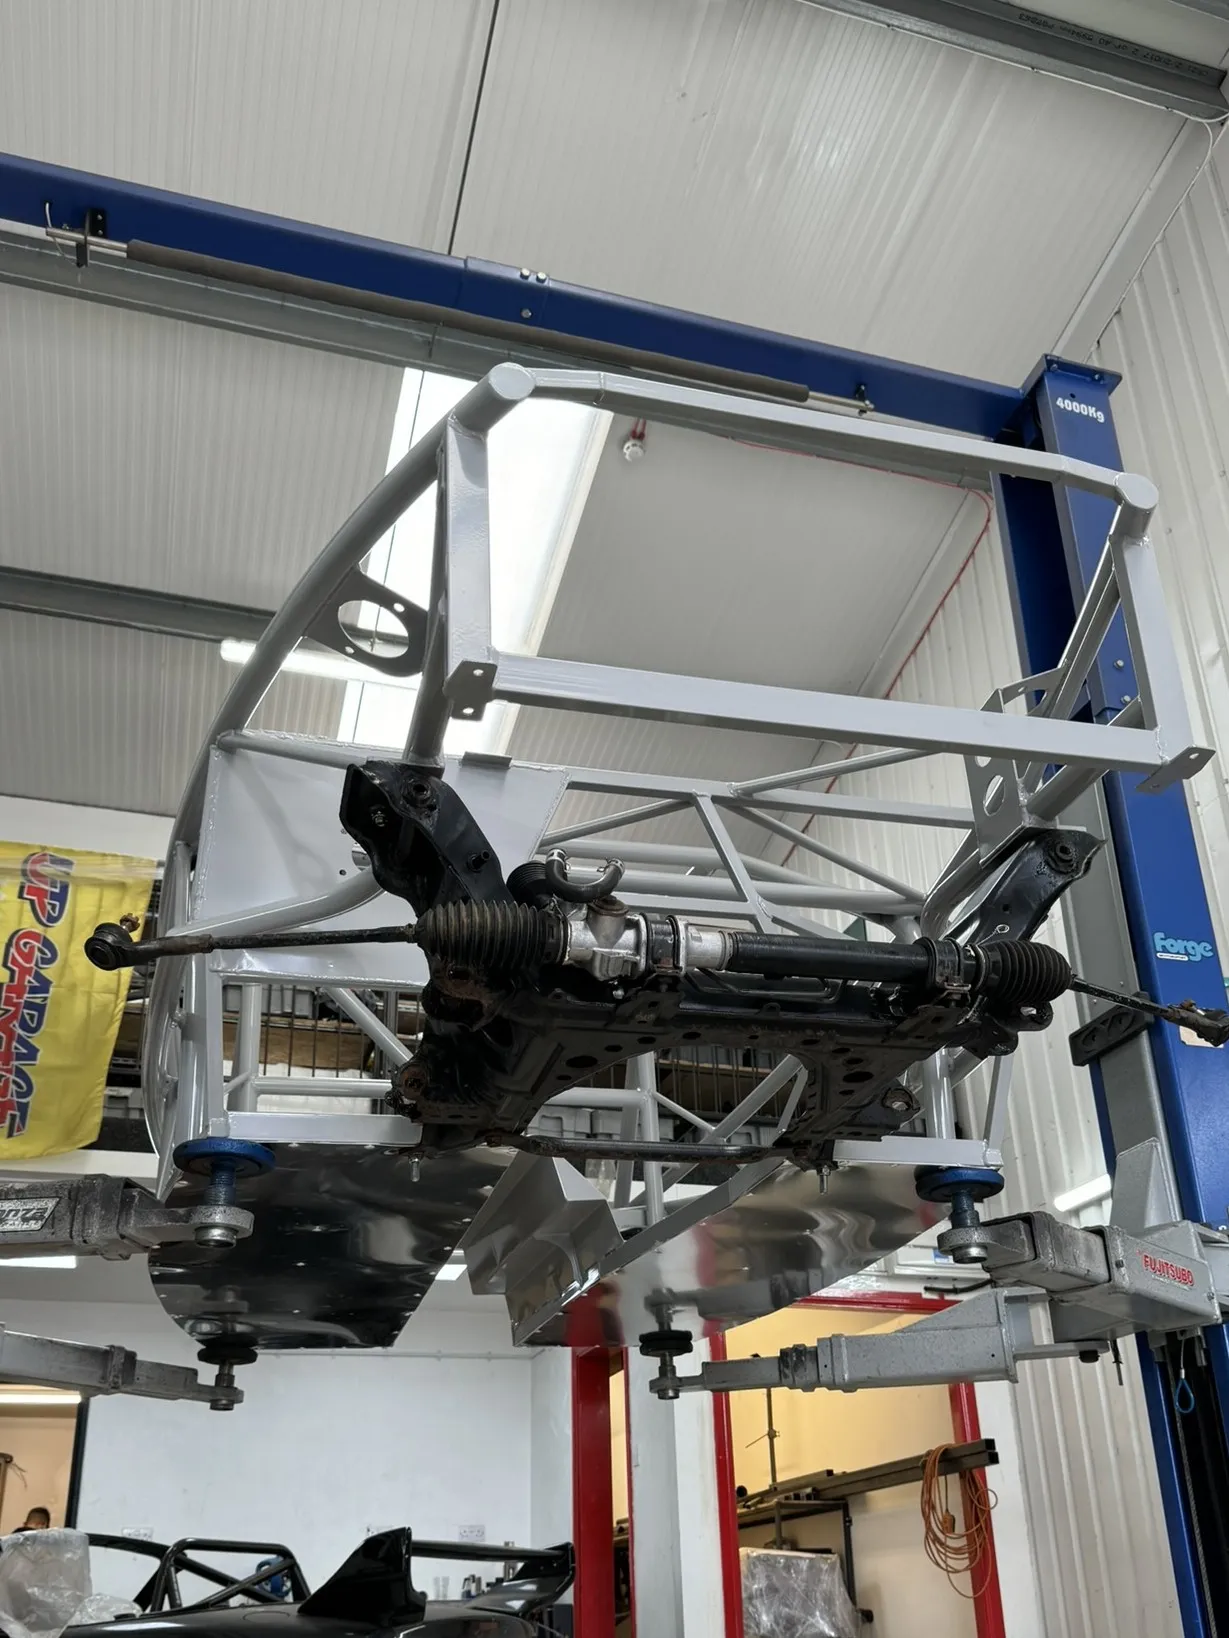
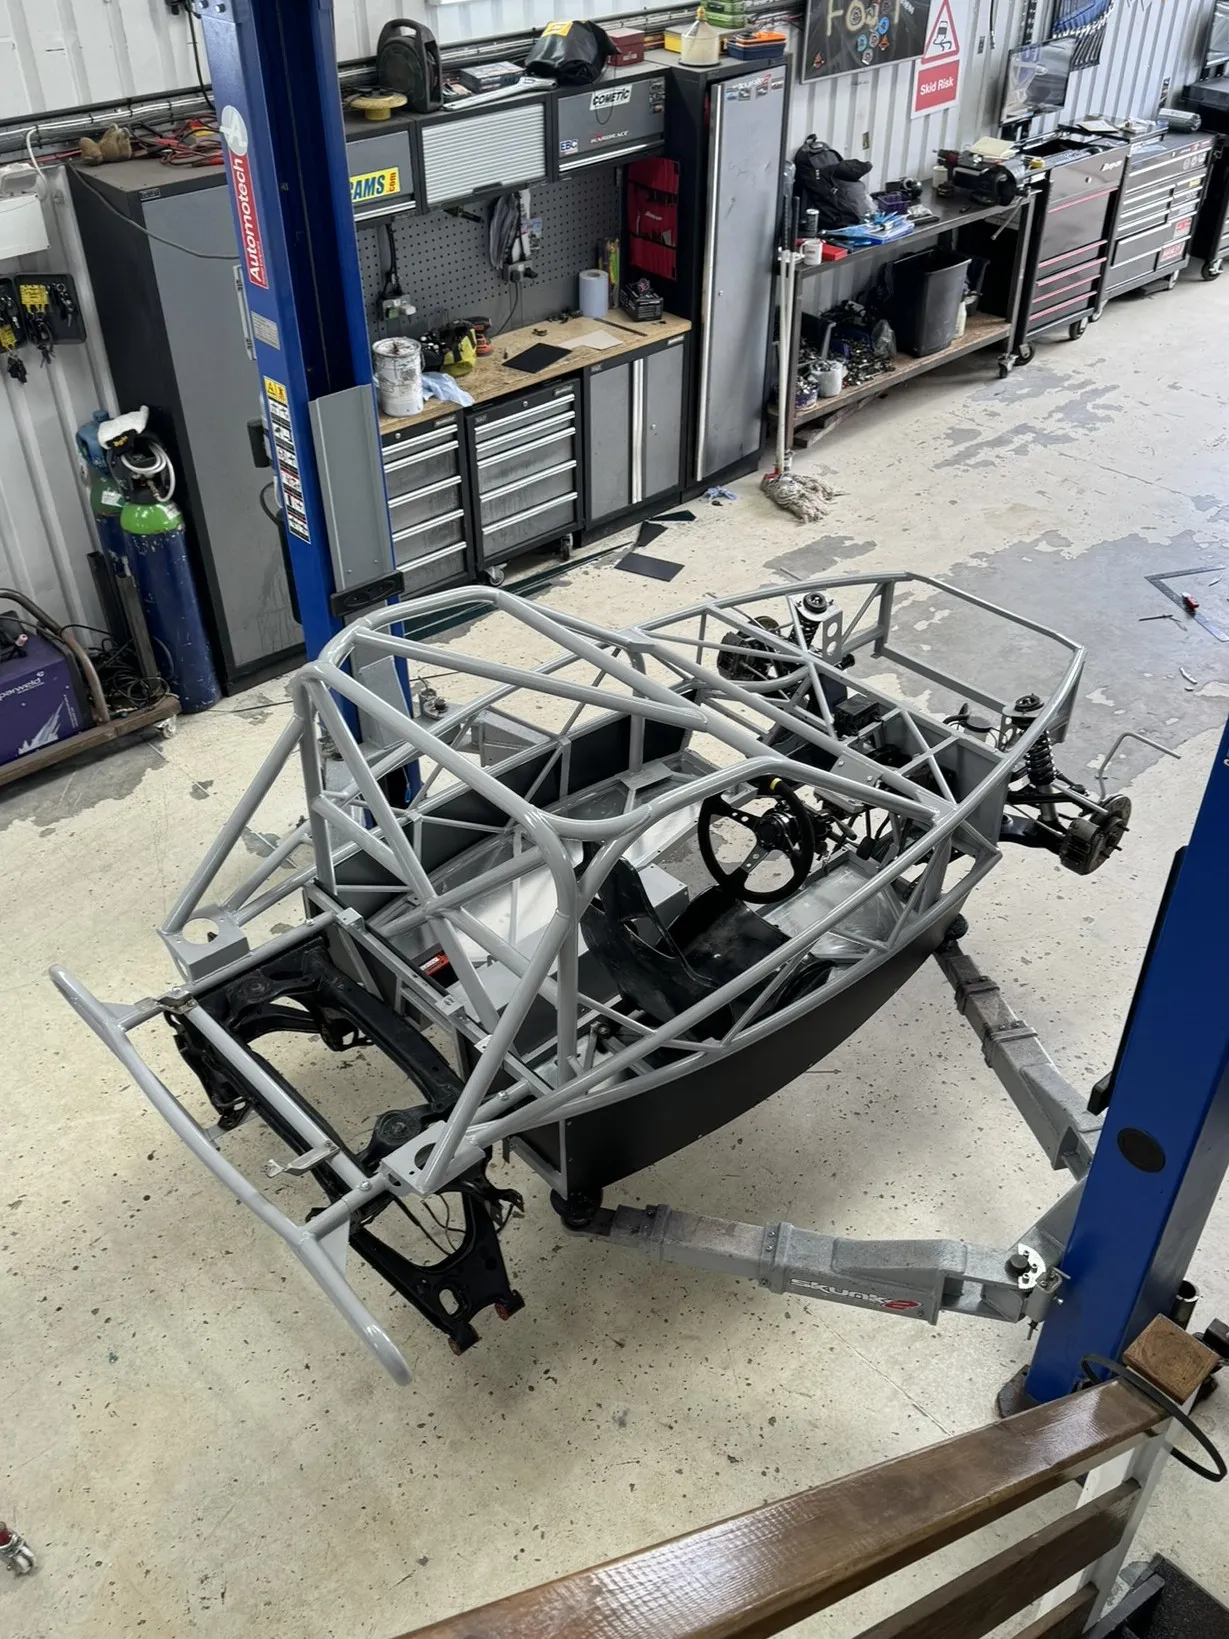
Day one. The floor pans went on first, because the subframes sit on them. Both subframes had been deep cleaned and prepped while the chassis was in storage, bushes stripped and greased, so they went straight in. The front suspension went together, the upper arms cleaned and painted, the steering rack fitted, brakes on.
Bulkhead, Tunnel And Pedals
The bulkhead and tunnel panels do not arrive as a finished fit. Each one was cut, bent and shaped, held in on temporary screws, taken out, drilled, and finally rivnutted in. That is deliberate. A rivnutted panel comes out again, which makes every service job under the tunnel easier. The floors were sealed with a colour matched sealer over the bonded edges, which also tidies the panel lines.
The pedal box, brake master, servo and clutch master went in. A throttle stop was made, because the pedal bracket wanted to bend at full throttle. The steering column sat too high and off centre to the driver, which is the nature of this bulkhead, so a drop spacer and a new bracket brought the wheel down 30mm and across. The seats were spaced to square up to the wheel. Later the pedal box came back out and the throttle, brake and clutch pedals were bent to sit evenly in front of the driver, then repainted.
The Fuel Tank
The chassis is made for a later tank than this one. Mounts were made, welded to the chassis and gusseted. The tank was trimmed front and back to clear the rear tub, and a drip tray made to sit under it.
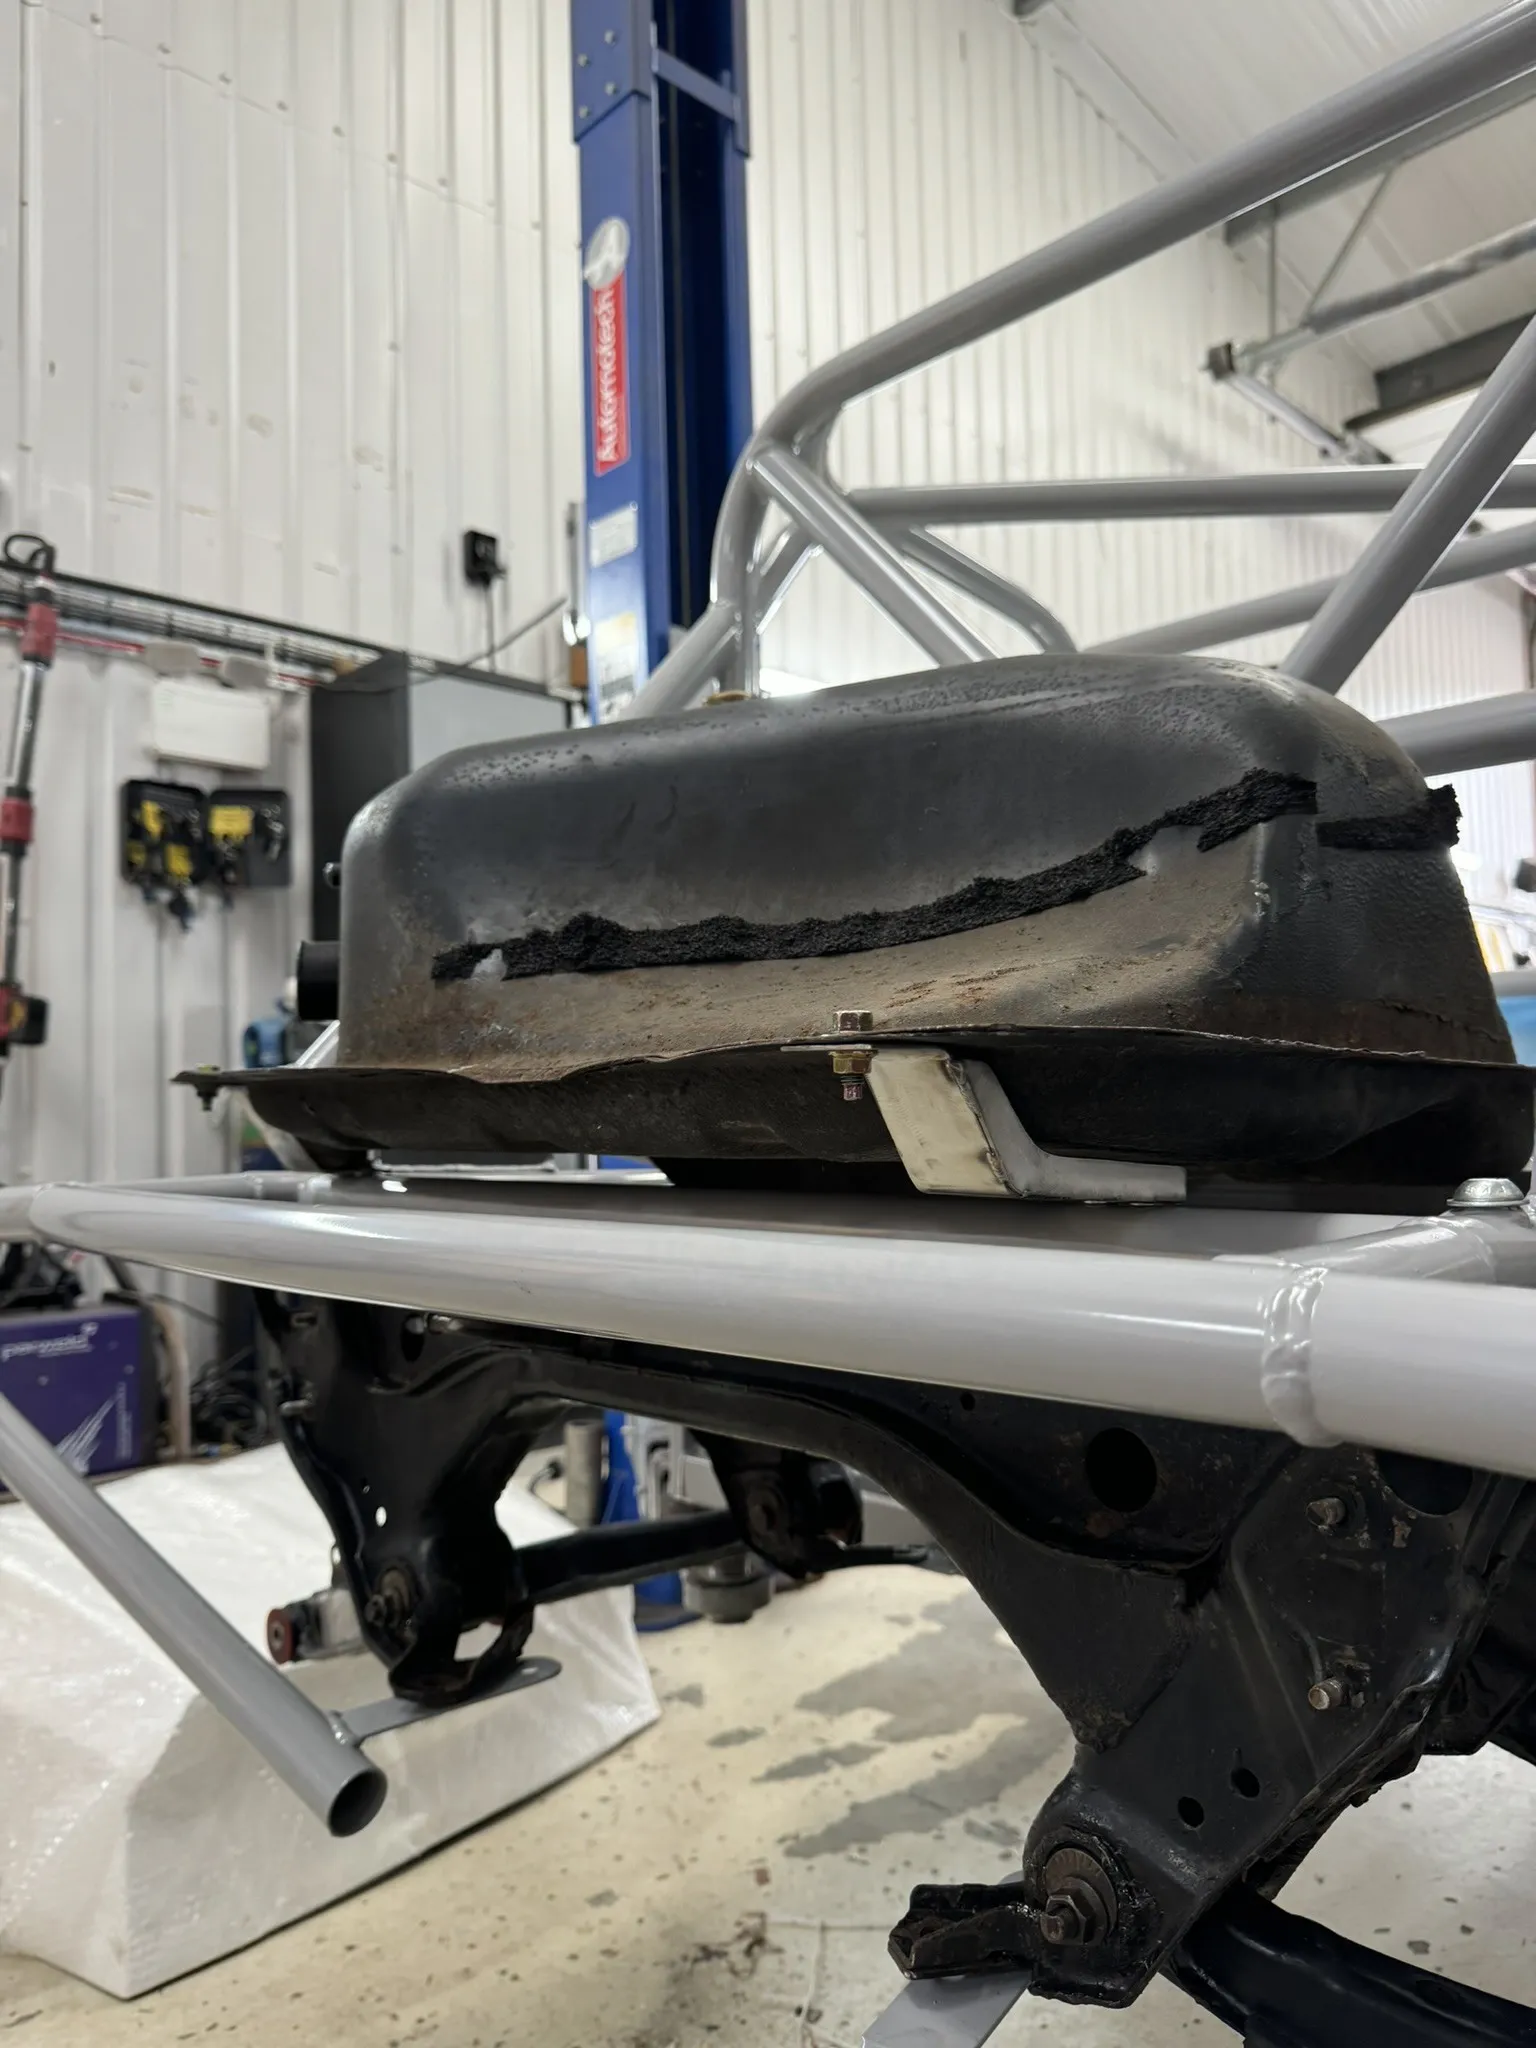
A new filler entry was cut and welded in to meet the filler cap on the new tub, and the neck made to length. The whole assembly comes out as a unit.
The Loom
The loom came out of the old car with every fault it had collected. Old tape, bullet connectors, crimps that should never have been there. All the old wrapping came off. Every bad joint was cut out and barrel spliced, connectors were replaced, grounds were extended, and the whole thing was re braided.
Then it was laid into the new chassis the right way round. The power harness and the rear harness for the lights and fuel pump both run under the floor along the PPF, the way Mazda did it, and come through one enlarged bulkhead hole on a Mazda grommet. None of the loom was run through the car. The battery sits behind the passenger seat in a refurbished and repainted box, four bolts a side and a strap. The ECU has its own tray, both fuse boxes are mounted, and everything is P clipped so nothing chafes.
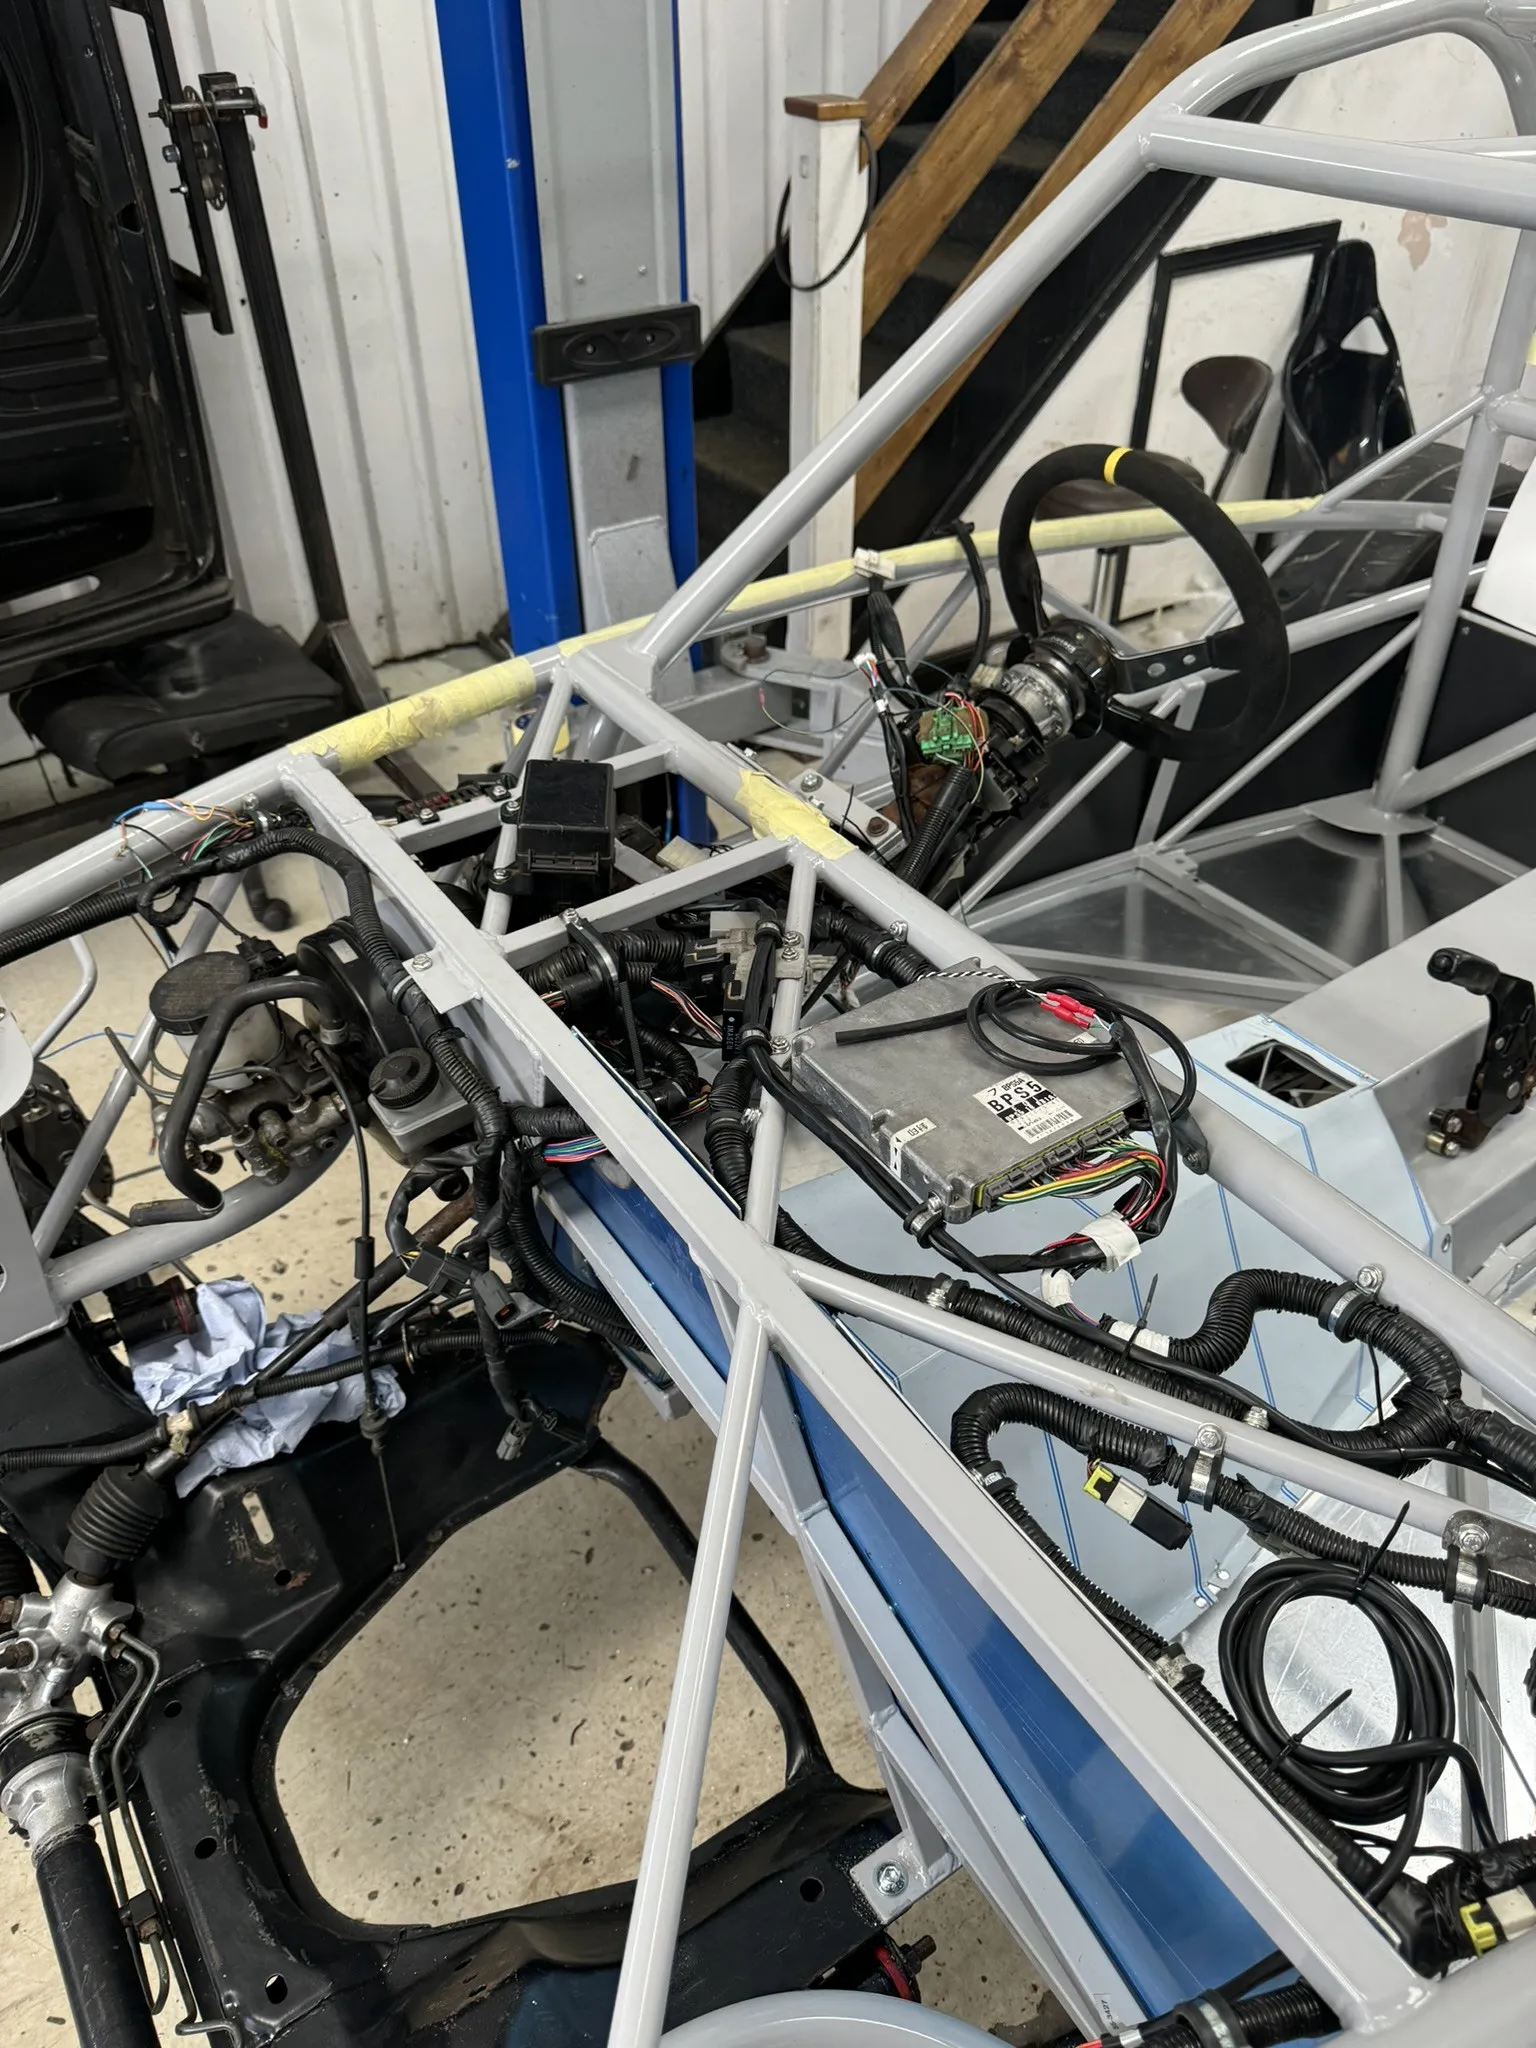
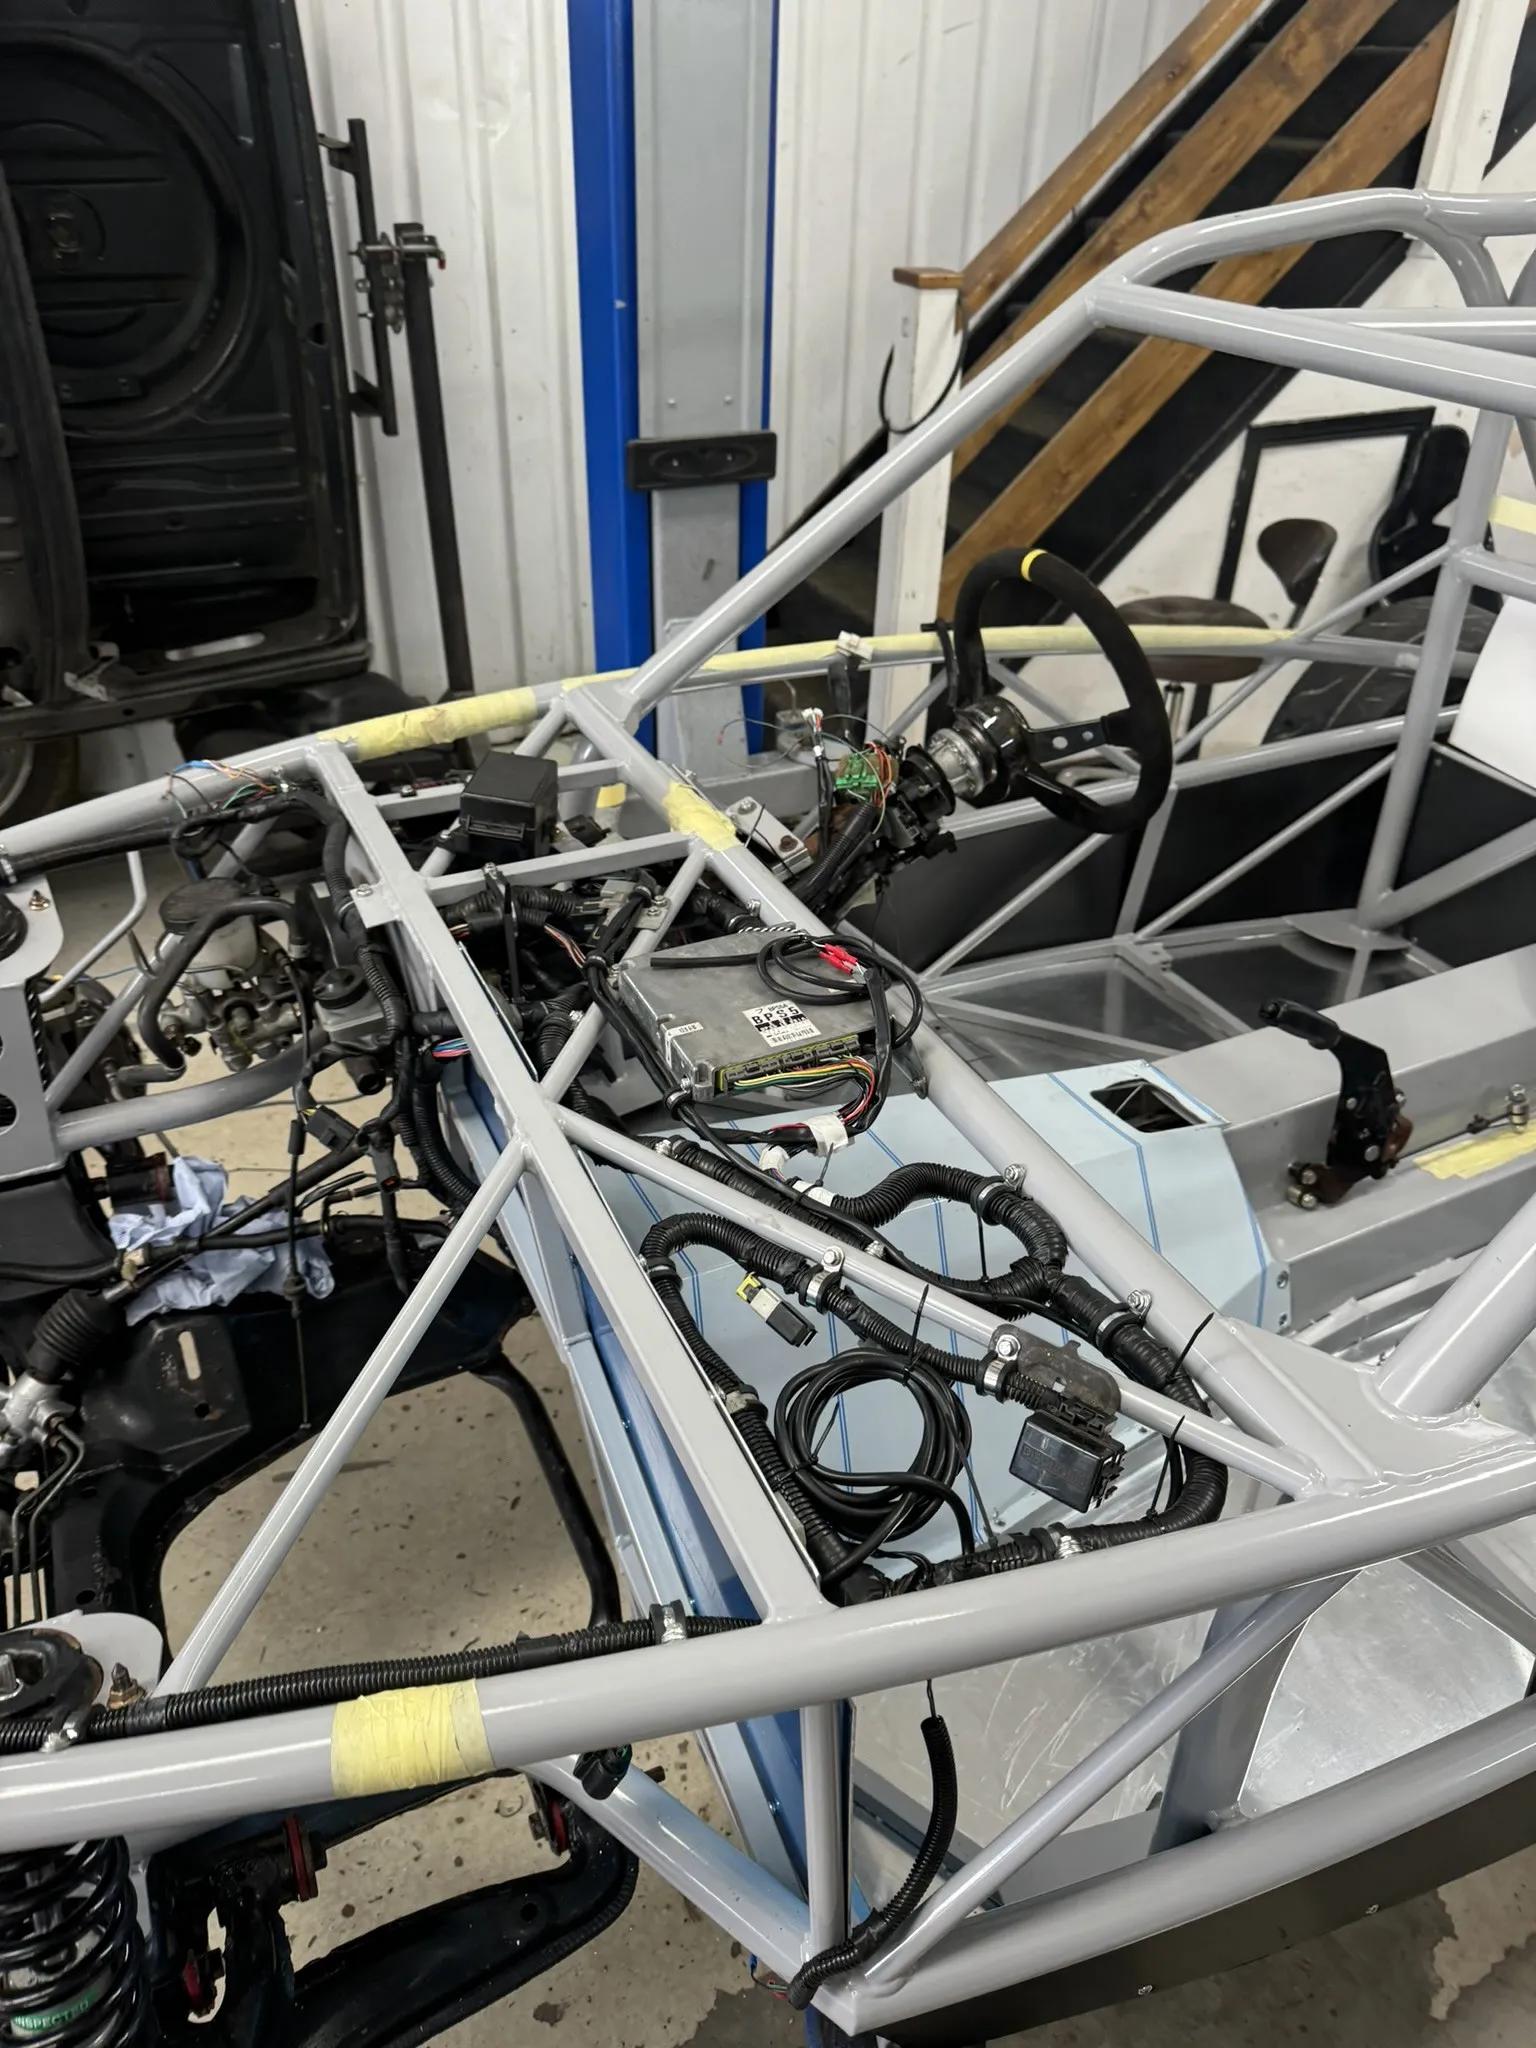
It went in twice. The first time was a temporary fix, to set every clip position and every length. Then it came out for the repairs and the braiding, and went back in for good.
Brake And Fuel Lines Under The Floor
Brake and fuel lines share the run under the car, held apart with separators on made brackets. The brake lines were made for the car by Proline Braided Lines, the same people who did our last Exocet. Two stainless brackets were made to hold the OEM style grommets at the front, positioned so the line neither binds at full lock nor pulls at full extension. The bias valve sits inside the car on a made plate and feeds through the rear bulkhead to both rear calipers.
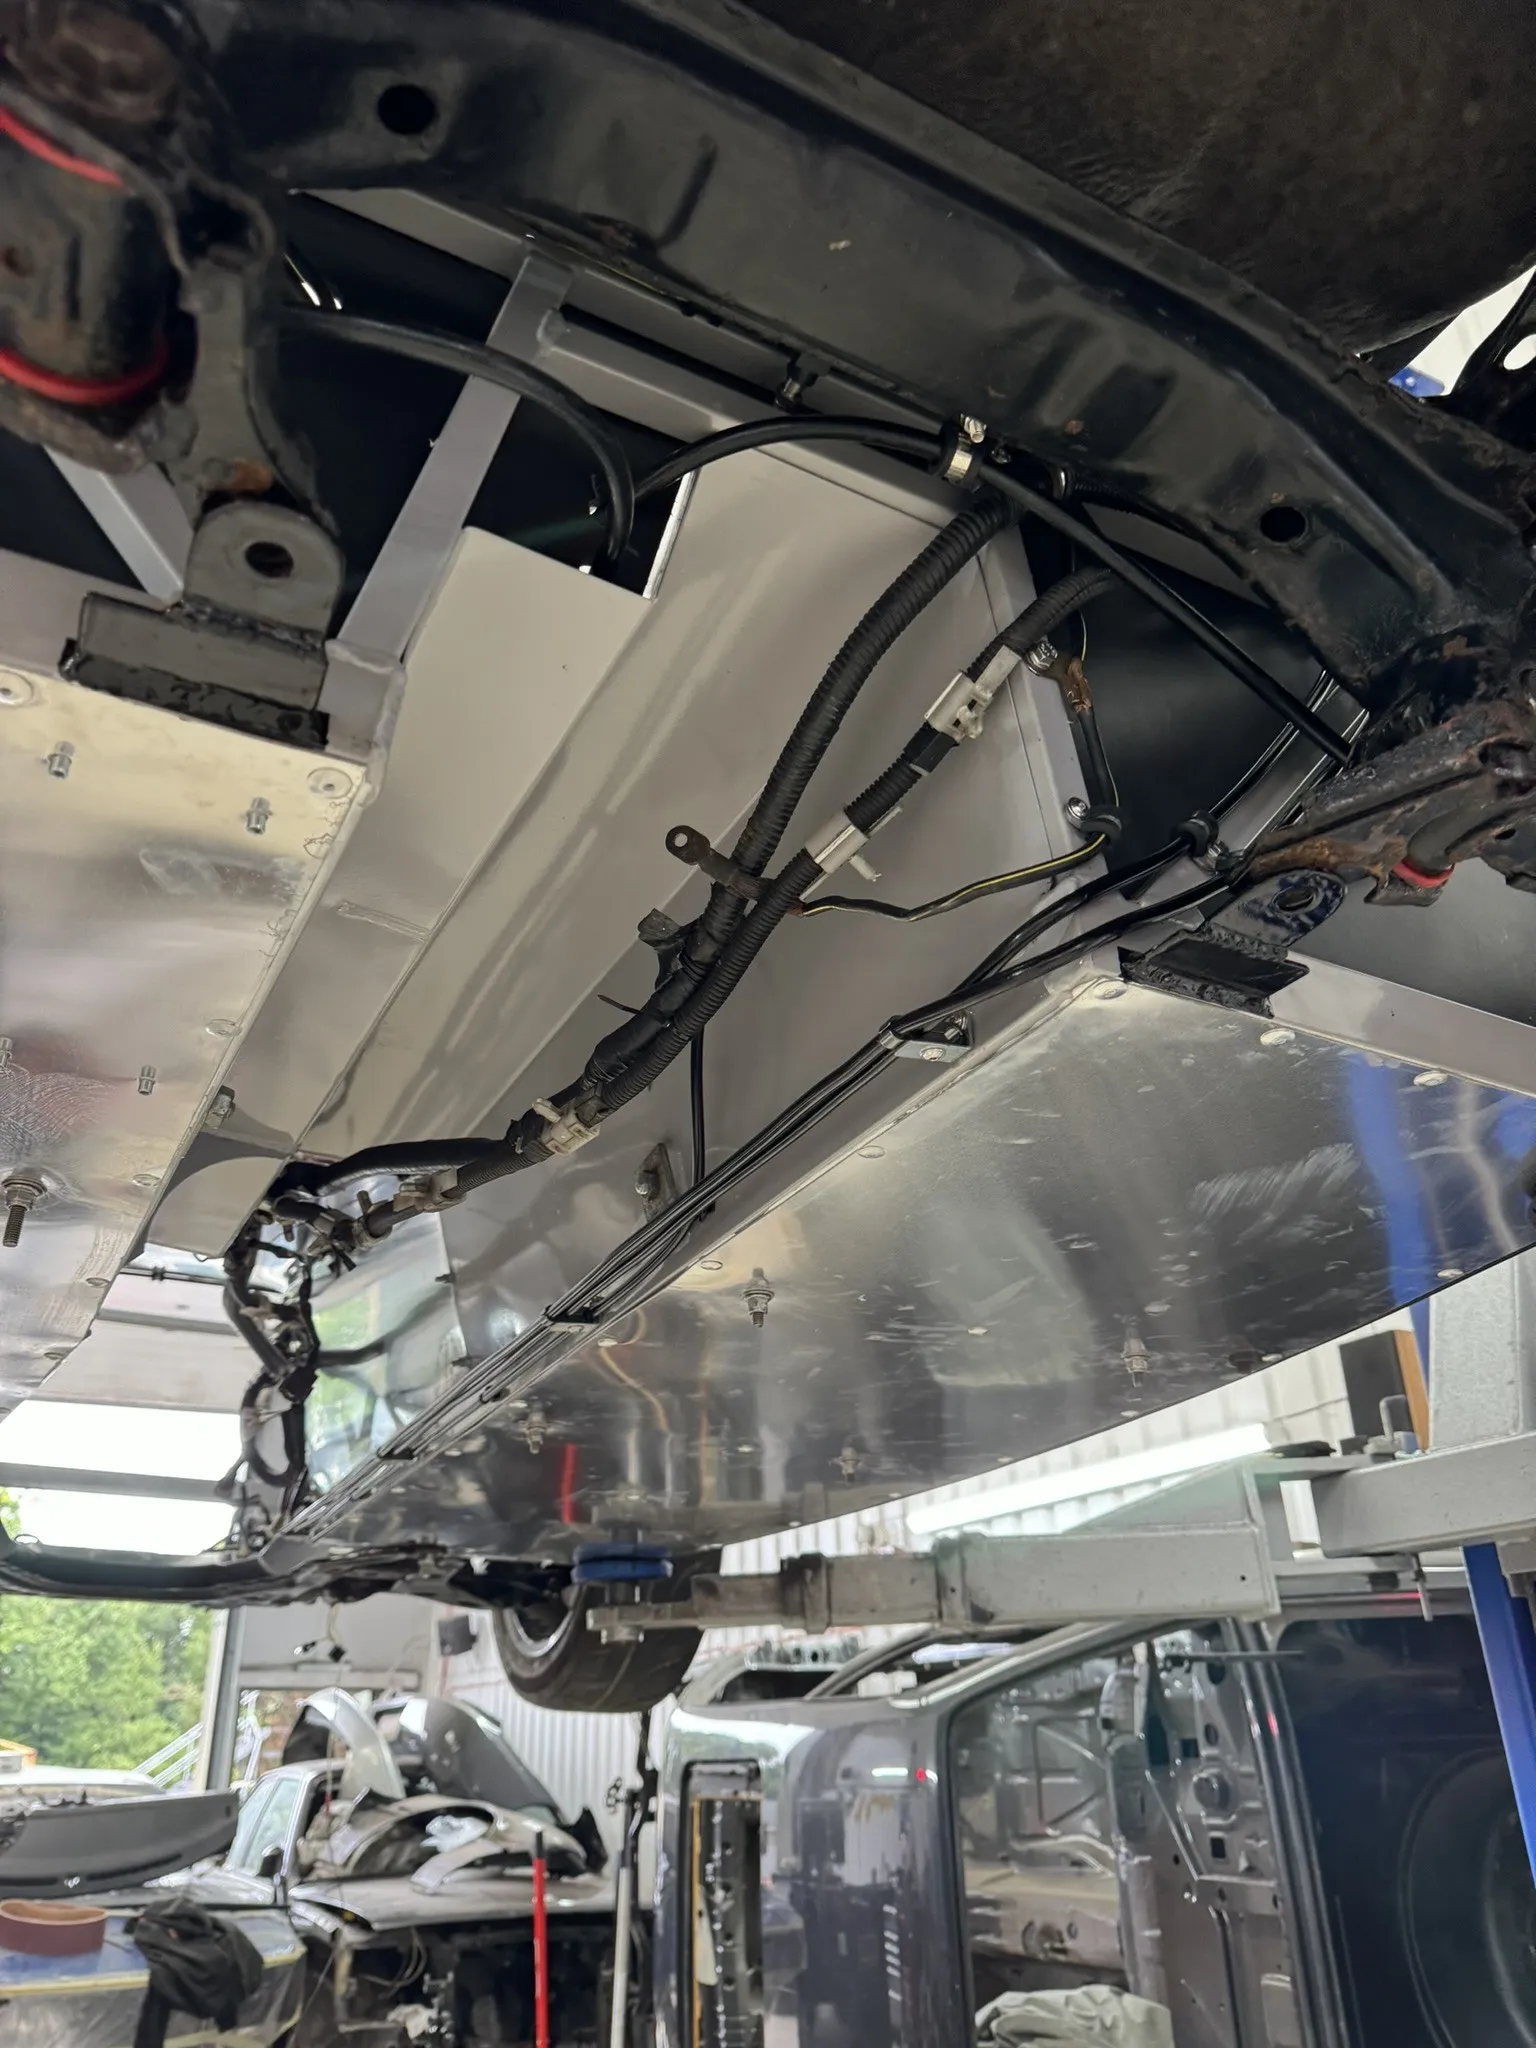
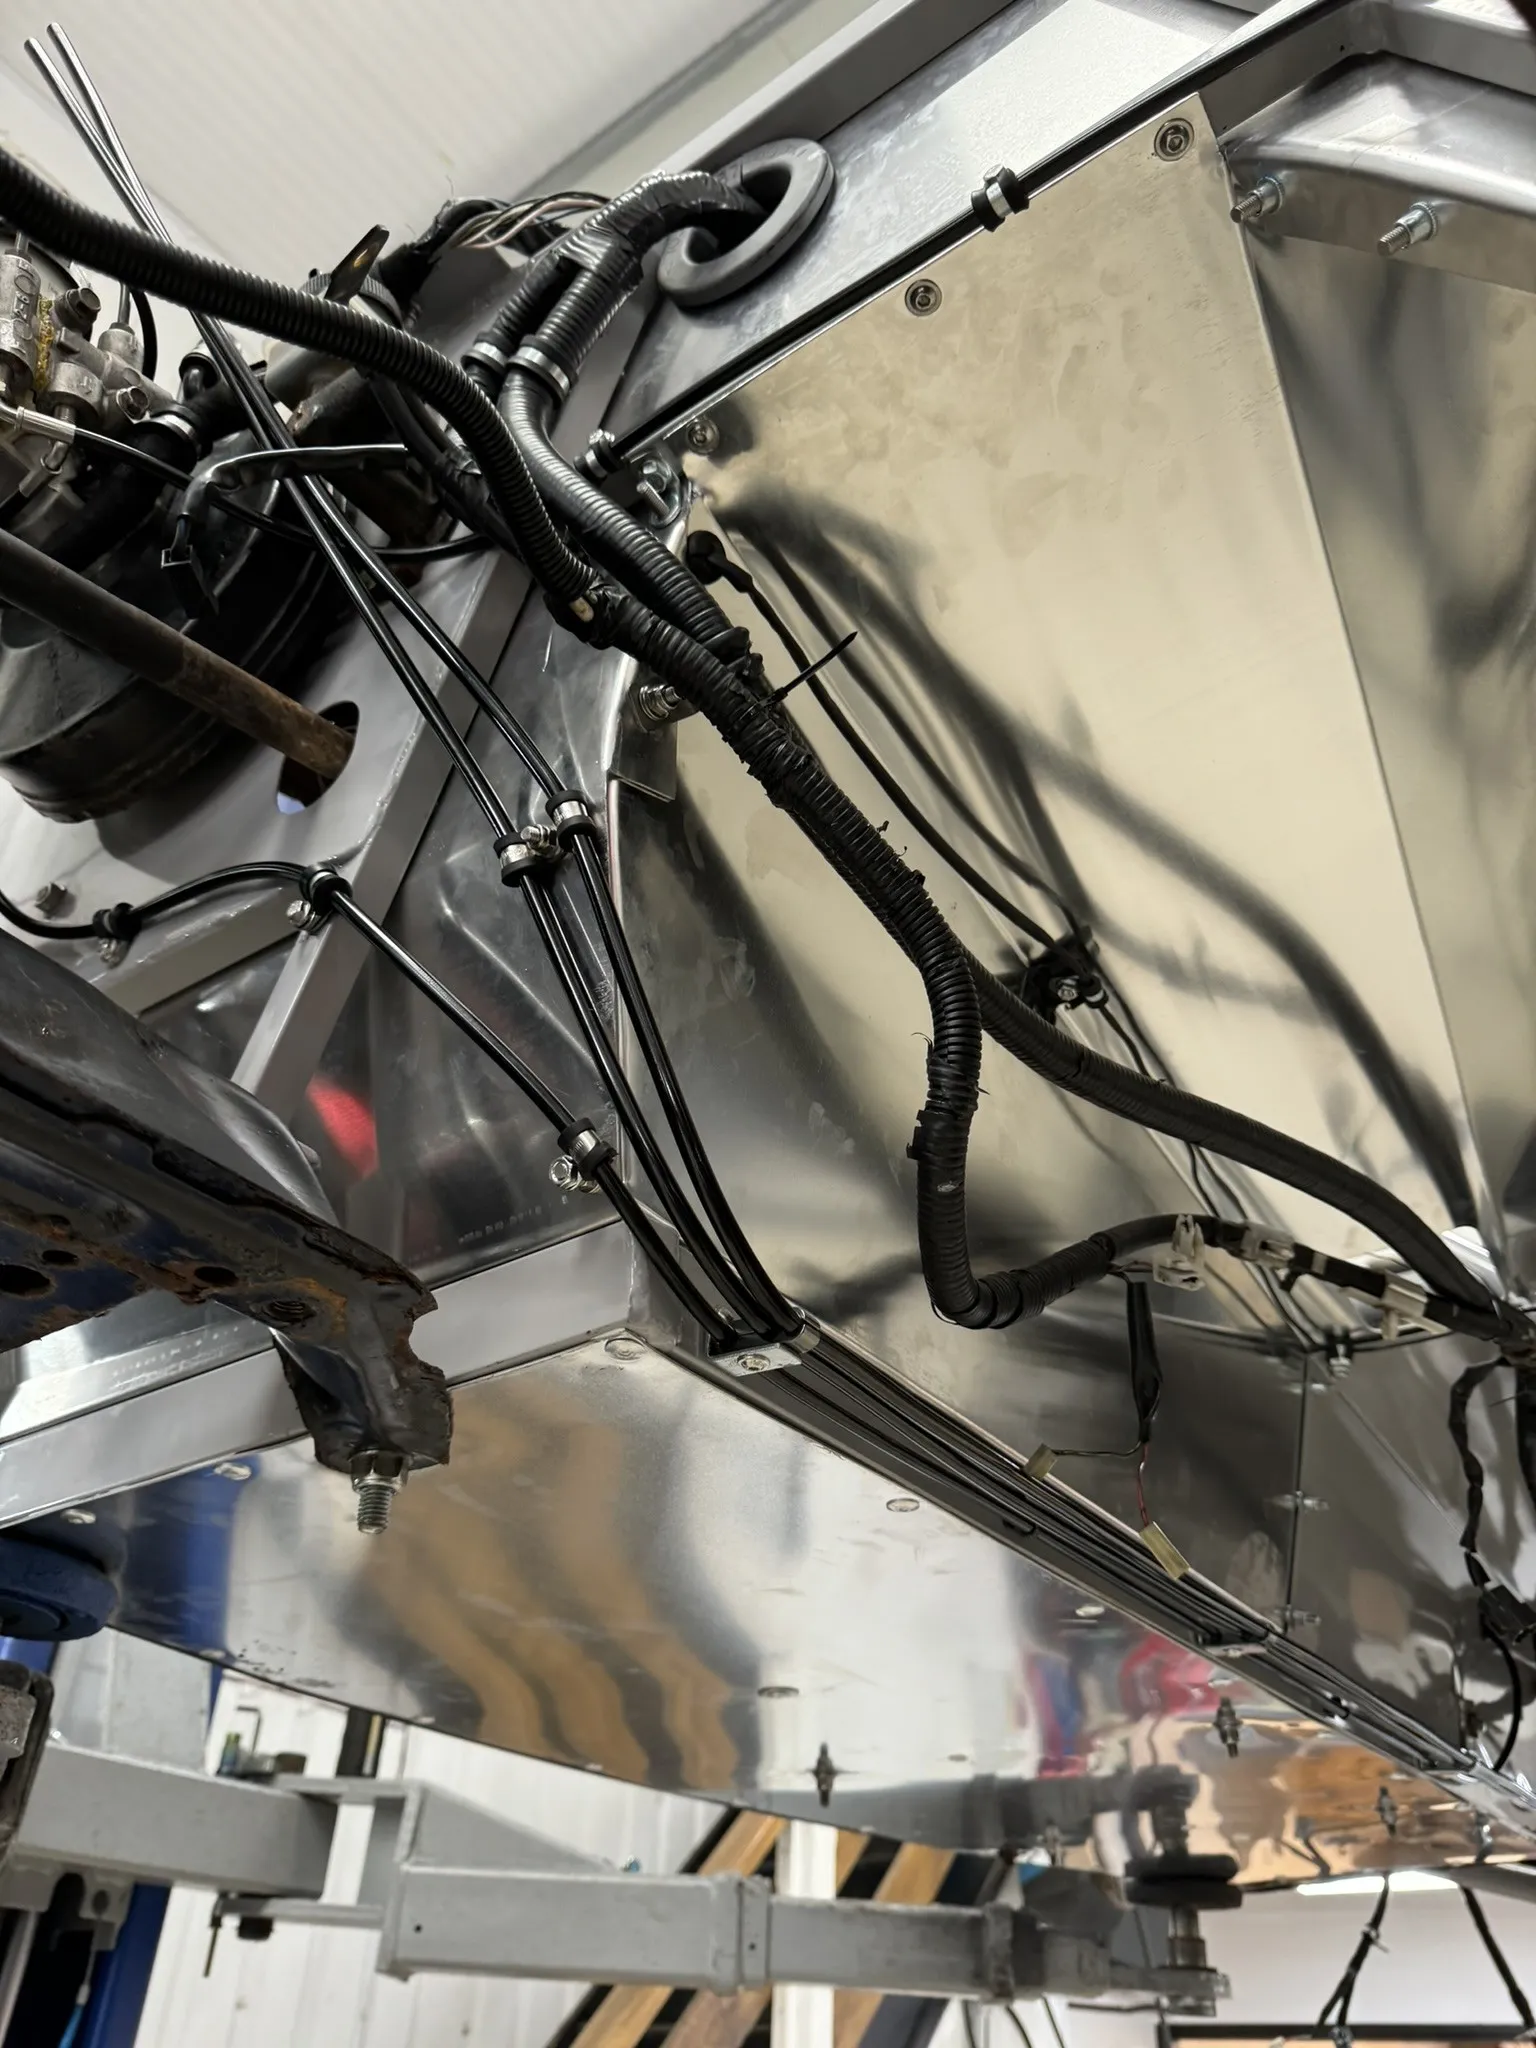
The fuel side was a choice between hard pipe and AN line. It went hard pipe, front to back, feed and return, with AN6 compression fittings at the fuel filter so the tank can still come out without cutting a line.
Tub, Arches And Lights
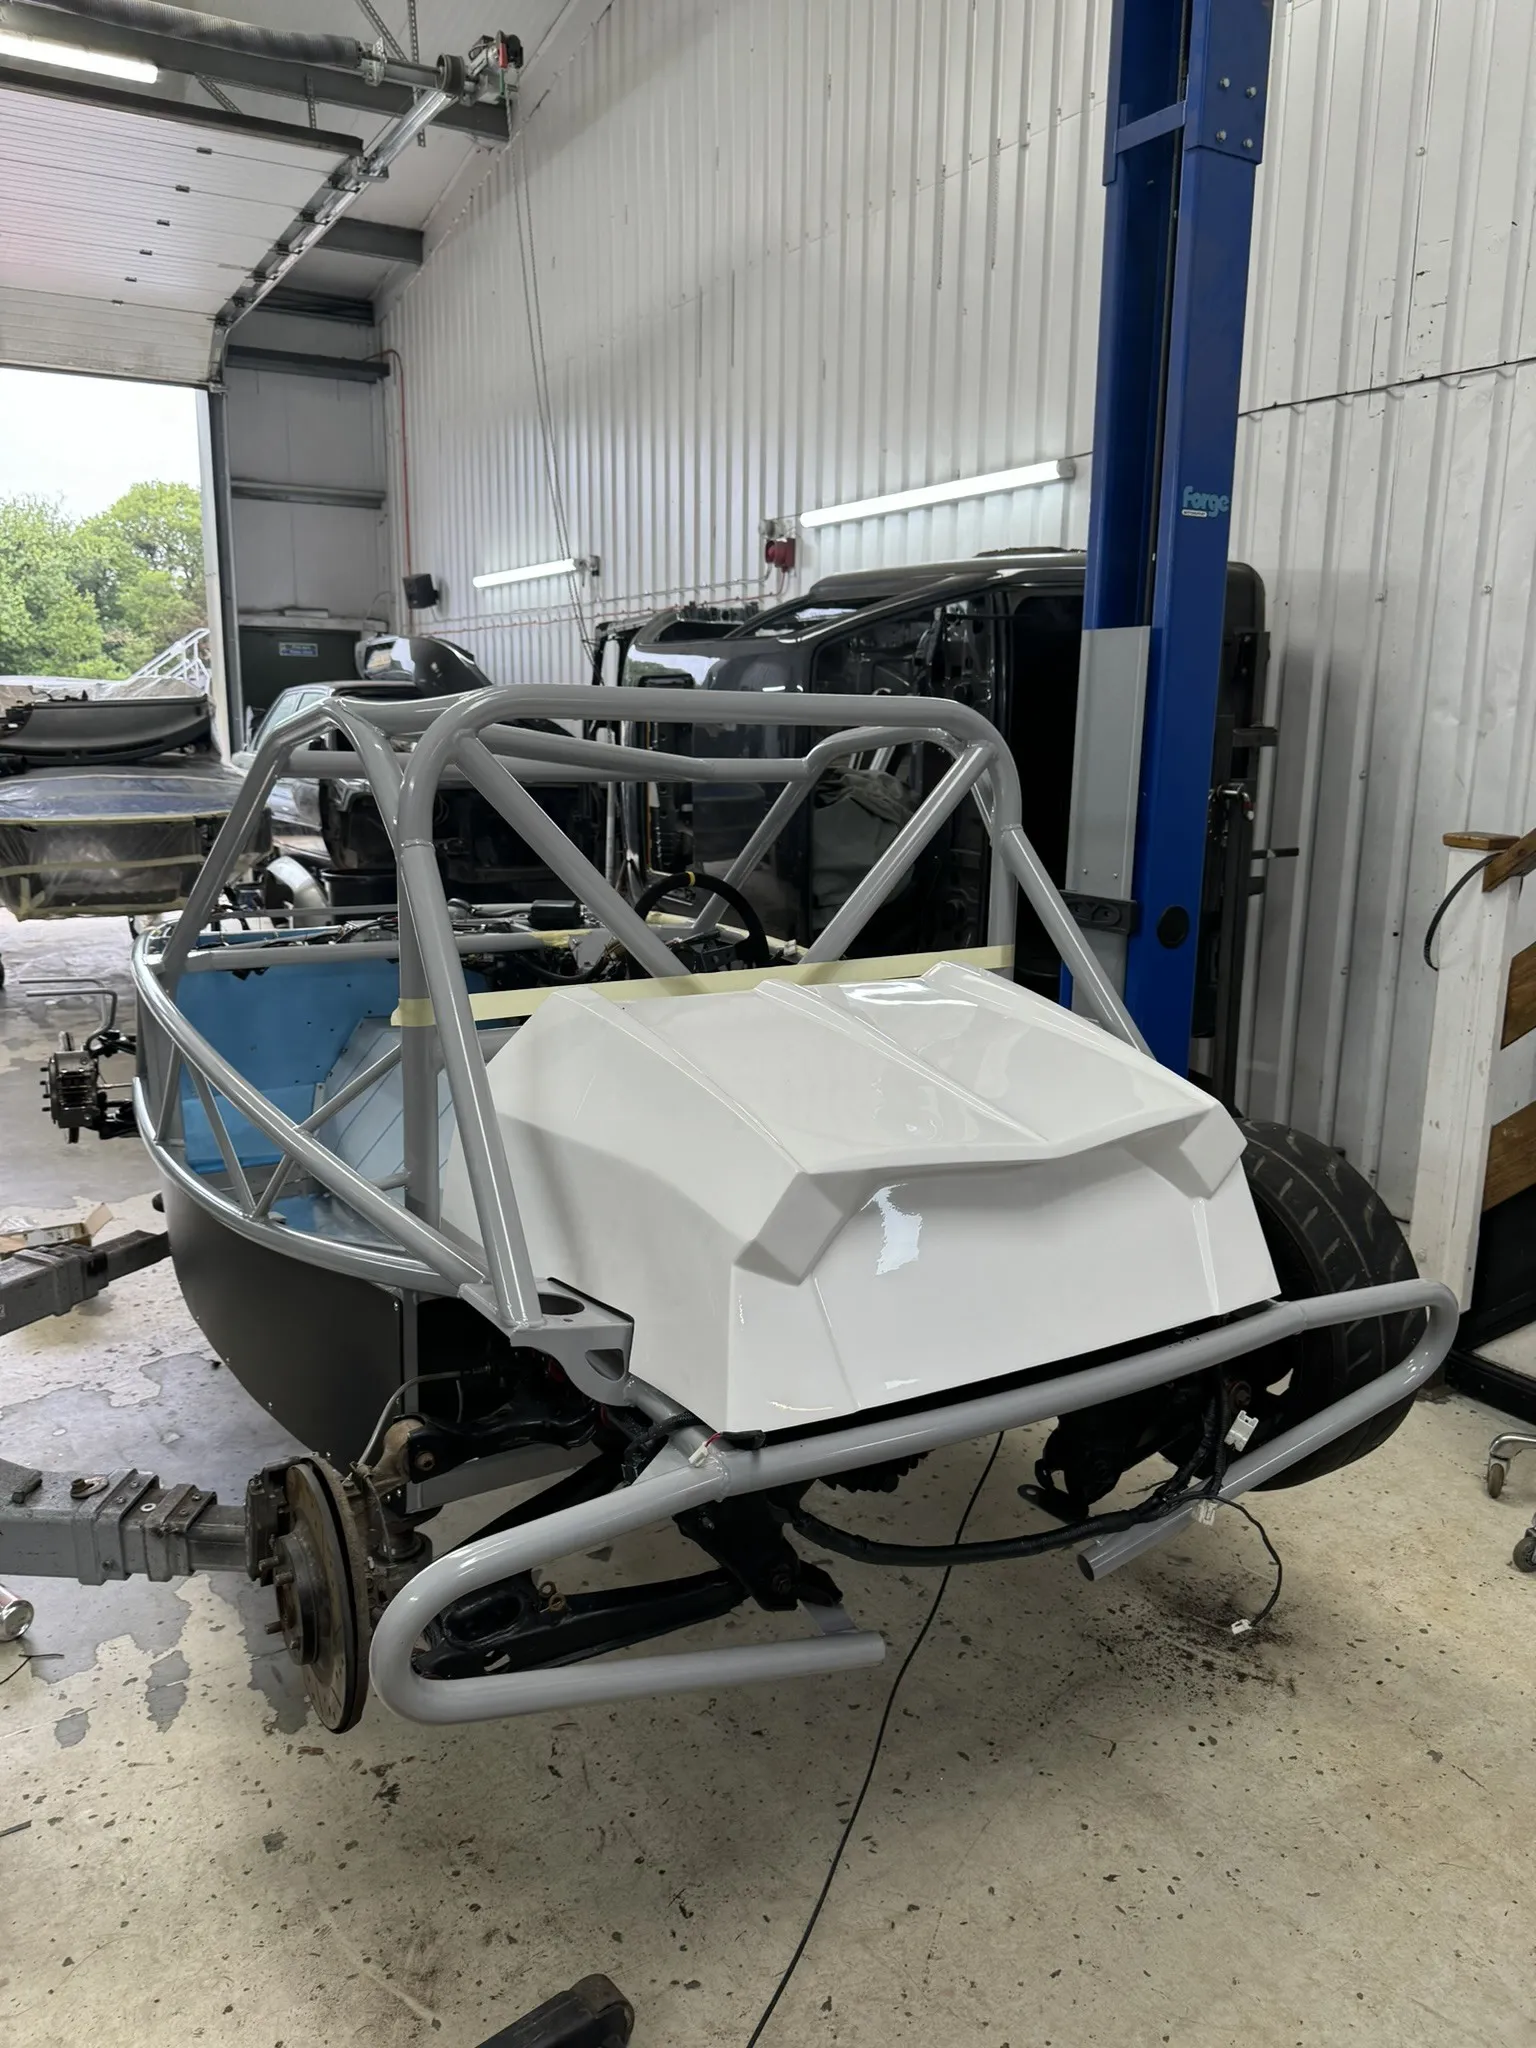
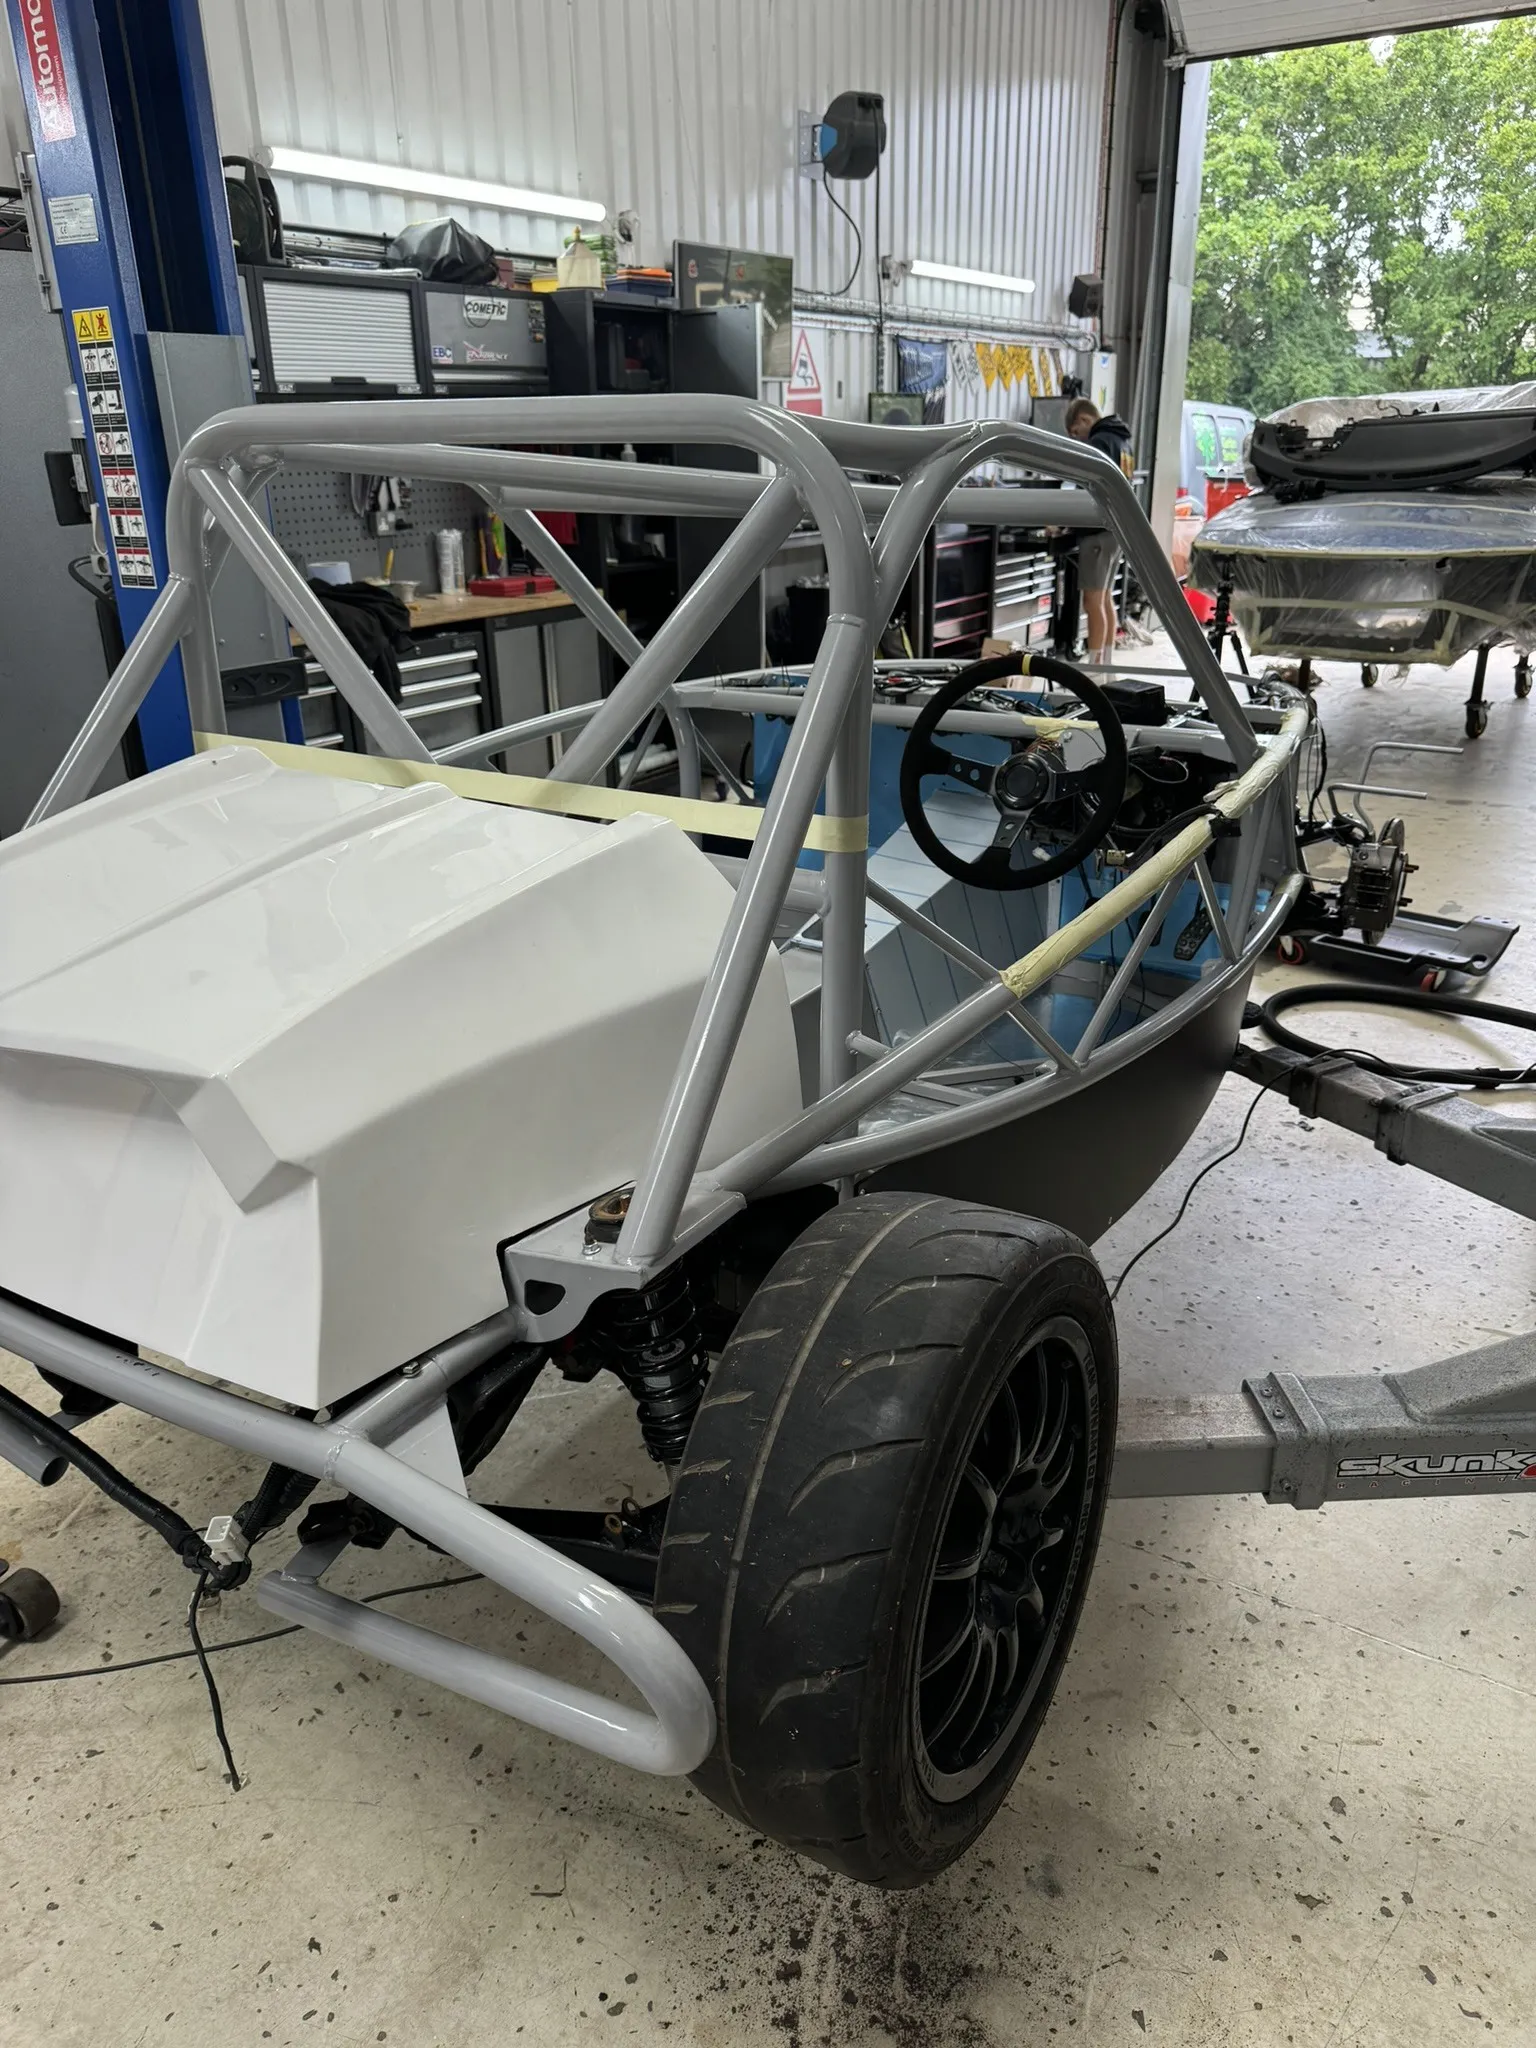
The rear tub was trimmed to clear the tank, and brackets were made to mount it. The side pods were shaped, trimmed flush and rivnutted in, with flanged socket heads replacing the countersunk screws that went in first. The rear bash bar was cut to fit this chassis and subframe, painted and bolted up. Mounting brackets were made to tie the rear subframe into the floor pans.
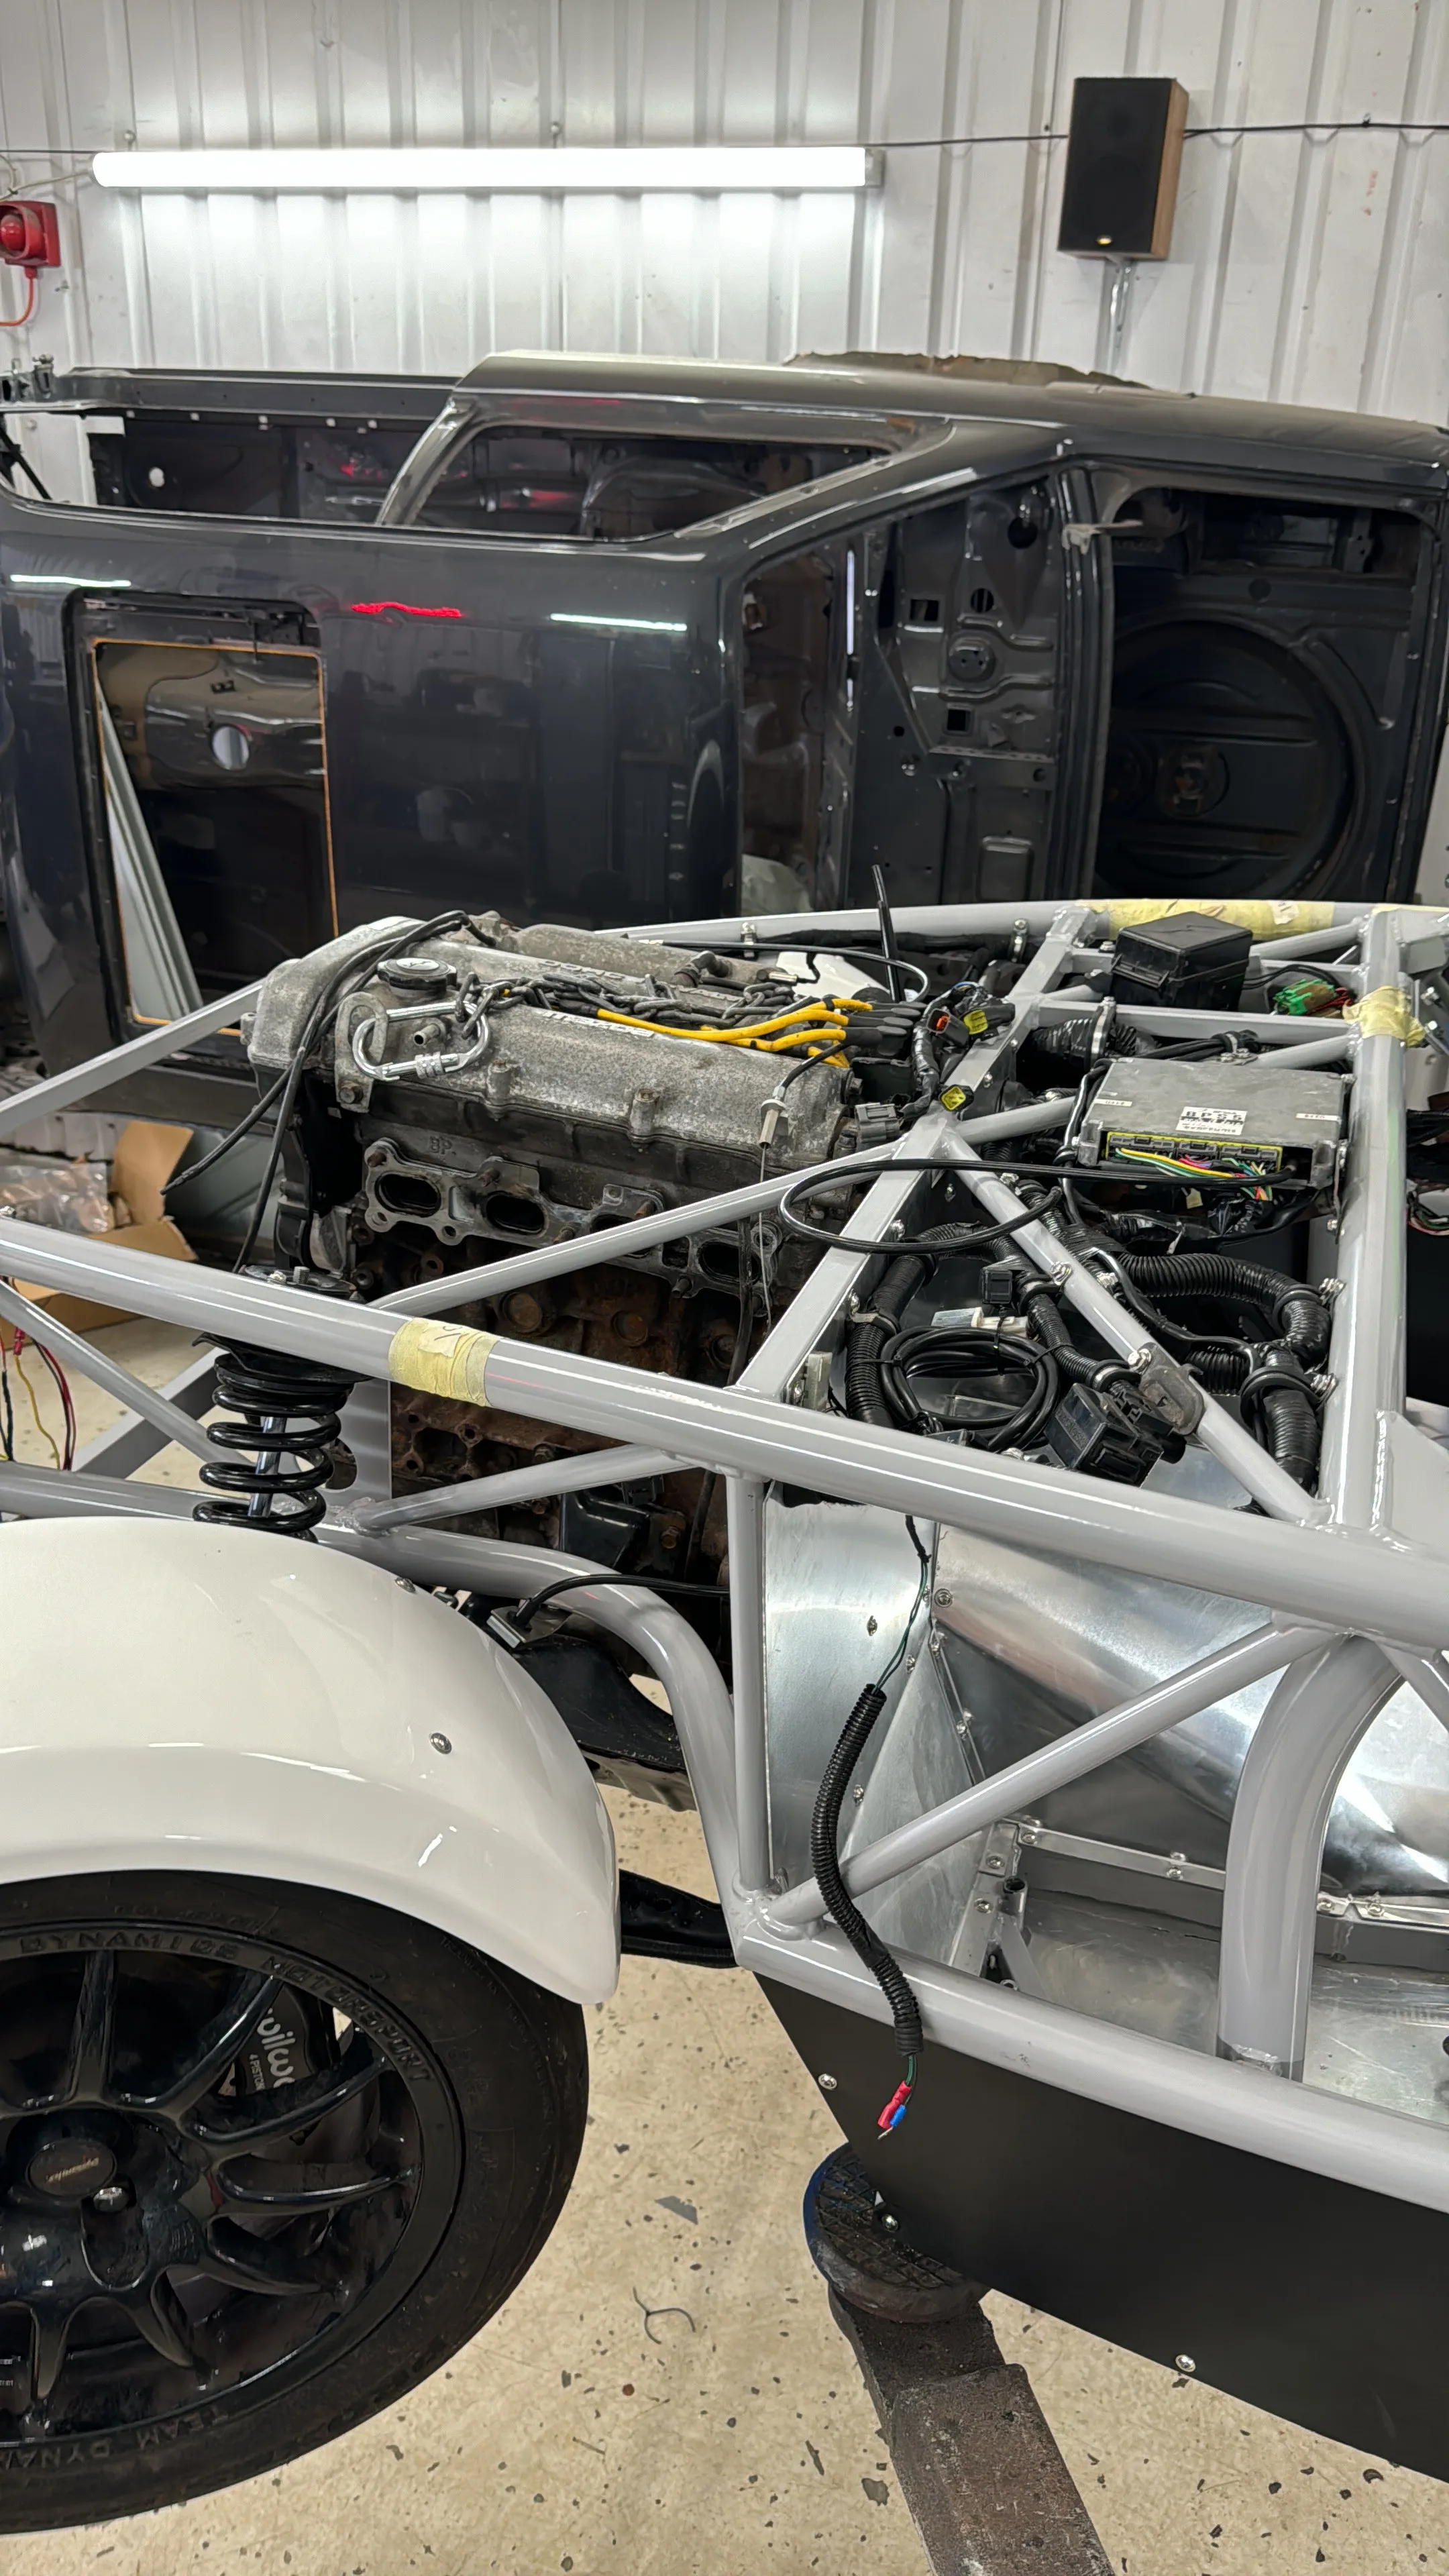
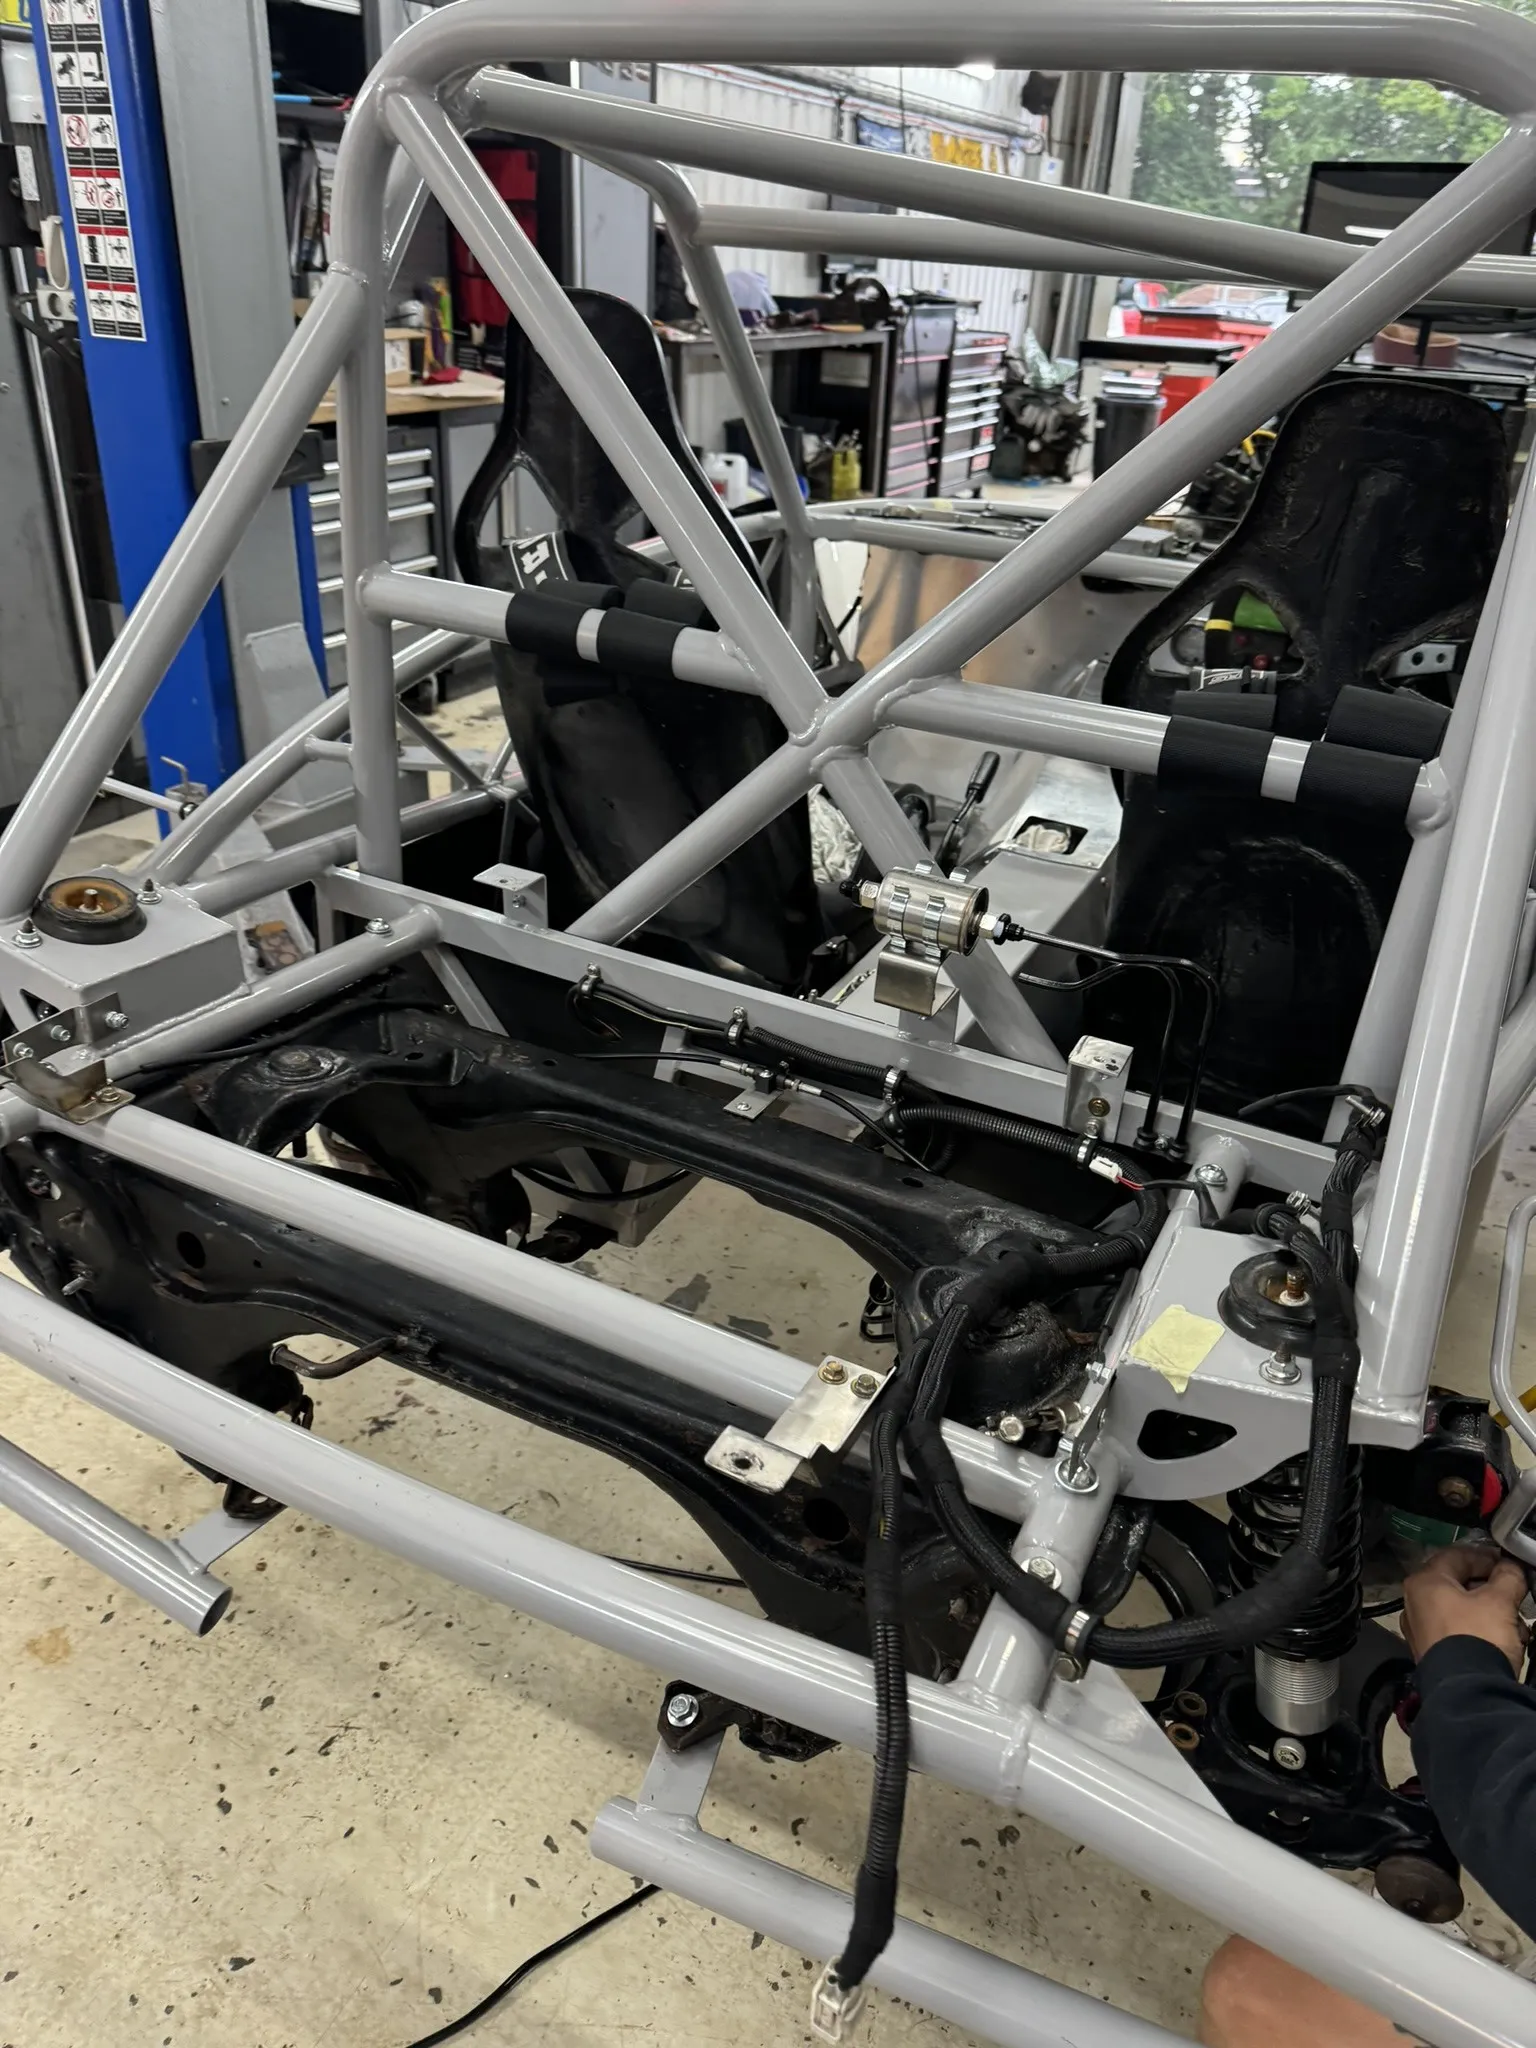
The rear arch brackets did not quite fit, so the hubs were drilled to take them, and new brackets were made, welded and painted. The rear lights went into the tub, with the fog and reverse lights on the arches, and the rear loom was extended, grounded, braided and clipped over the tank with an edging strip where it passes.
Engine In
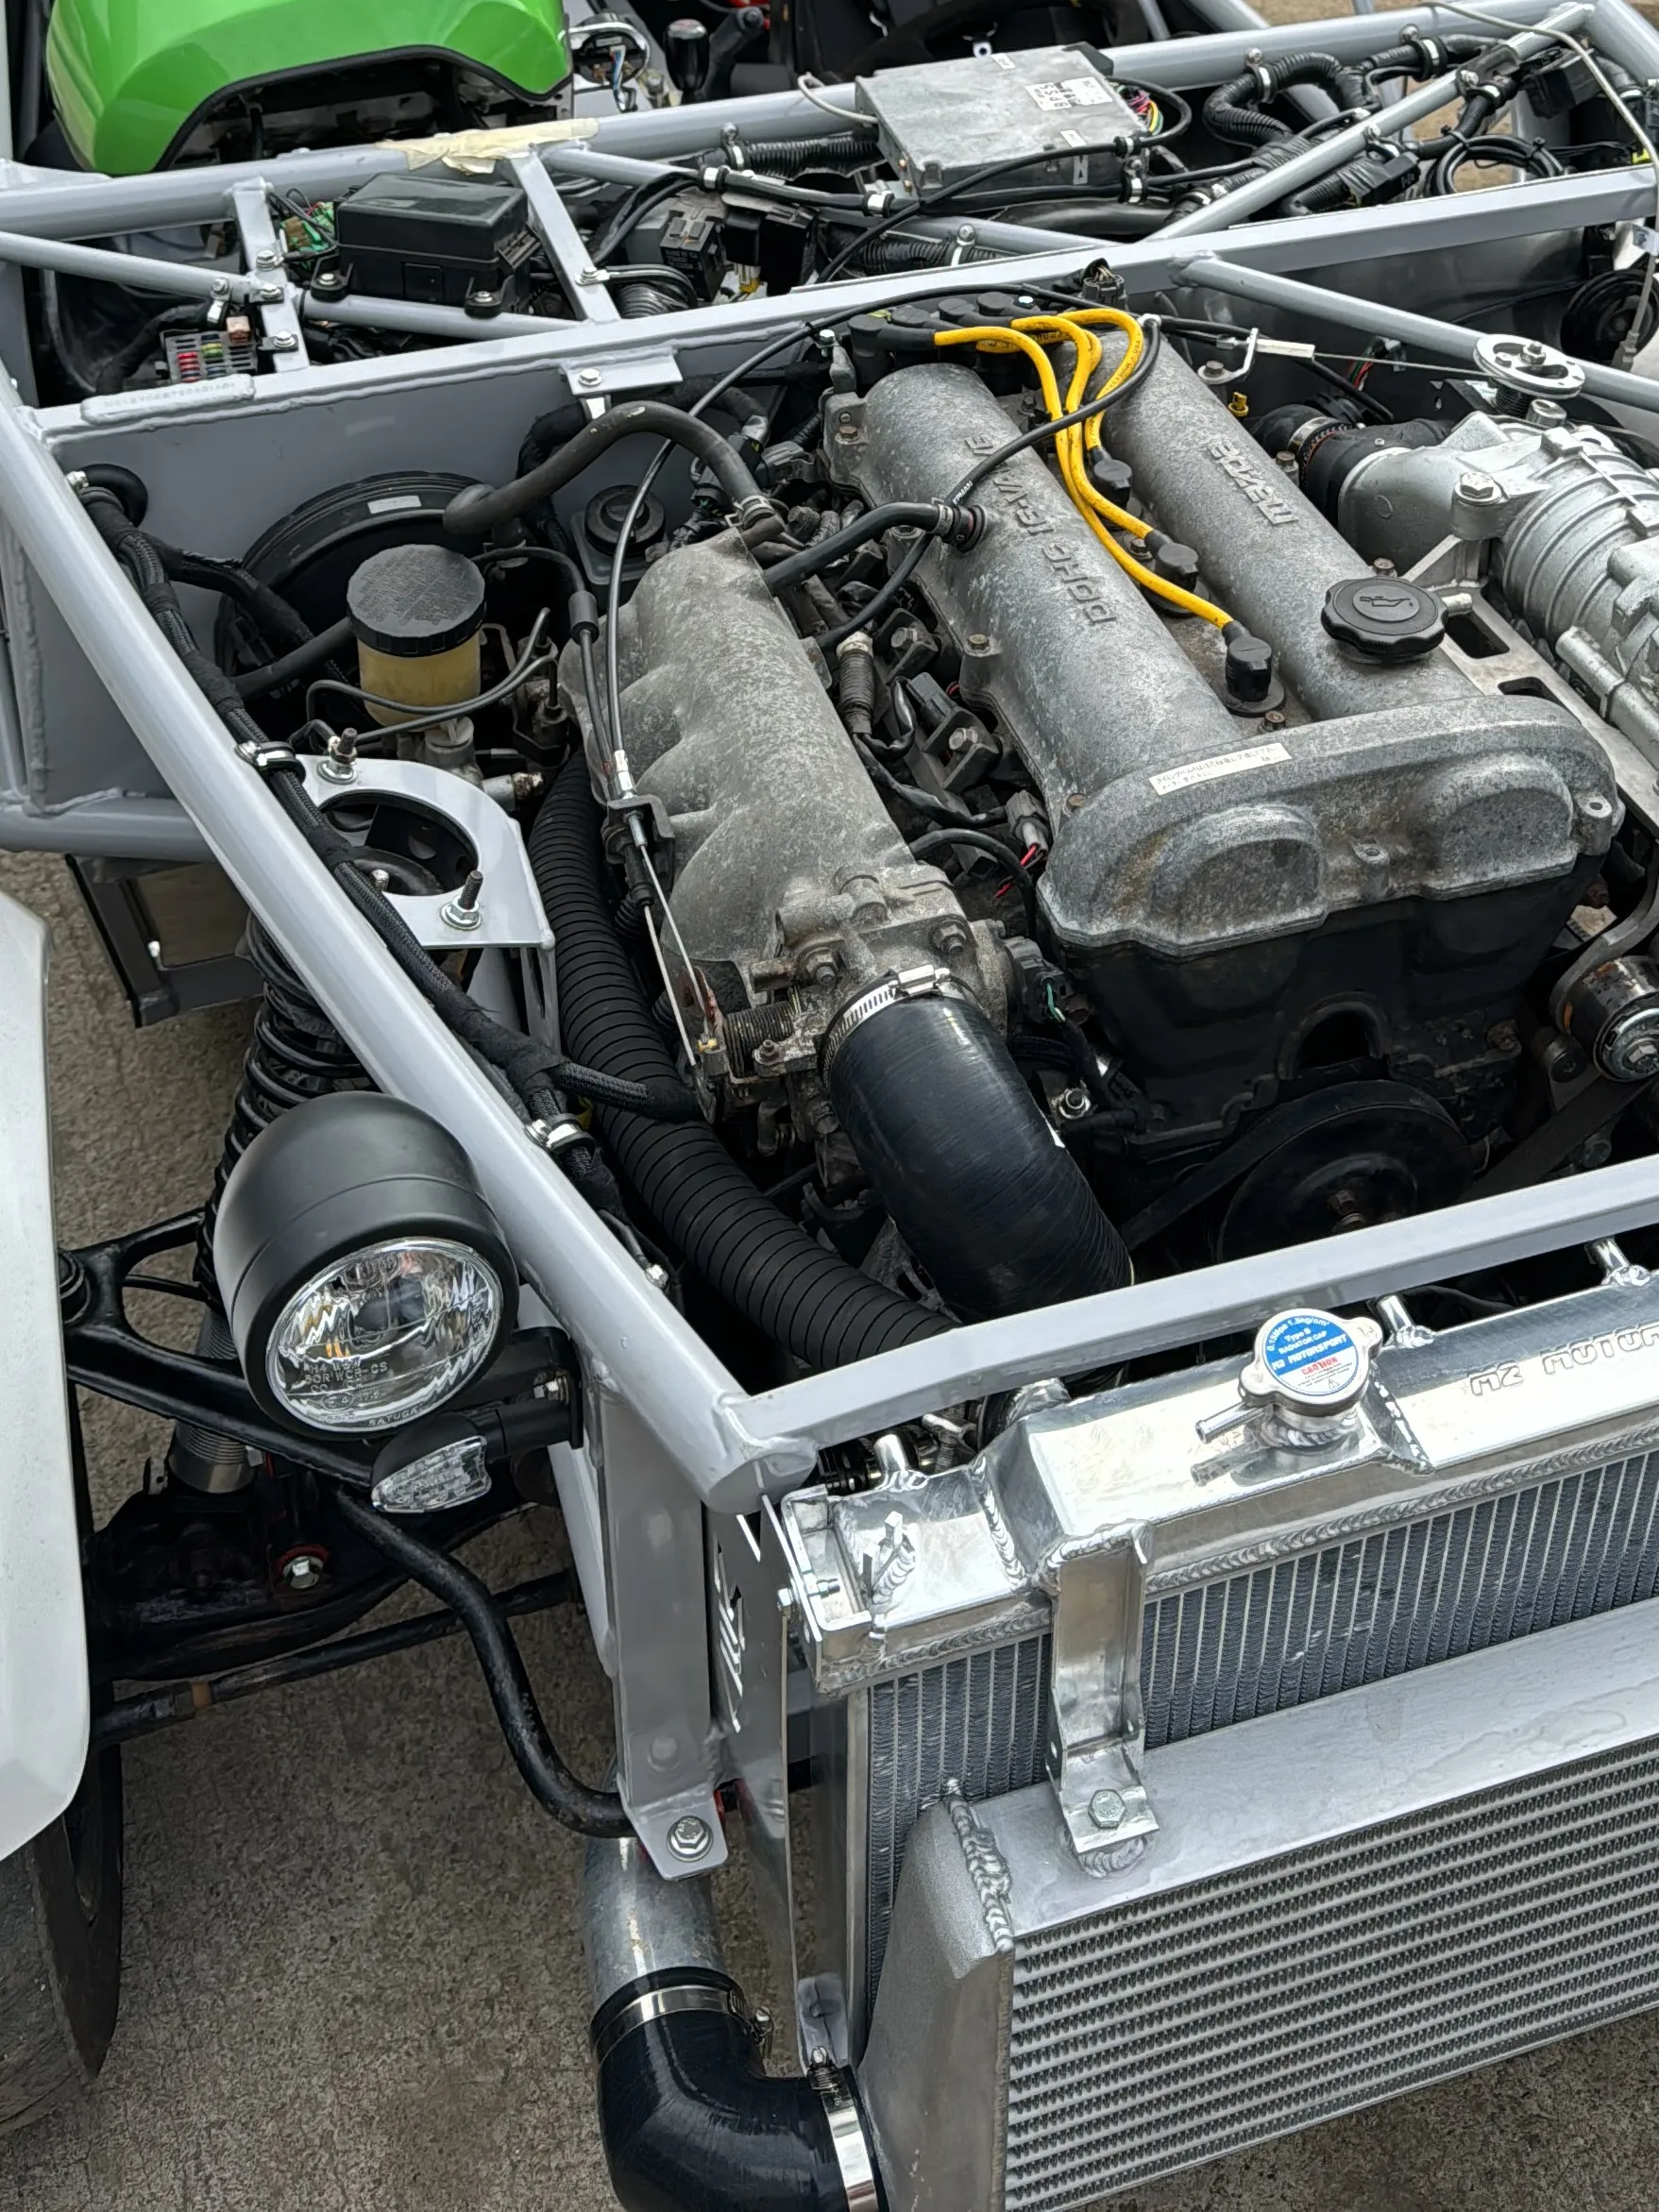
With the underside and bulkhead work done, the engine and gearbox went in. Driveshafts, diff and PPF, prop, anti roll bars and drop links, then the exhaust, with new stainless hangers made to reach the chassis. The cam cover and a few engine accents went out for blasting and paint, because a dirty engine in a new chassis would have been the wrong finish. The old clocks were repaired where the copper traces had split behind the coolant temperature gauge, and refitted.
The Supercharger
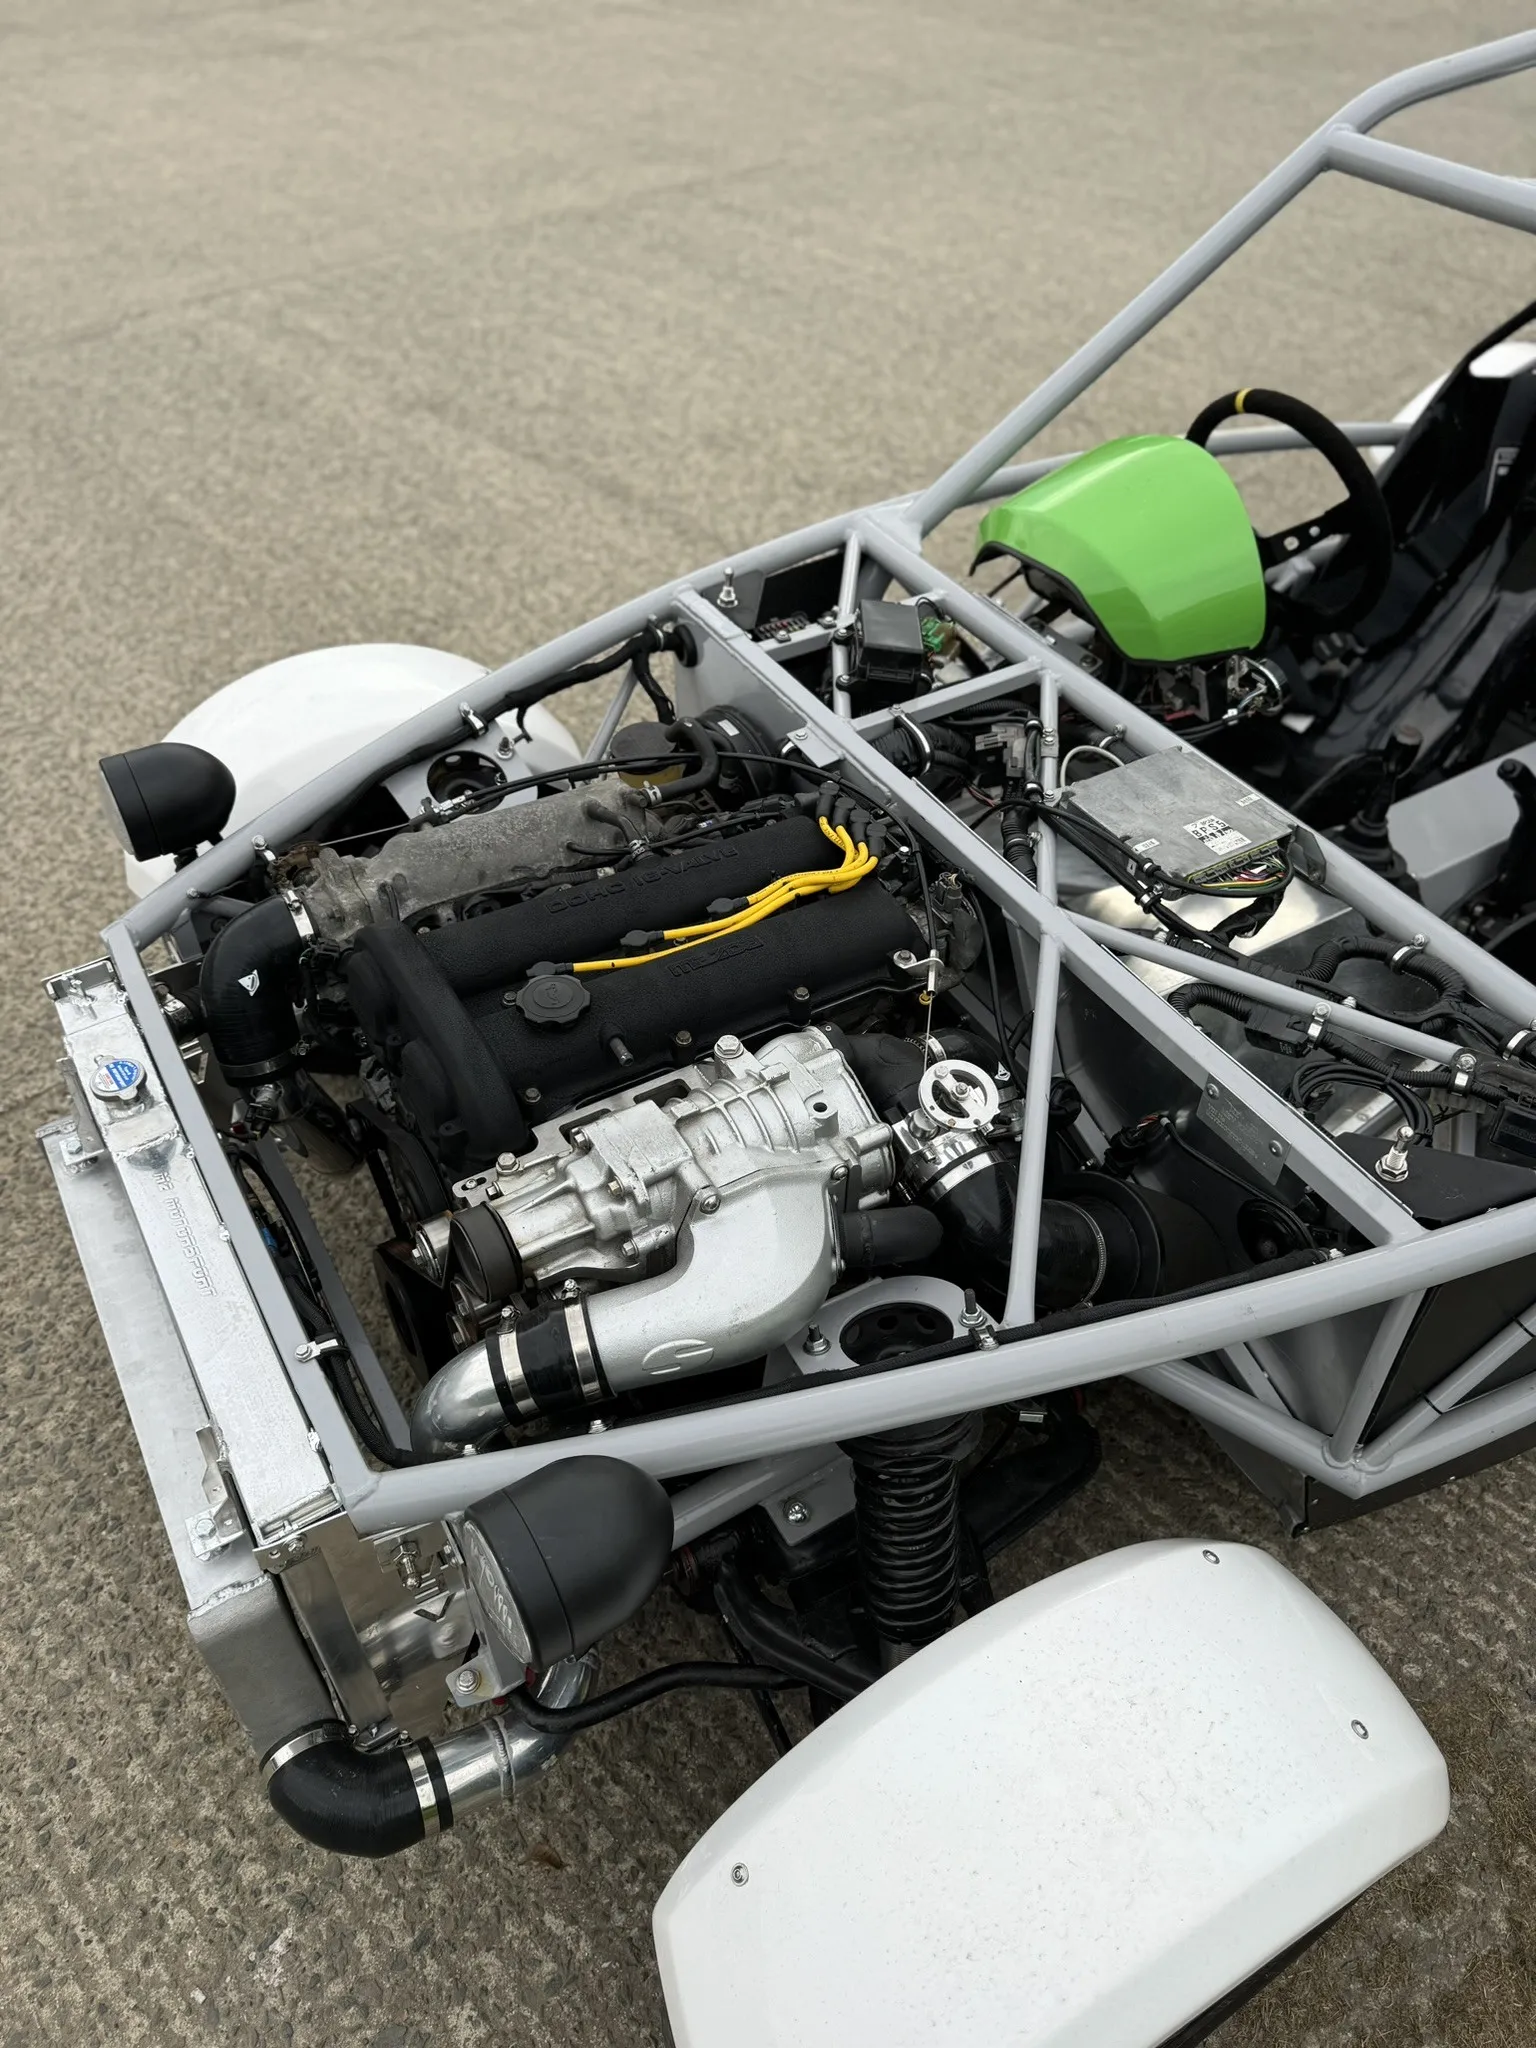
On the old chassis the supercharger, its second throttle body and the air filter all fitted. On the race chassis a bar runs where they used to sit, so the inlet had to change. The throttle body flange was cut off and welded back on at an angle. That drops the body enough to get a filter in the pocket, fed with cold air from the front, and the throttle cable was adjusted and re mounted to suit.
The bypass valve had to move too, and its diaphragm was failing. A new valve went on, with a hard pipe made to relocate it underneath, primed and painted, clear of the bonnet. The boost piping was cleaned out and repaired where the crash had hit it, and the intake air temperature sensor, cracked in the same crash, was replaced.
Radiator, Intercooler And Bonnet
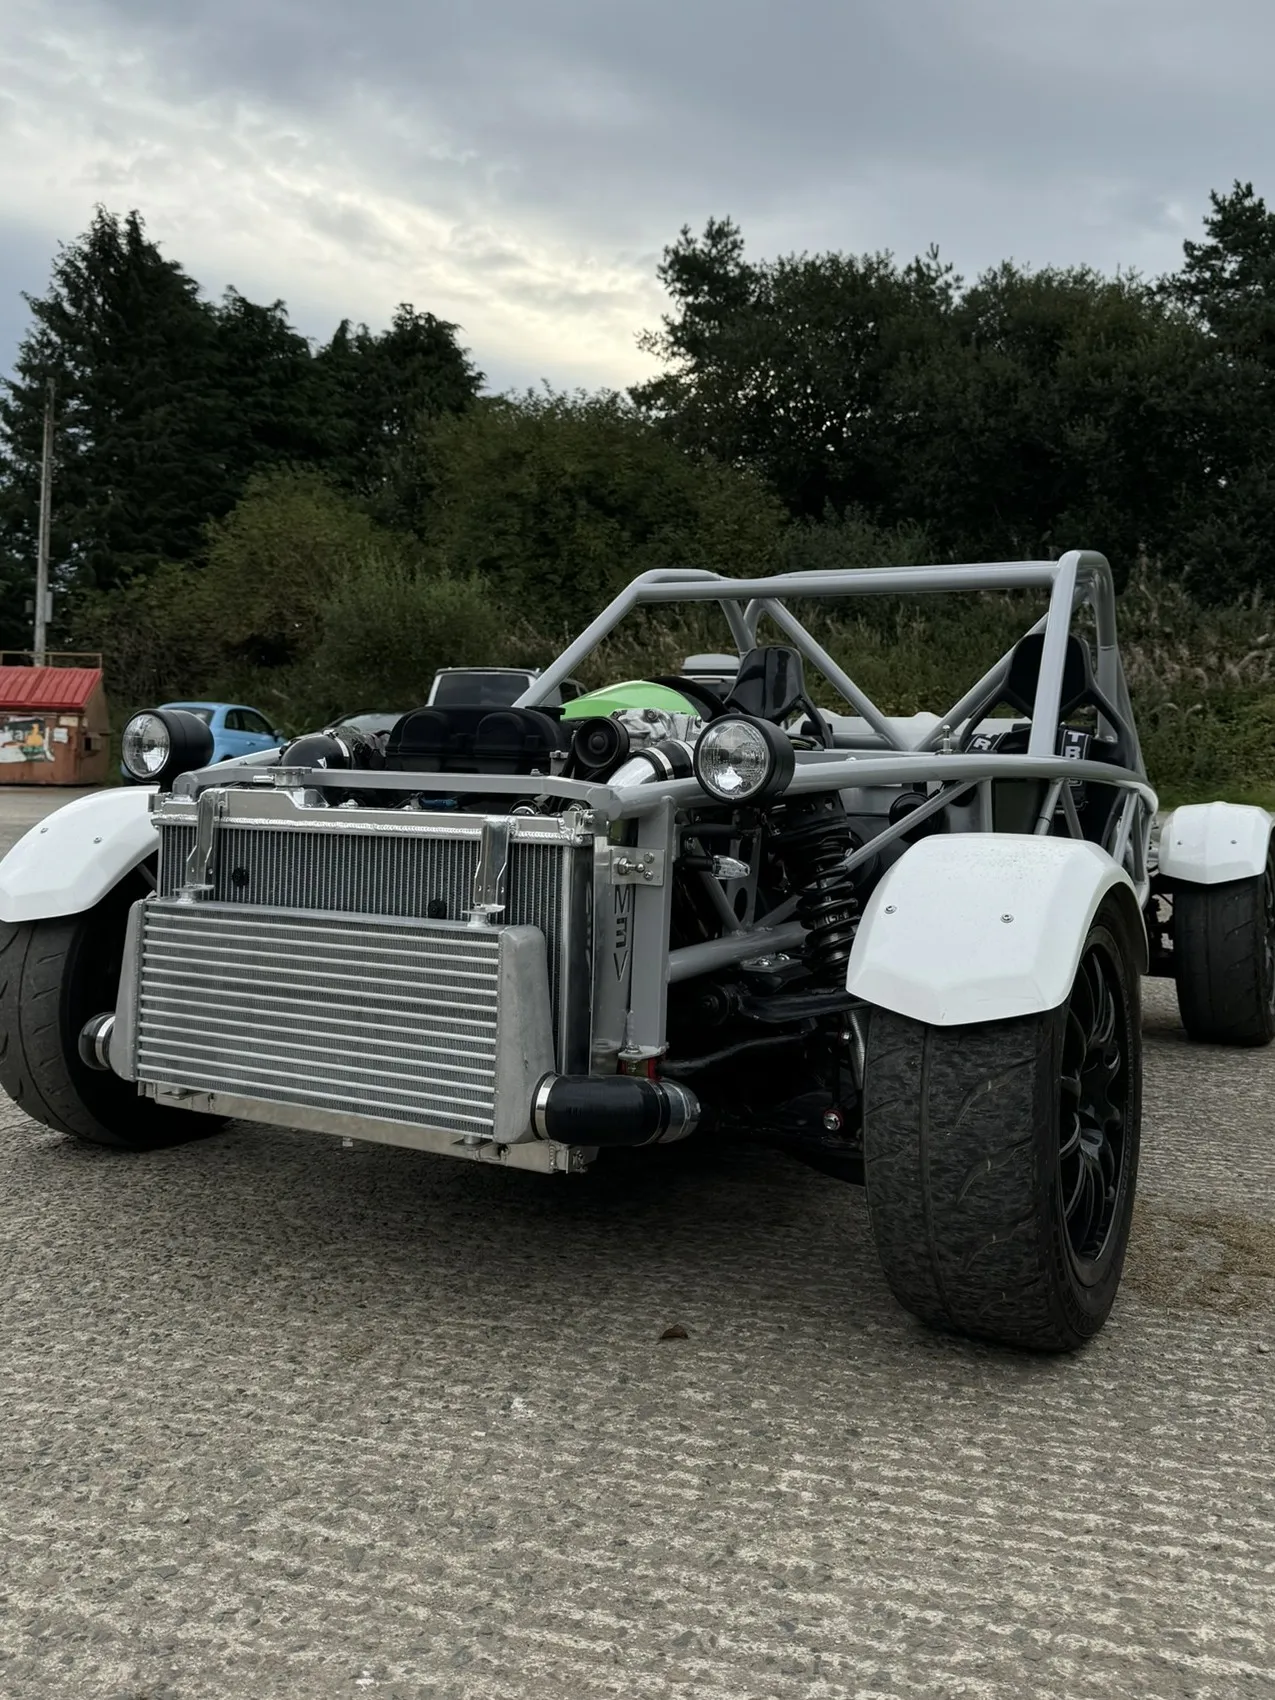
The radiator brackets were modified to bring the radiator into the body and its outlet was altered to make room for the boost pipe. The bonnet was trimmed to clear the radiator and intercooler. It mounts on four pins, with brackets made for the chassis and a panel riveted into the ECU tray to take the rear pins. Corner covers were made to hide the pedal box and wiring, the front grille was bonded in, the fan wiring was modified and the front loom was finished with the new lights.
First Start, MOT And Handover
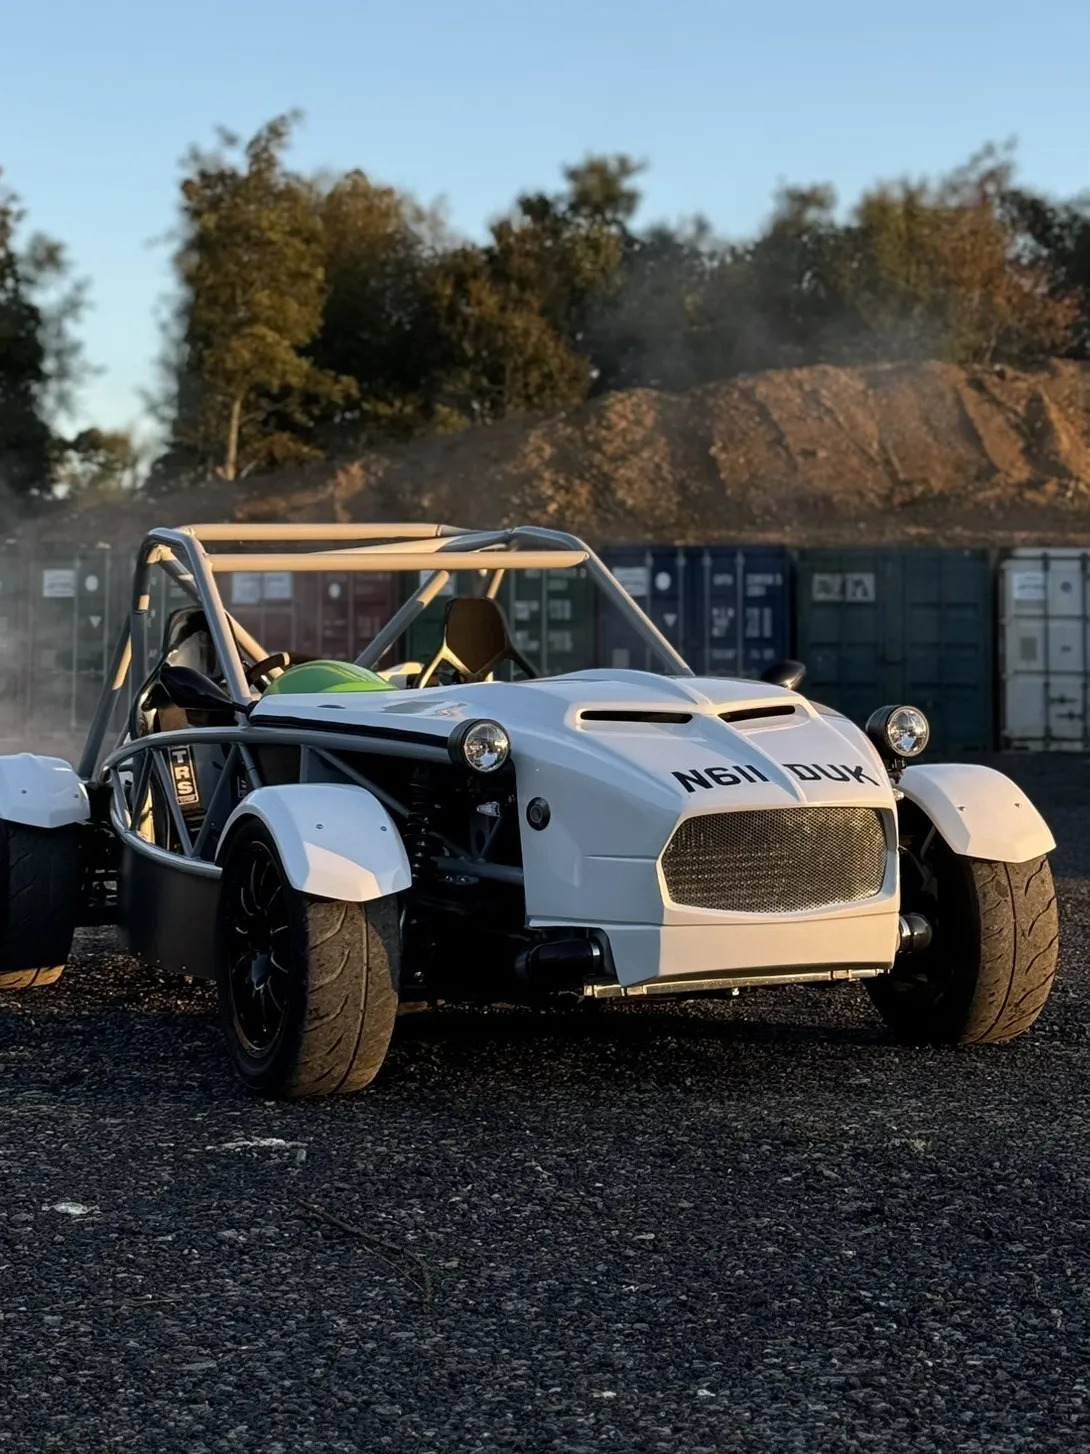
Fuel in, leaks checked, a nut and bolt check over the whole car. First start and a systems check, a small change to the map to improve running, then coolant filled and bled. Wing mirrors wired in. Alignment. A service, oil, filter and plugs. A shake down on the road, then plates on and the car taken for its MOT.
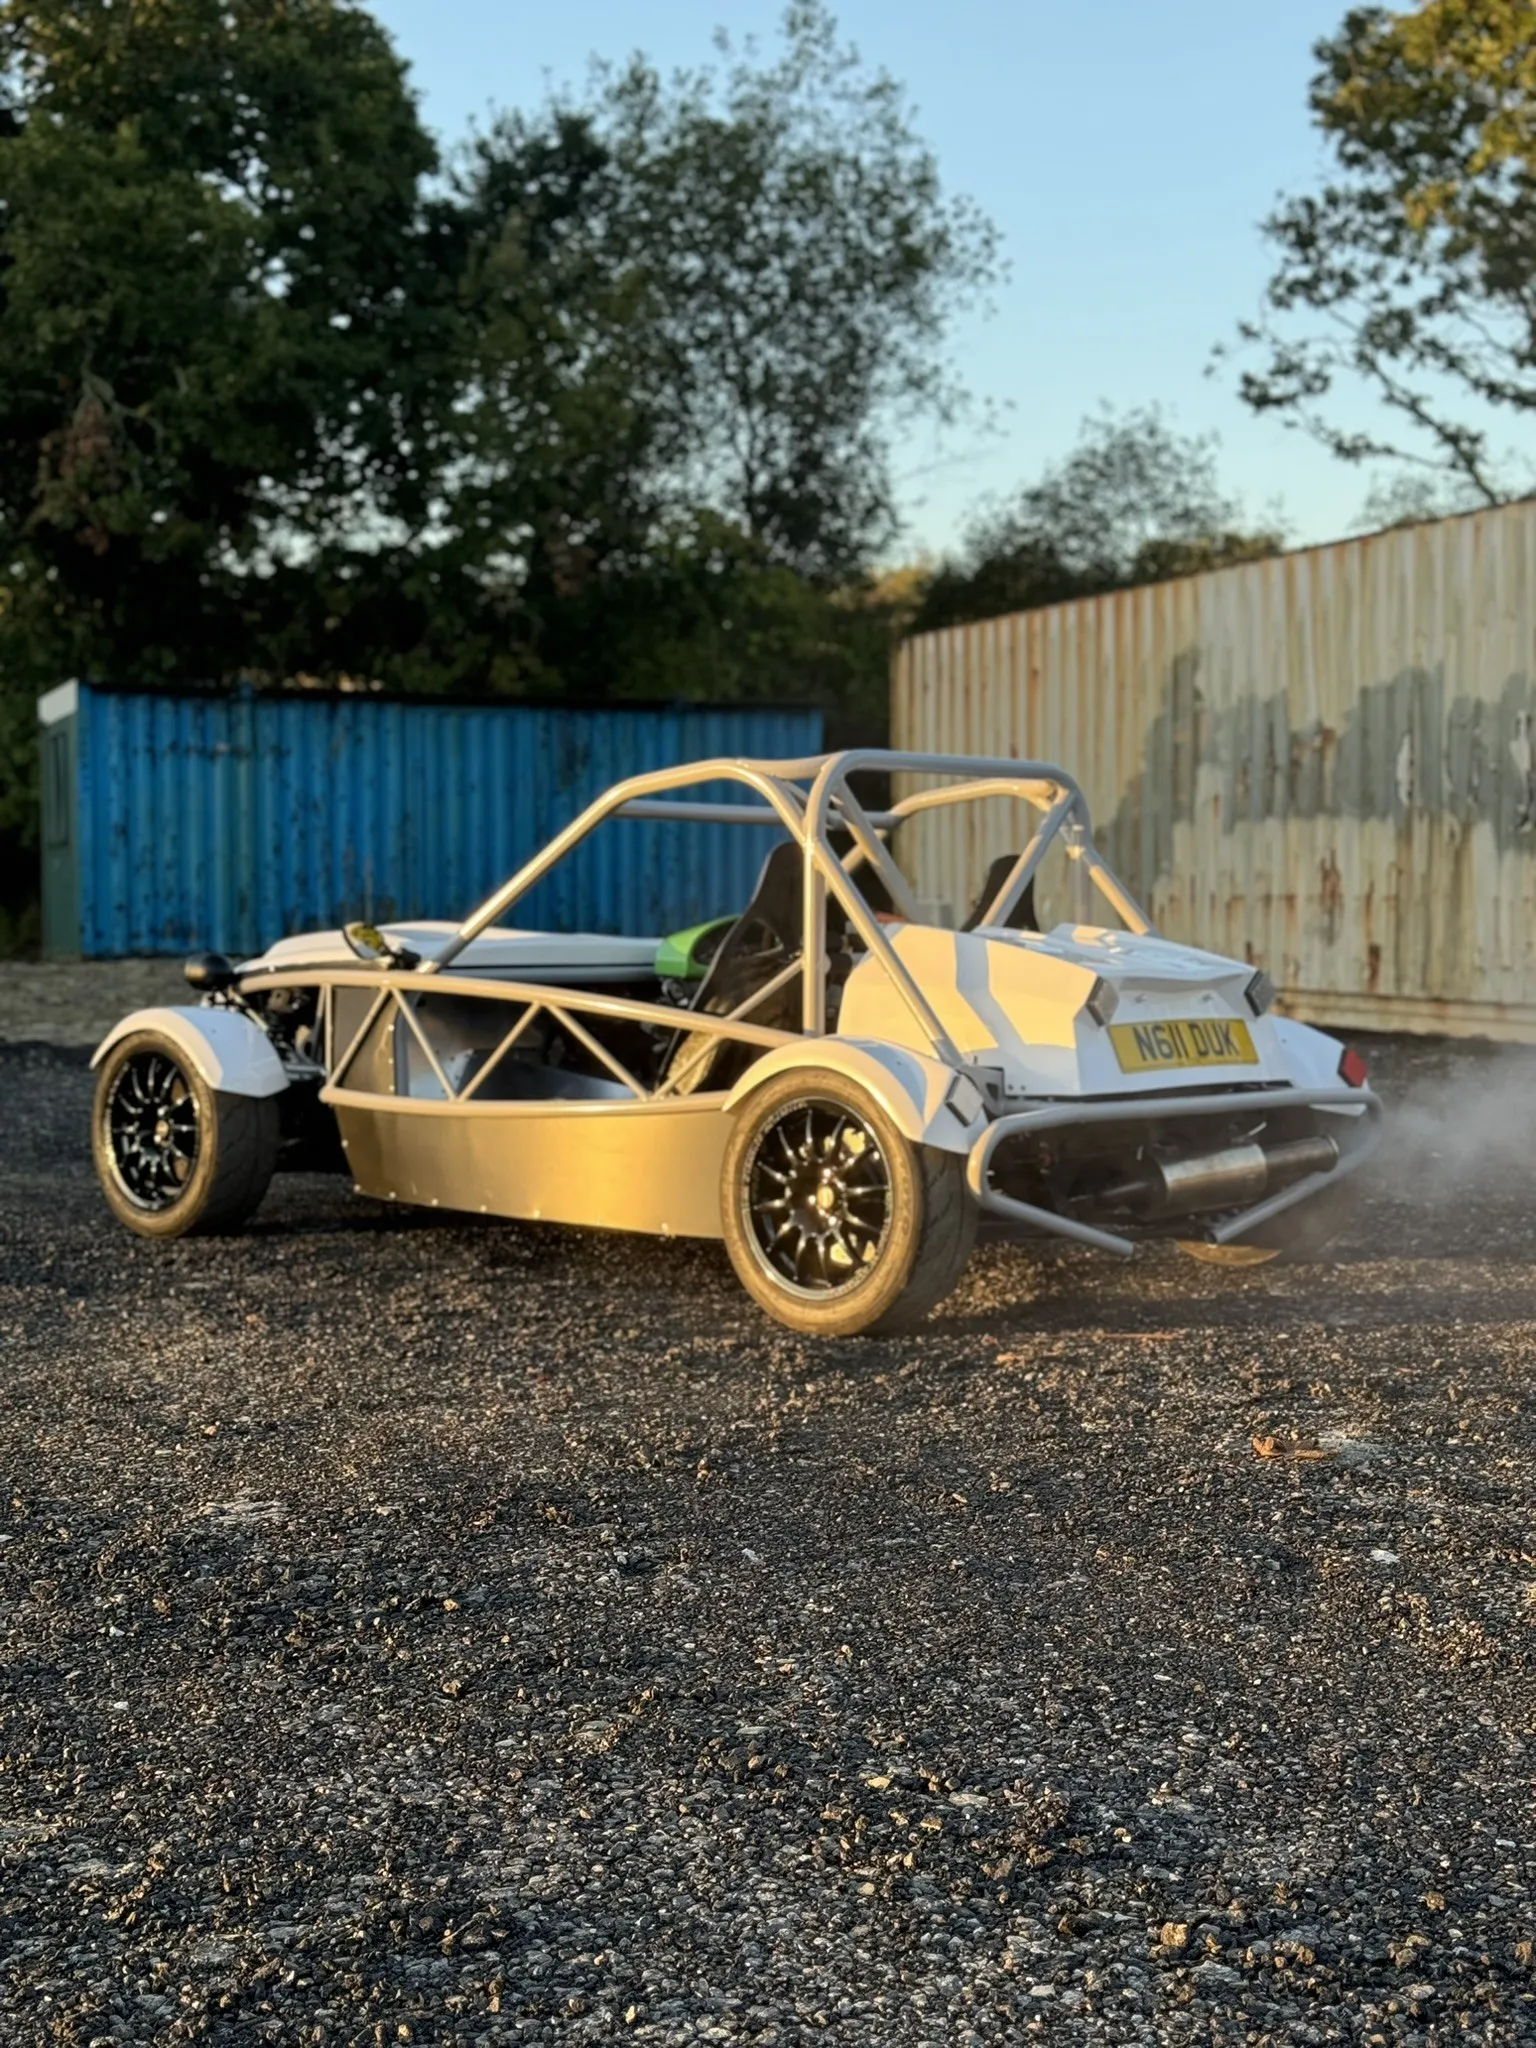
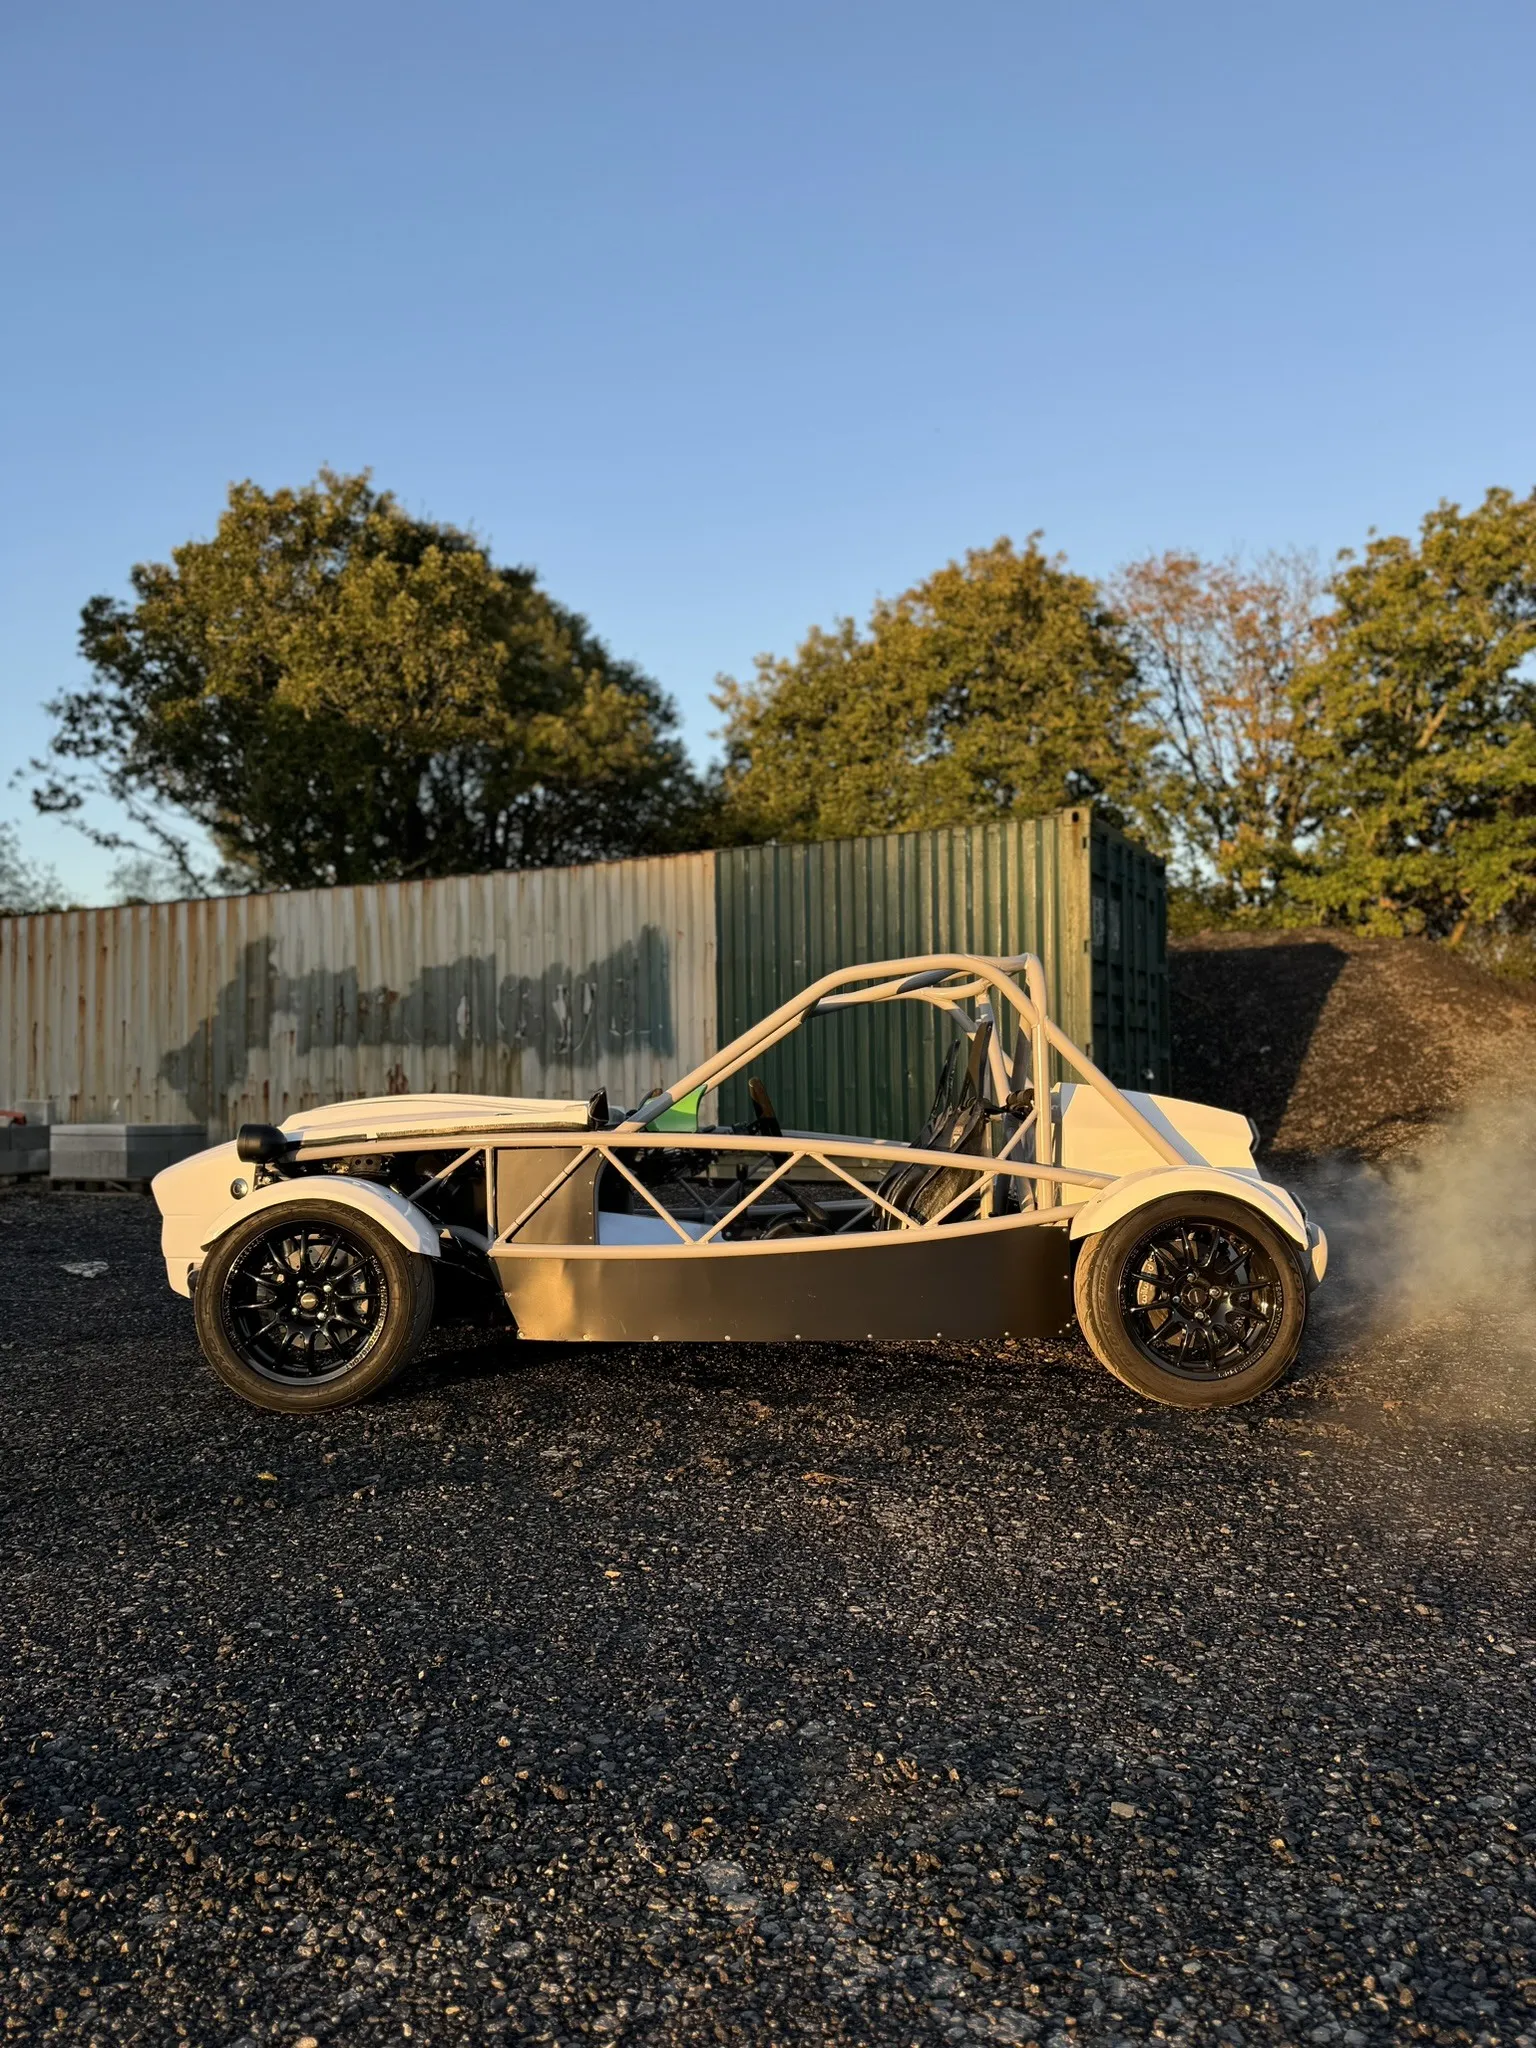
The same engine, the same brakes, the same tank and the same owner, on a new chassis.