The Mk1 MX-5 is one of the best driver’s cars ever built for the money. It is also one of the rustiest. Park one in the British weather for long enough and the sills, floors and chassis rails quietly dissolve from the inside out. This one came to us a long way down that road, and rather than patch over it we did what these cars actually need: cut the rot out and rebuild the structure properly. Here is the full story.
Watch the full build
What We Were Dealing With
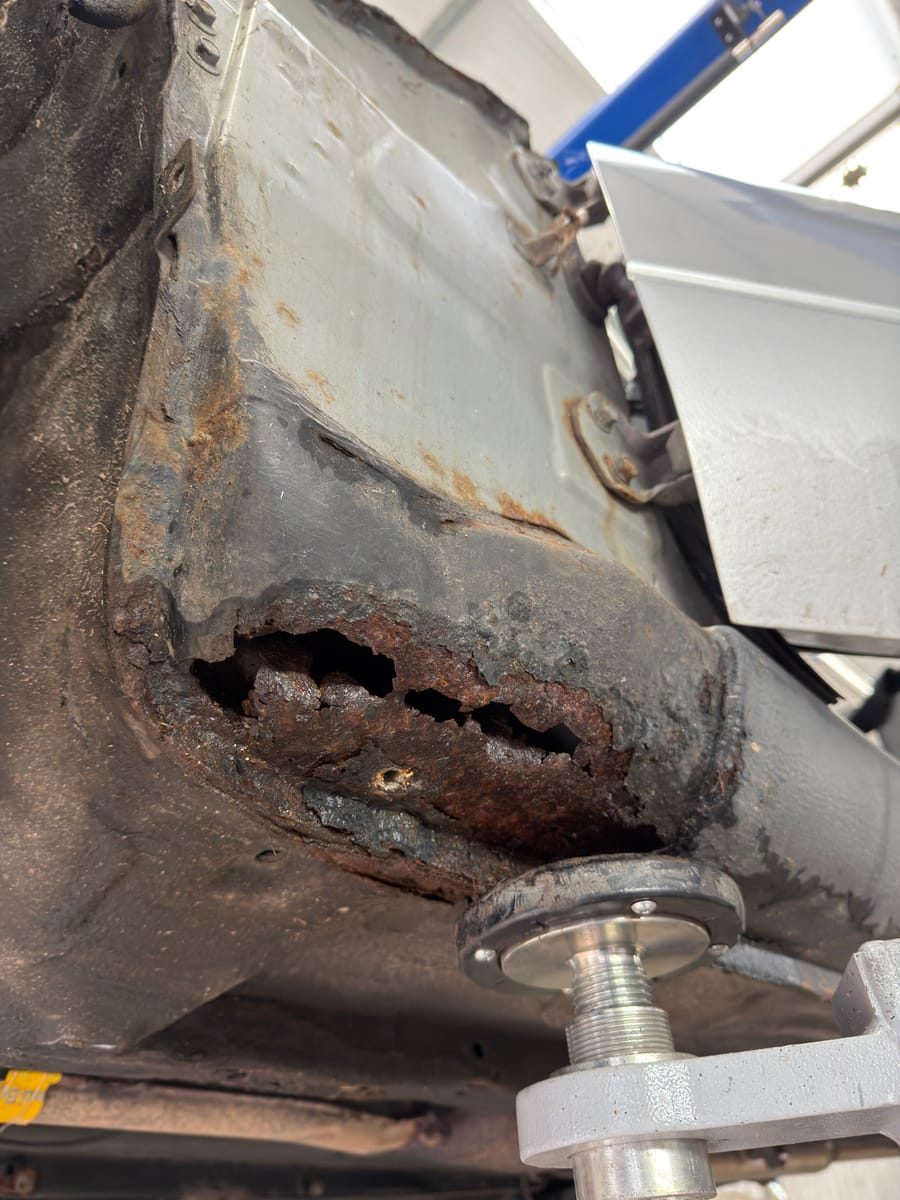
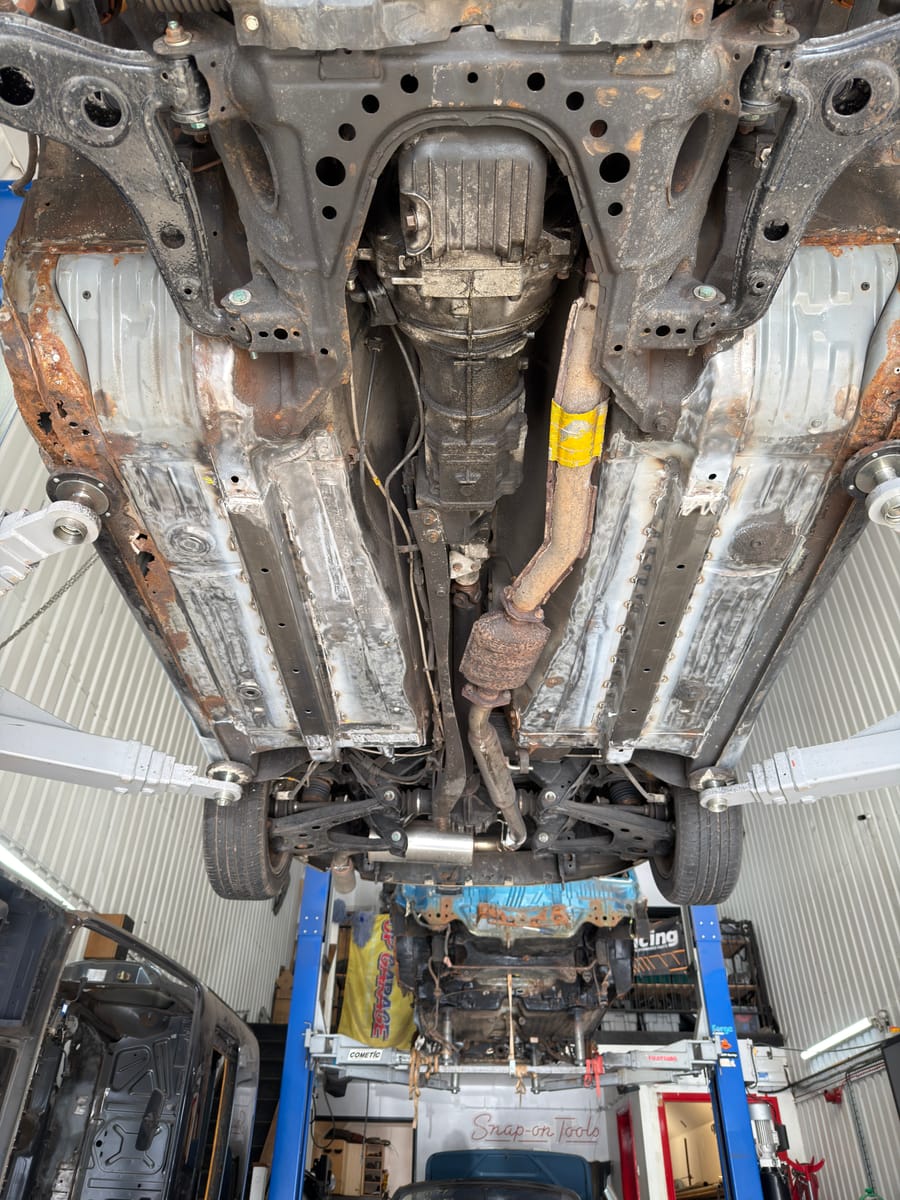
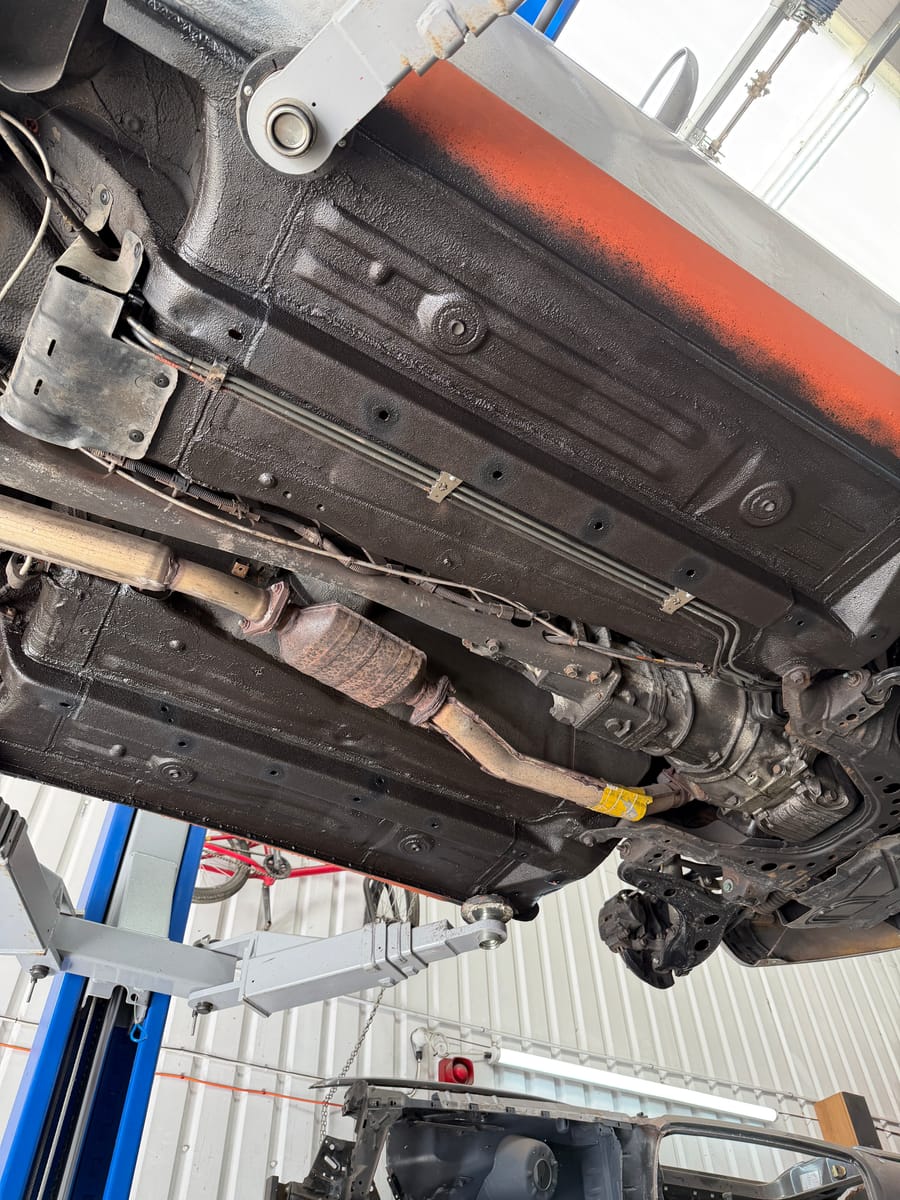
This was not a tidy car hiding one bad patch. With it up on the ramp the picture was honest and ugly. The front sills were soft enough to put your fingers through, with effectively no sill left in places. The chassis rails were beaten up and rusted, and although they looked black and solid from outside, internally they were going the same way as everything else. The fuel lines were rotten, there was a brake line flopping loose, and the underside of the floors had given up in patches.
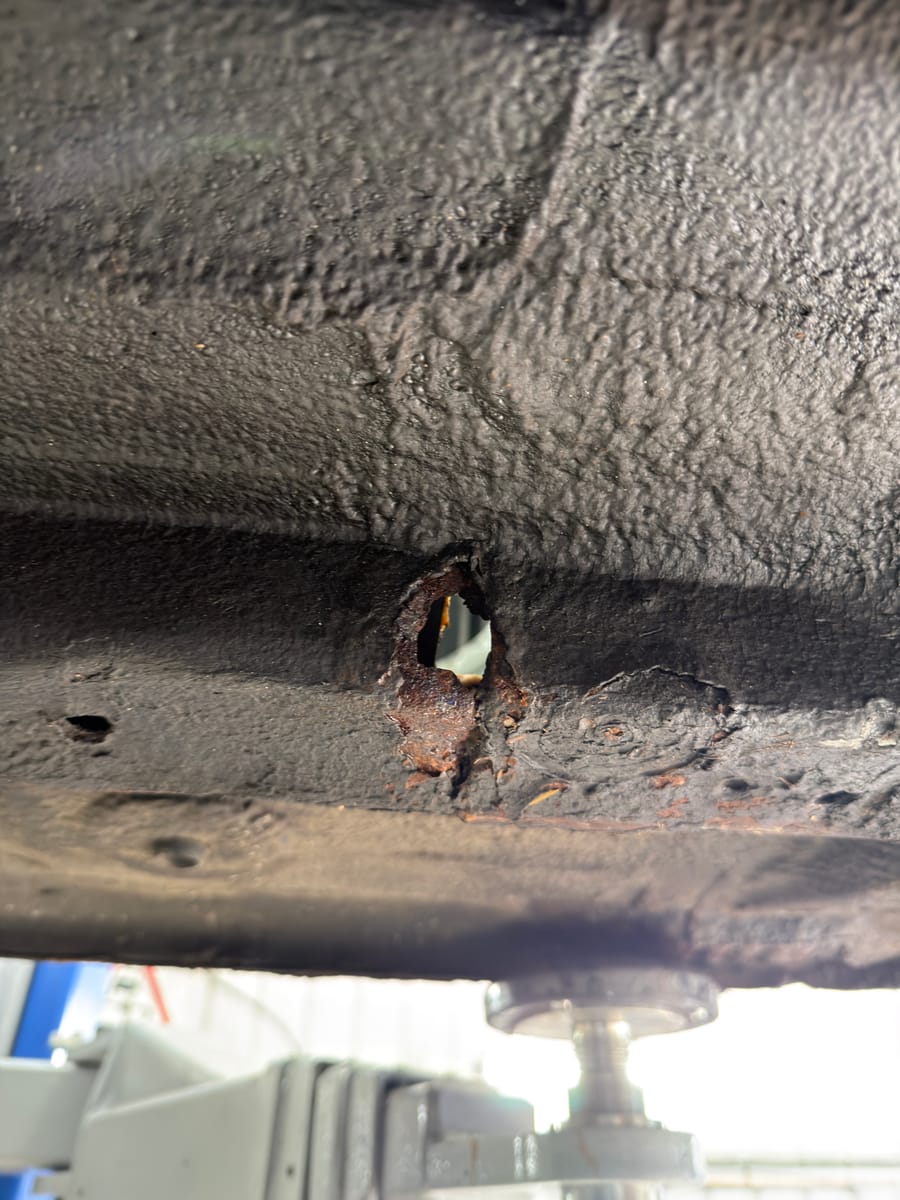
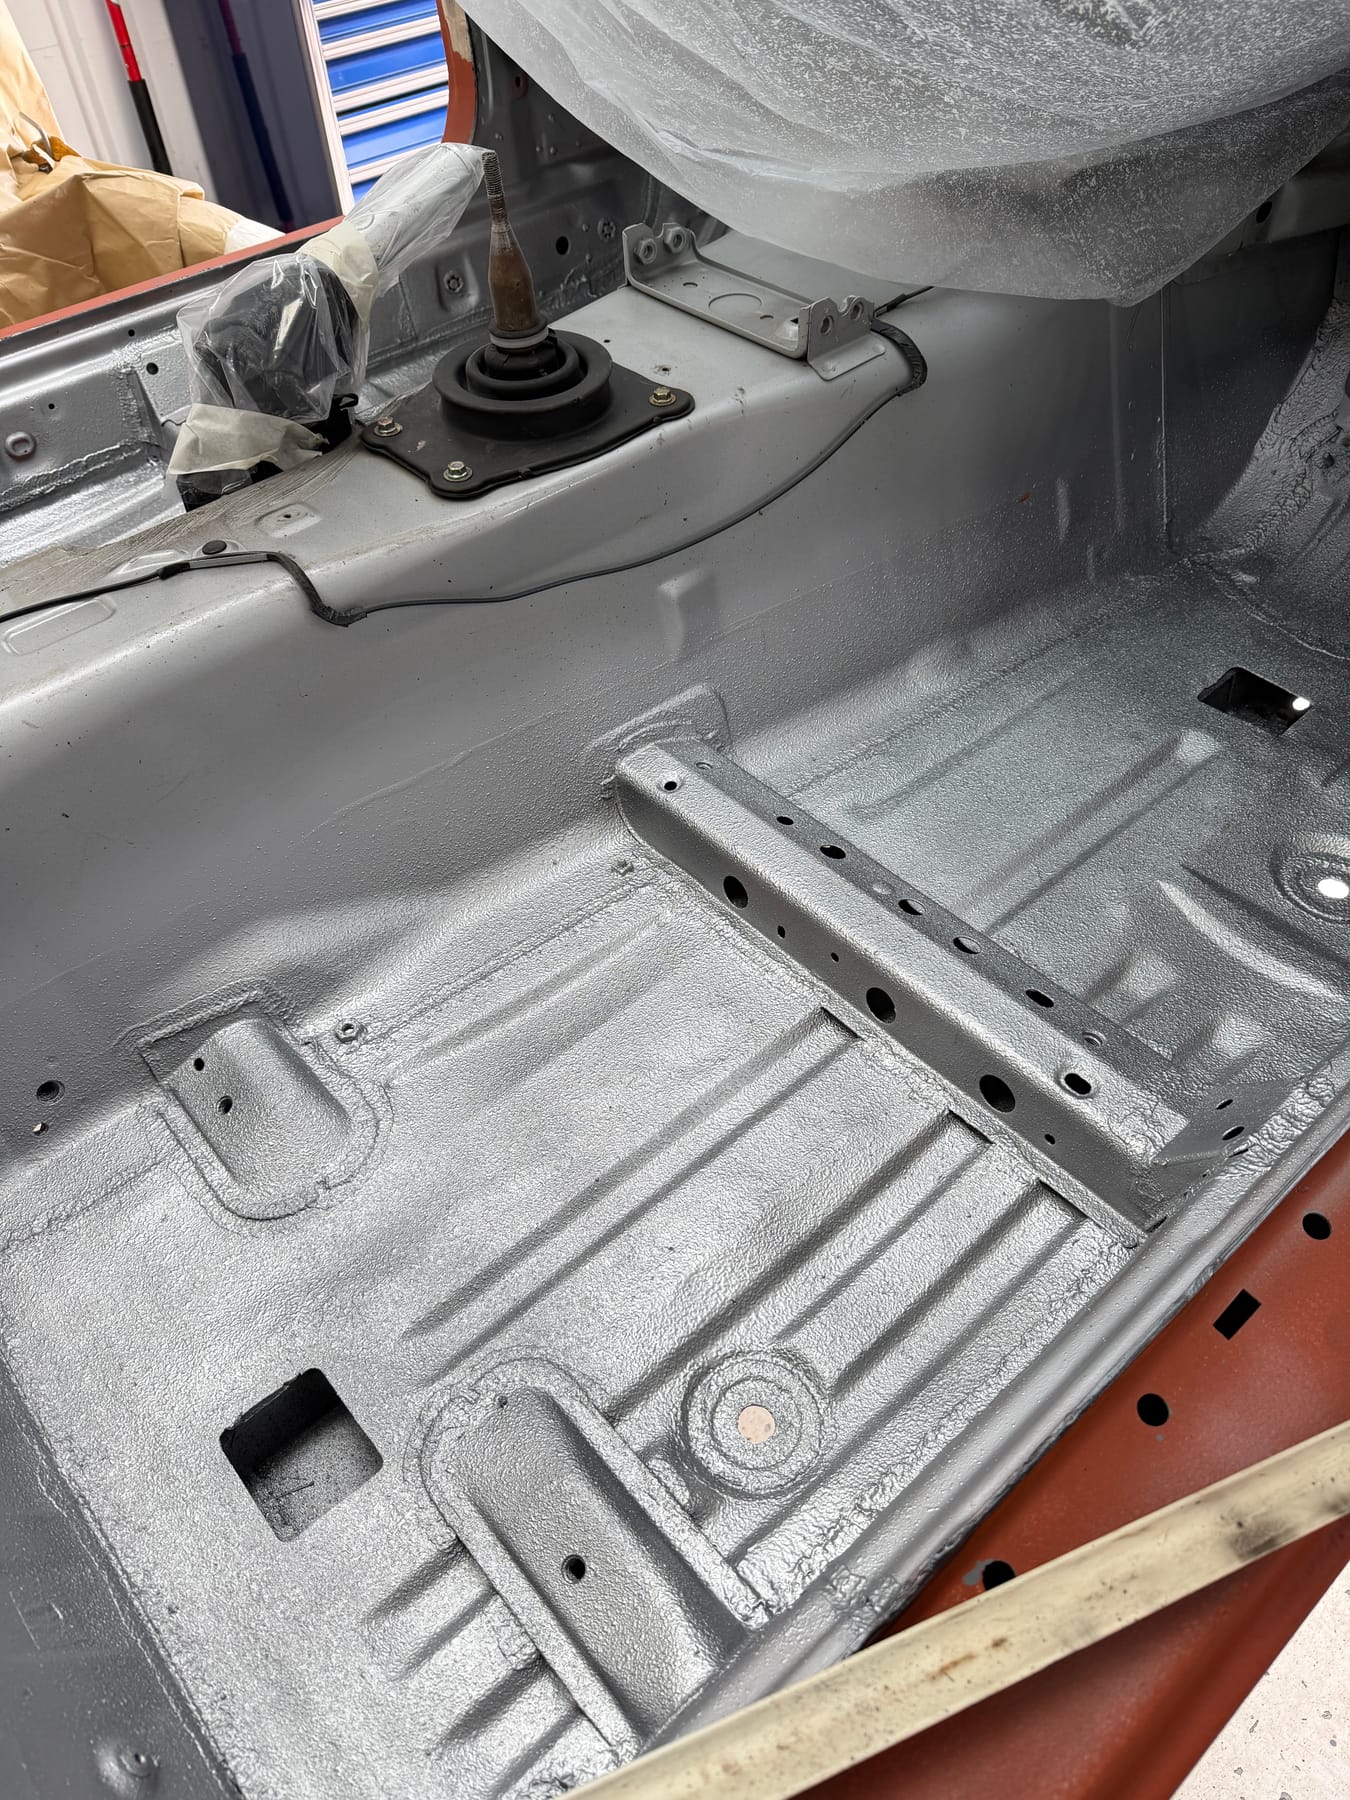
One bright spot, and it is a genuinely good sign on a Mazda, the internal floors were mostly sound. There were sections to remake, a large piece under the driver seat rail and the front floor corners, but the bulk of the trouble was on the underside. That told us the bones were worth saving, so we got stuck in.
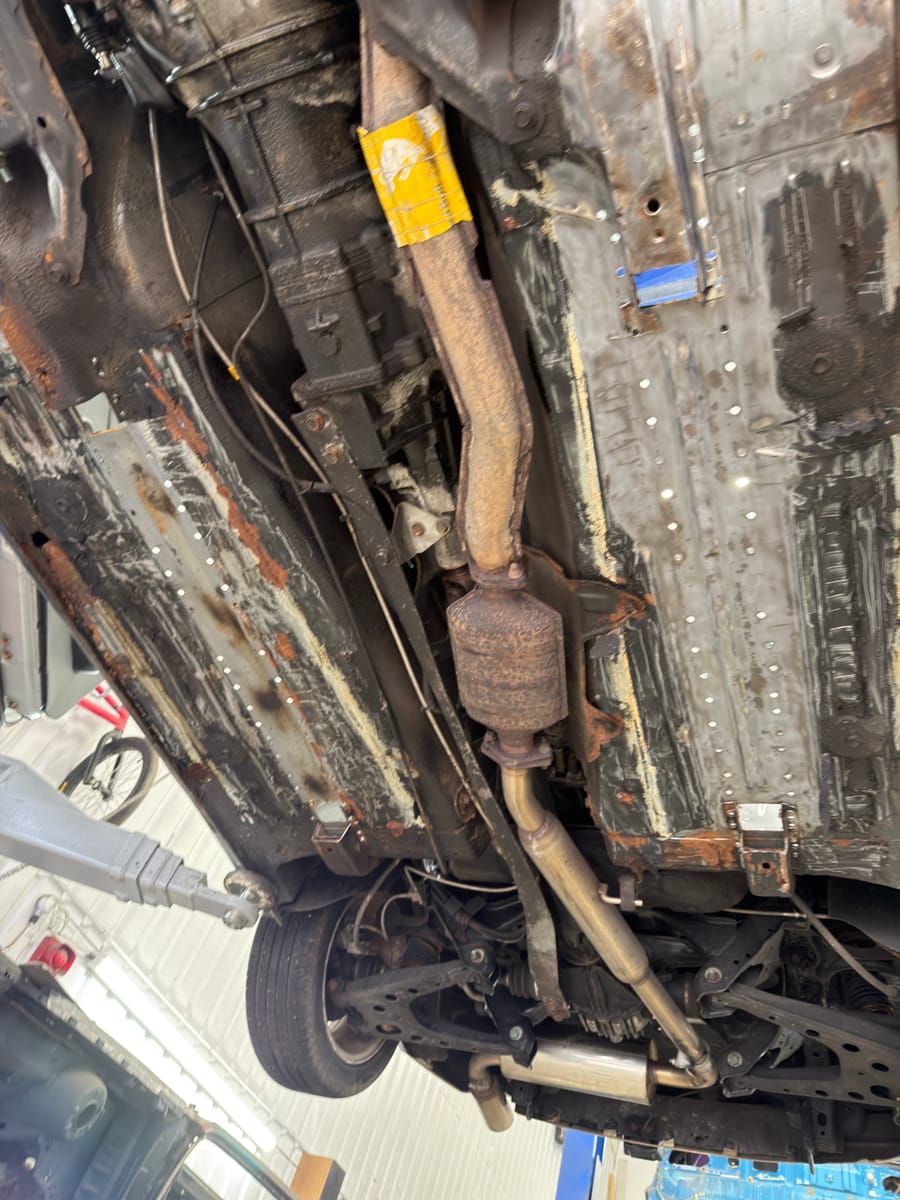
This was actually the second visit. A couple of years ago we replaced the rear sills and a rear arch on this car, and that work was still dead clean. This round was the front half: chassis rails, floors, torque boxes and front sills.
Chassis Rails In 3mm, Stronger Than Standard
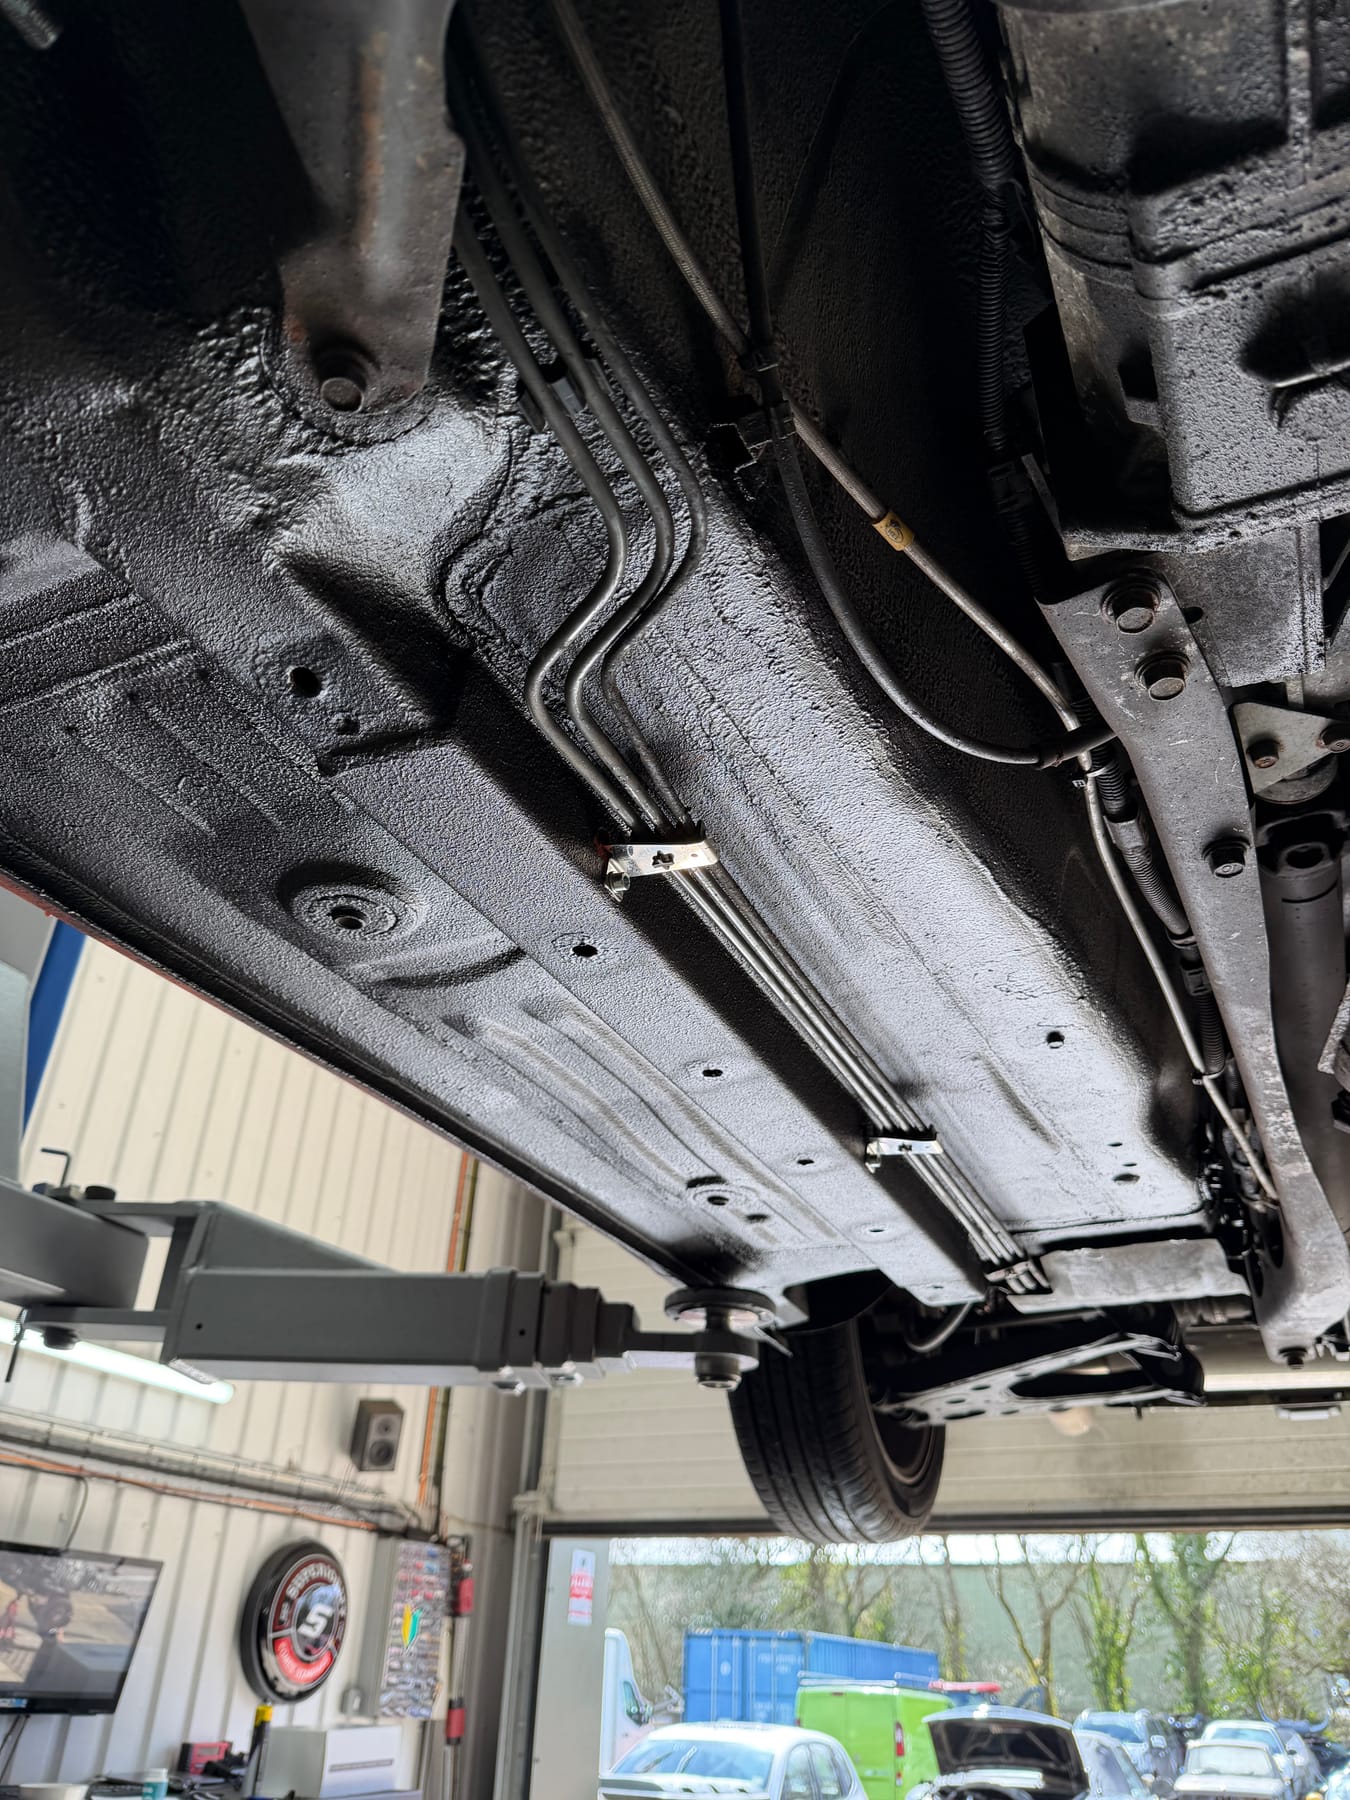
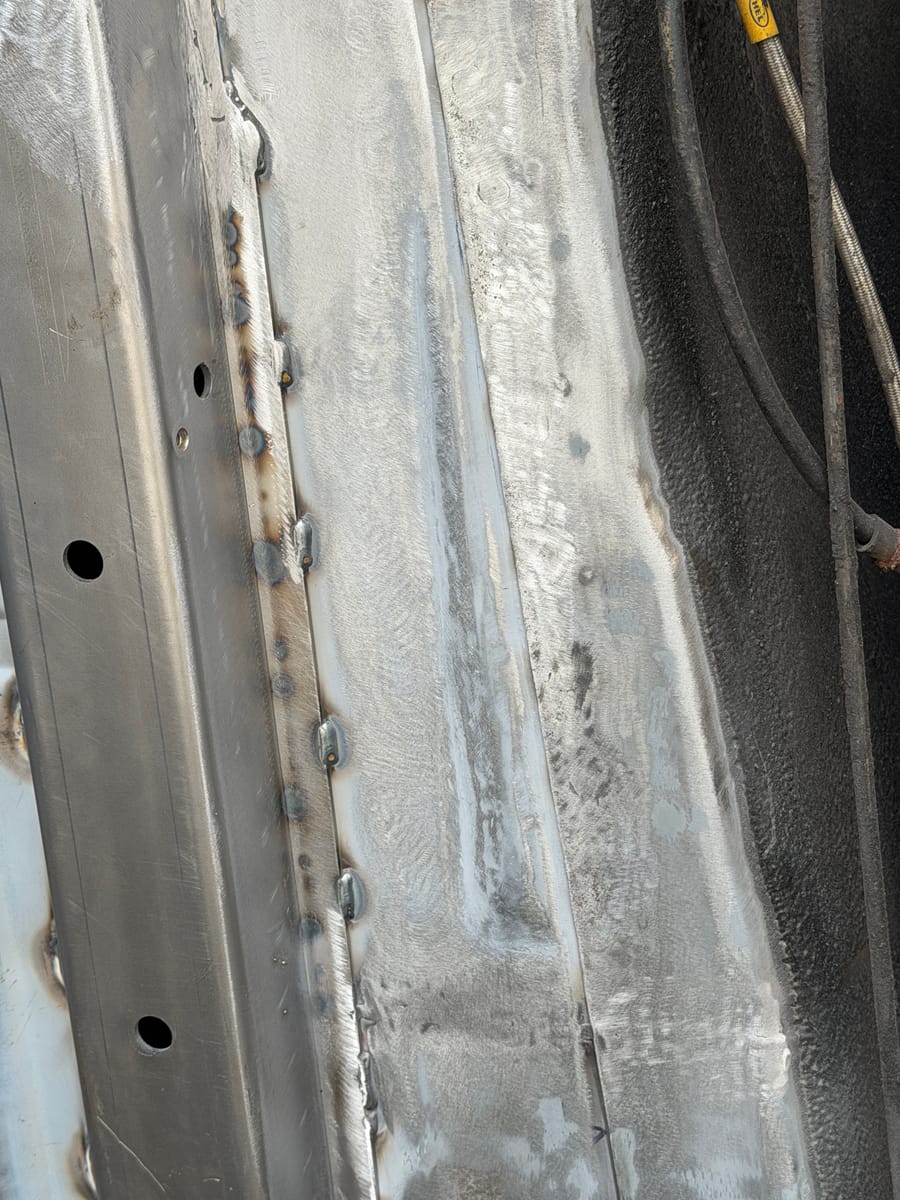
We replaced the chassis rails full length, from the front torque box all the way back, with 3mm thick rails. The originals are spot welded along the top through the floor, so the job starts inside the car drilling out every spot weld, then underneath to release the rails along their length, before the new rails go up, get squared, tacked, then plug welded and stitched in solid.
Going to 3mm is a deliberate upgrade. It replaces the dented, corroded originals and leaves the car stiffer and stronger than it left the factory. It is a great foundation for a car that is going to be driven hard or kept for the long haul.
Floors And Torque Boxes, Hand Made To Fit
This is where the craft comes in. Where the floor and the front torque boxes had gone, we did not bolt in a compromise. We made the panels. Measuring off the car, cutting the steel, then shaping it by hand on the English wheel, rolling in the swage lines that the original panels have, hammer forming and planishing the edges until each panel sits like it grew there. Everything goes in over weld through primer so the laps are protected from the inside, and we use backers to hold panels square while they are welded.
A small trick worth mentioning, we grind our own spot weld drills with a near flat, slightly concave tip so they cut the top panel without biting through the one underneath. Spot weld drills are expensive and this gets a very long life out of them. It is the kind of detail that makes a structural job clean rather than a fight.
Front Sills And Door Shuts, No Shortcuts
The front sills came off completely. Once the rot is into the spot welds you cannot always tell weld from rust, so it is patient work to release the sill, find good metal, and decide how far back to go. On this car we took the inner sill right up to the door shut so we could expose and repair everything inside, rebuild the inner sill upright, the jacking supports and the A pillar bottoms, then tie the new front work neatly into the rear sill we had done on the previous visit.
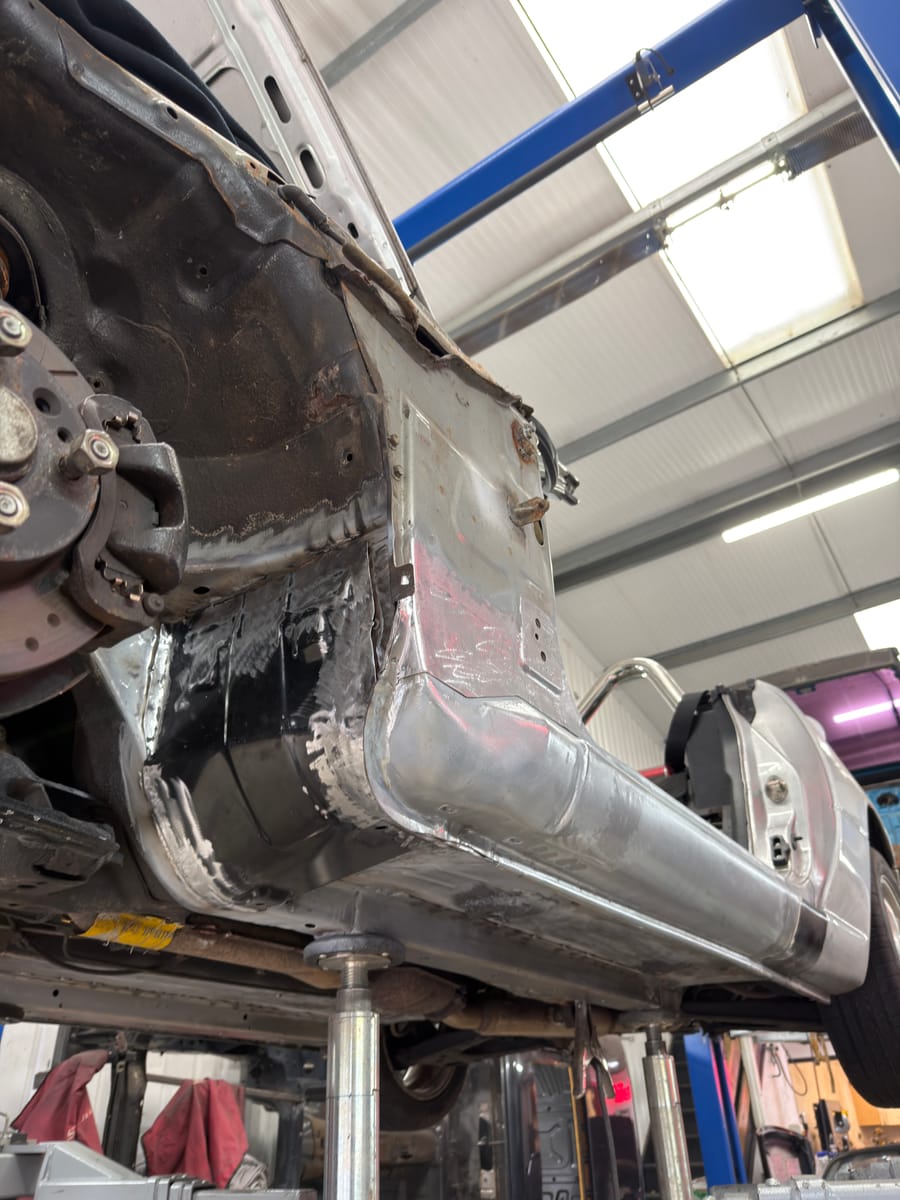
Where an original section was still good we kept it. A couple of the jacking and floor support pieces were salvaged off the original panels because they were sound, and only the rotten metal was remade. That is the honest way to do it, save what is good, replace what is gone, and make the join invisible.
Protection, So It Lasts
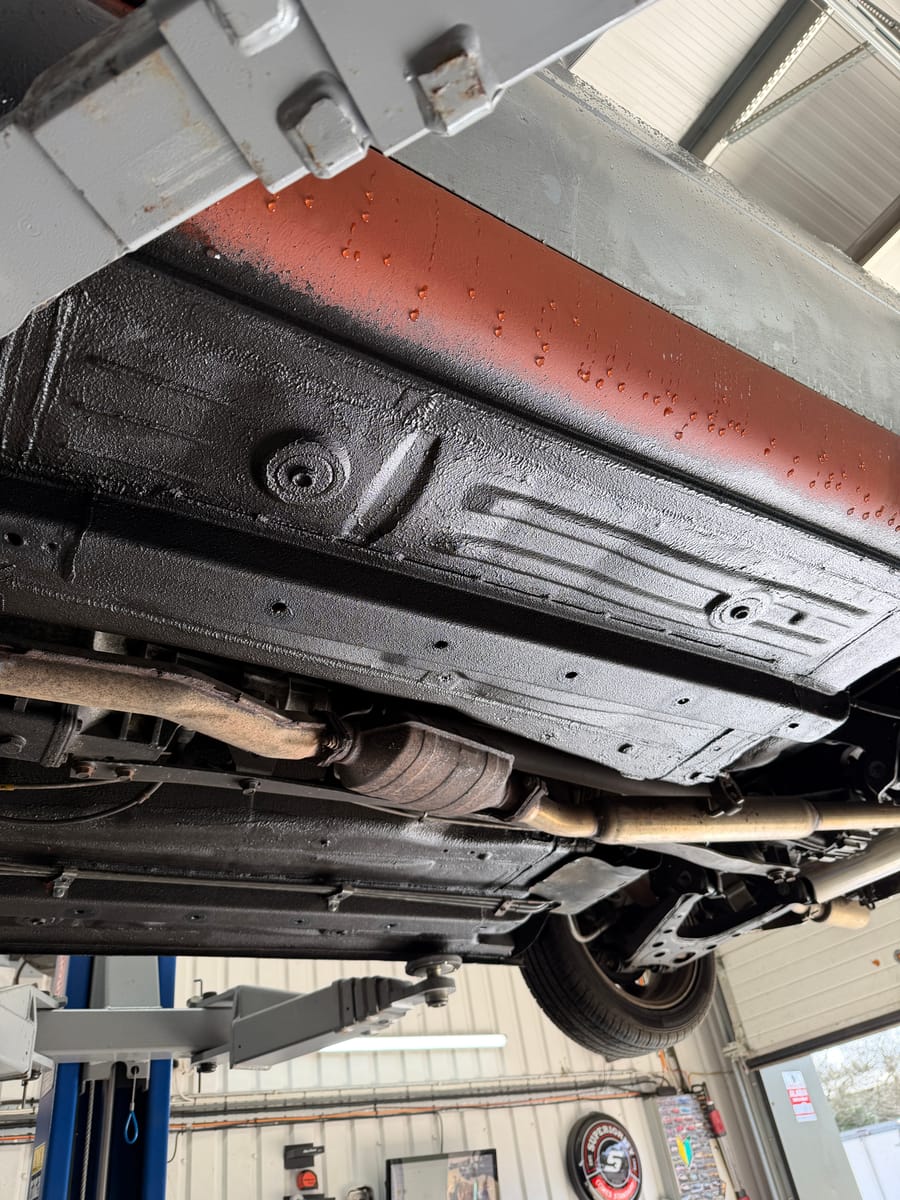
A structural repair is only as good as how it is sealed back up, and this is the part a lot of jobs skimp. Every cavity was coated in a heavy weldable primer as the work went in, then once all the welding was dressed the bare metal was cleaned, degreased and primed with a rust encapsulating primer. We ran spray sealer over every lap and joint, pushing it right into the seams by hand so nothing is left open, then smoothed each one into a clean concave line. Over the top went two full coats of stone chip, with extra build on the high wear and high traffic areas. Inside, the floors were sealed, painted in a fresh 1k coat and given a dusting of stone chip too, to protect against feet and road abuse.
Then the part you cannot see but matters most. We cavity primed and cavity painted right through the chassis rails, the full length of the sills, the arches and every other cavity we could reach, whether we had welded there or not. That is just part of how we do an extensive rebuild. Rust starts inside these closed sections, so that is where the protection has to go. While we were at it the A-pillars were scraped back, treated and repainted, and a front arch repair was welded in and recoated.
Back Together, And On To Paint
With the structure done and protected, the car went back together. The rotten fuel lines were replaced and routed on new stainless brackets, with a new fuel filter, the interior went back in, dash, carpets, steering column, console, seats and trim, and the front end was reassembled. A few of the wing and bumper mounting bolts had sheared, as they always seem to on these, so those were drilled out and sorted along the way.
We are straight about what we do not do. We do not paint cars in house, we do not have the spray facility for it, so the exterior bodywork and paint go to a body shop. The car left us as a sound, protected, properly rebuilt shell ready for that final step.
The Takeaway
If you own a Mk1 MX-5, the rust is not a question of if, it is a question of when and how much. The cheap way is to hide it. The right way is to cut it out, rebuild the structure in proper steel, and protect it inside and out so it does not come straight back. That is the work we take on, and we do enough of it that the common panels sit on our shelf ready to go. If your Mk1 is heading the same way as this one, bring it in and we will tell you straight what it needs.
Watch the full build on our YouTube channel.
Back to all builds