
Swapping the diff is one of the best things you can do to an MX-5, whether you are going from an open diff to a limited slip, changing the ratio, or just replacing a whining unit. Across the Mk2 range every type shares the same casing and the same mountings, so the car does not care which diff you are fitting. The job is the same. Here is how it comes out and goes back in.
Work out what you have first. The companion to this is our guide on identifying your diff, which is worth doing before you order anything.
What is holding it in
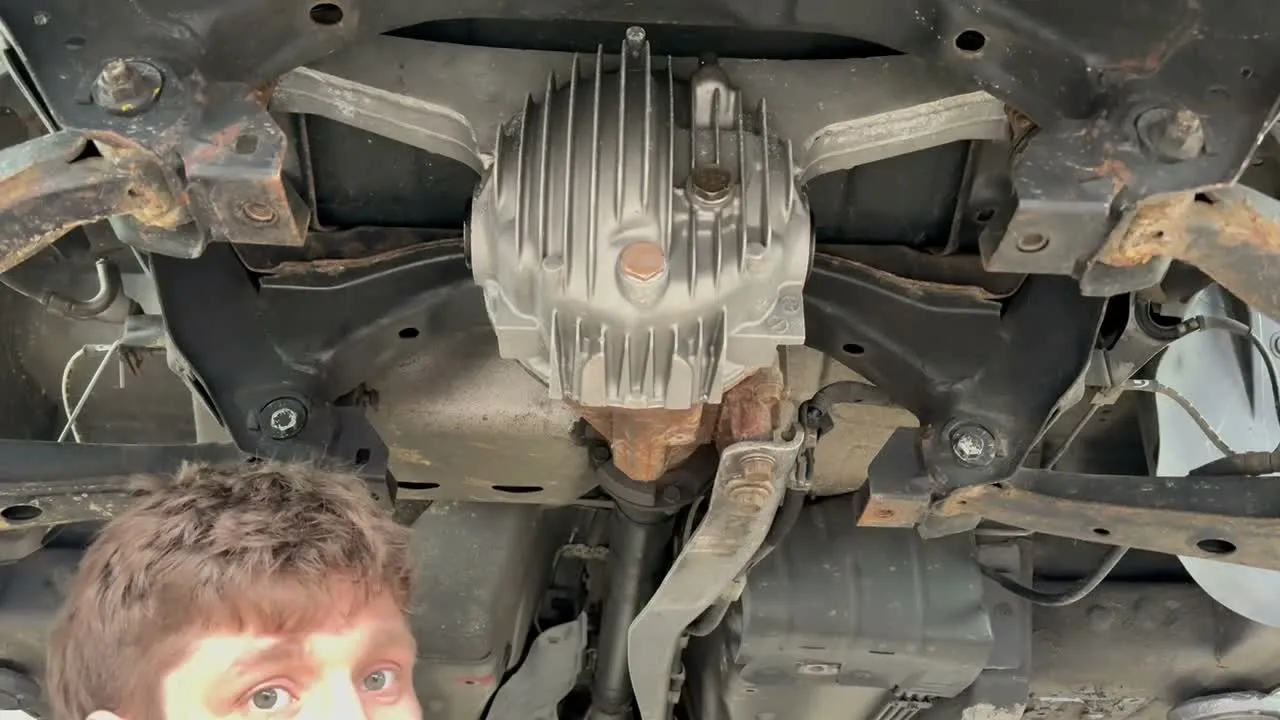
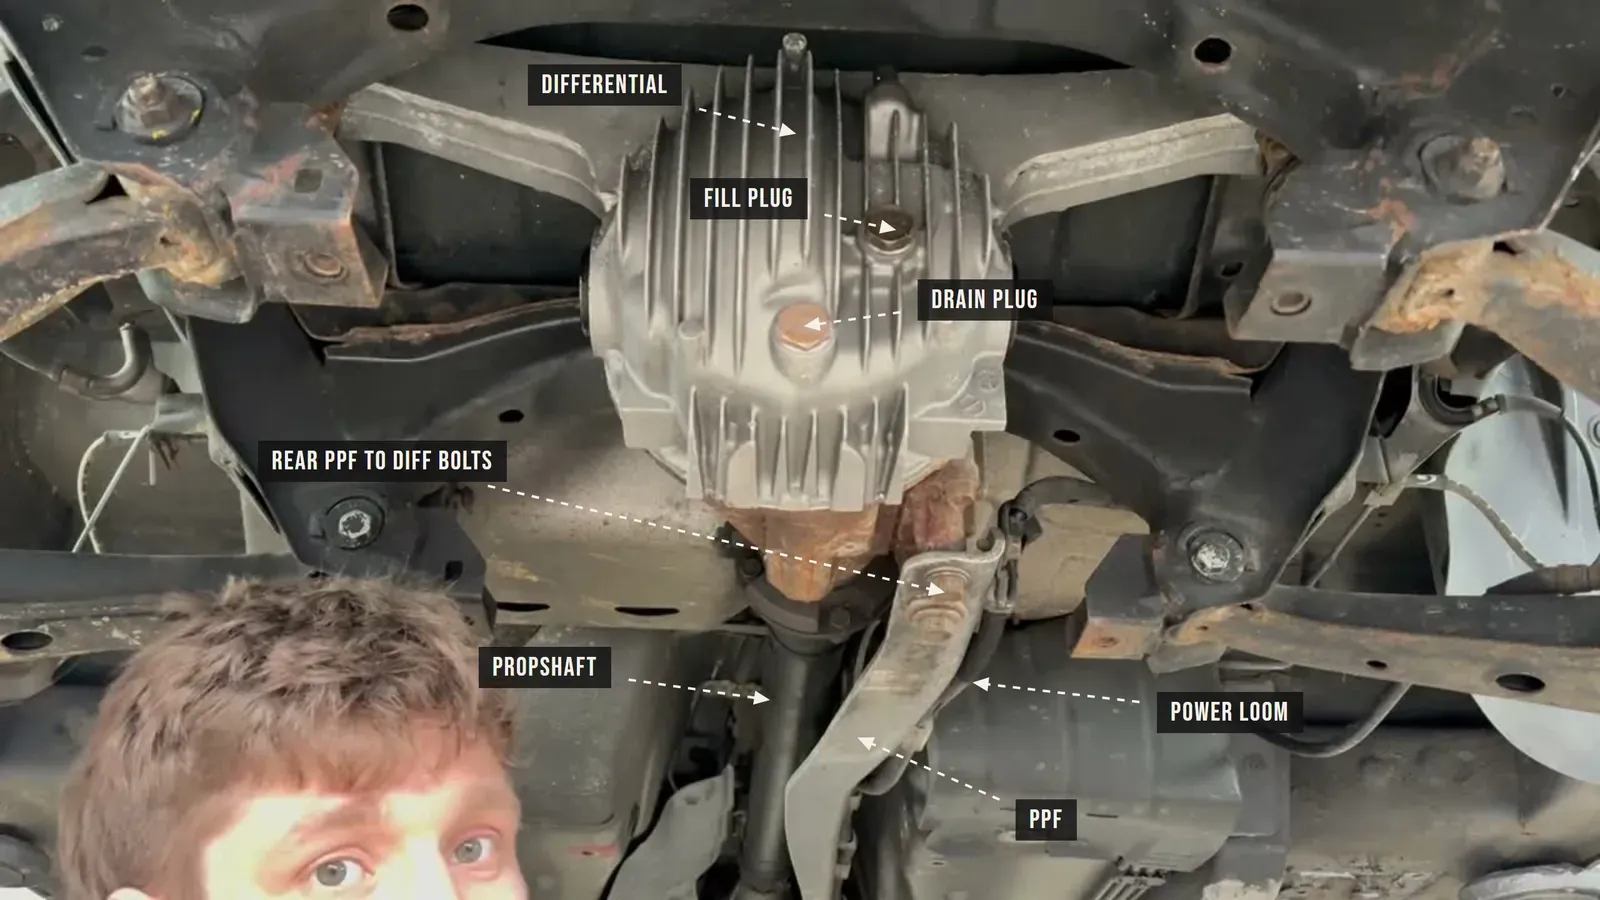
The diff is held by four things, and you work through them in order: the two driveshafts into the hubs, the propshaft from the gearbox, the Power Plant Frame (PPF) that ties it to the gearbox, and two mounts onto the subframe. Get the car up on a ramp or on four stands, level, and drain the diff oil before you start.
Taking it out
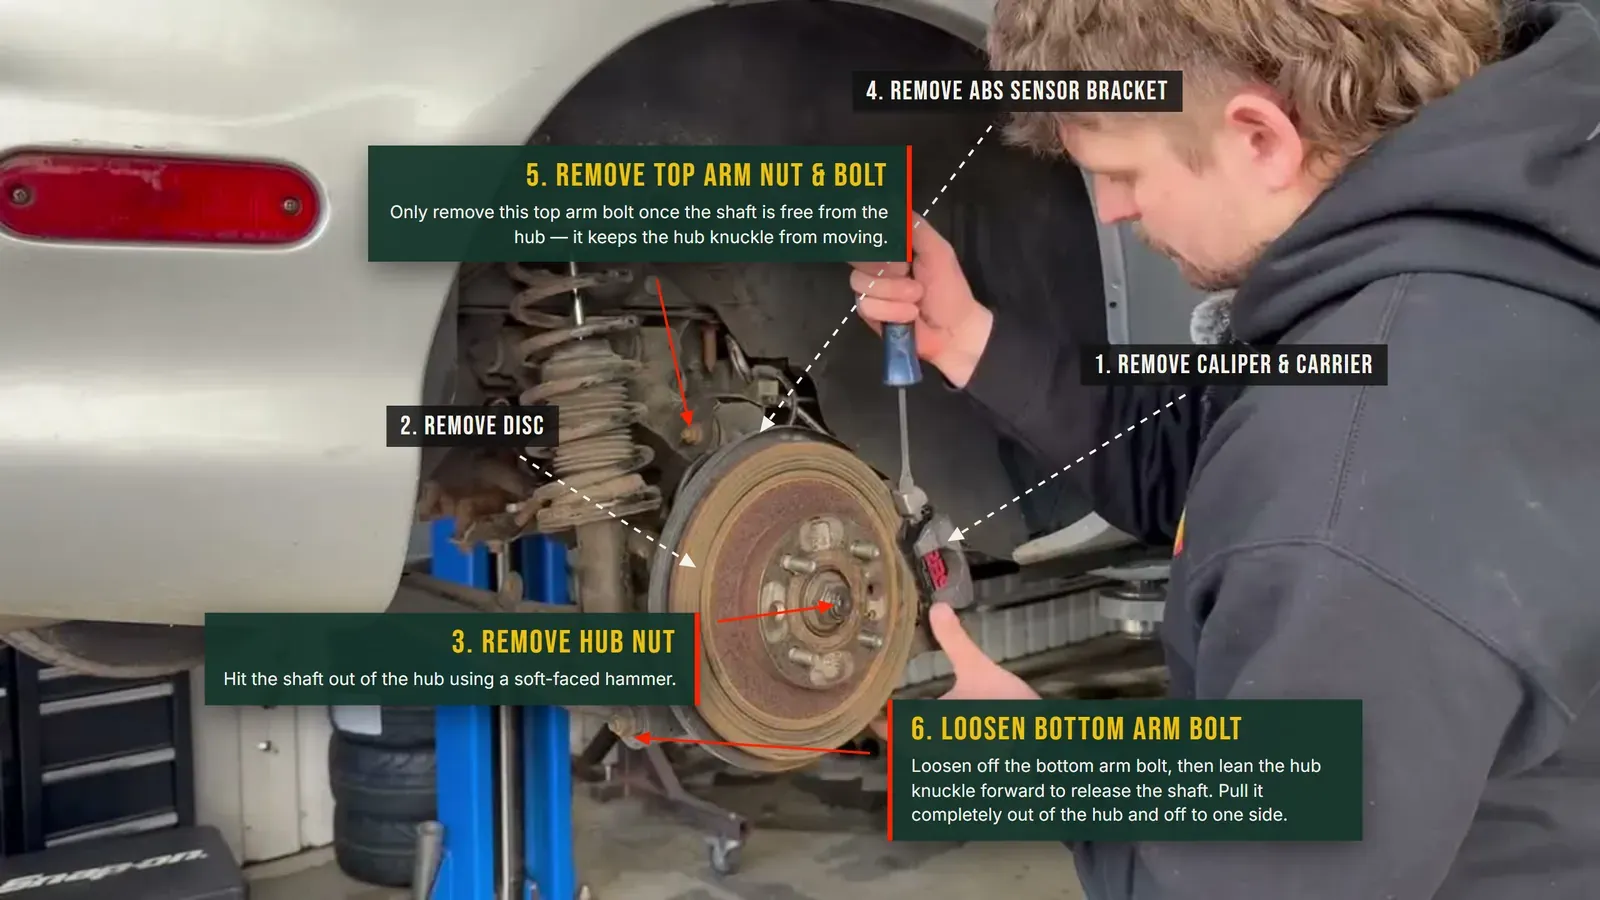
1. Driveshafts out, both sides.
- Wheel off. Take the brake caliper and carrier off the hub and hang them up, so the brake lines are not strained and the hub can move.
- On an ABS car, take the ABS sensor out of the top of the hub.
- Off with the hub nut.
- Knock the driveshaft free from the hub, not the diff. A soft-faced or copper hammer on the end of the shaft drives it back out of the hub splines. Do it while the arm is still bolted up, so everything is held tight and the blow lands clean. Once it is free of the hub, move on.
- Remove the top arm bolt, the one that bolts the upper arm to the top of the hub.
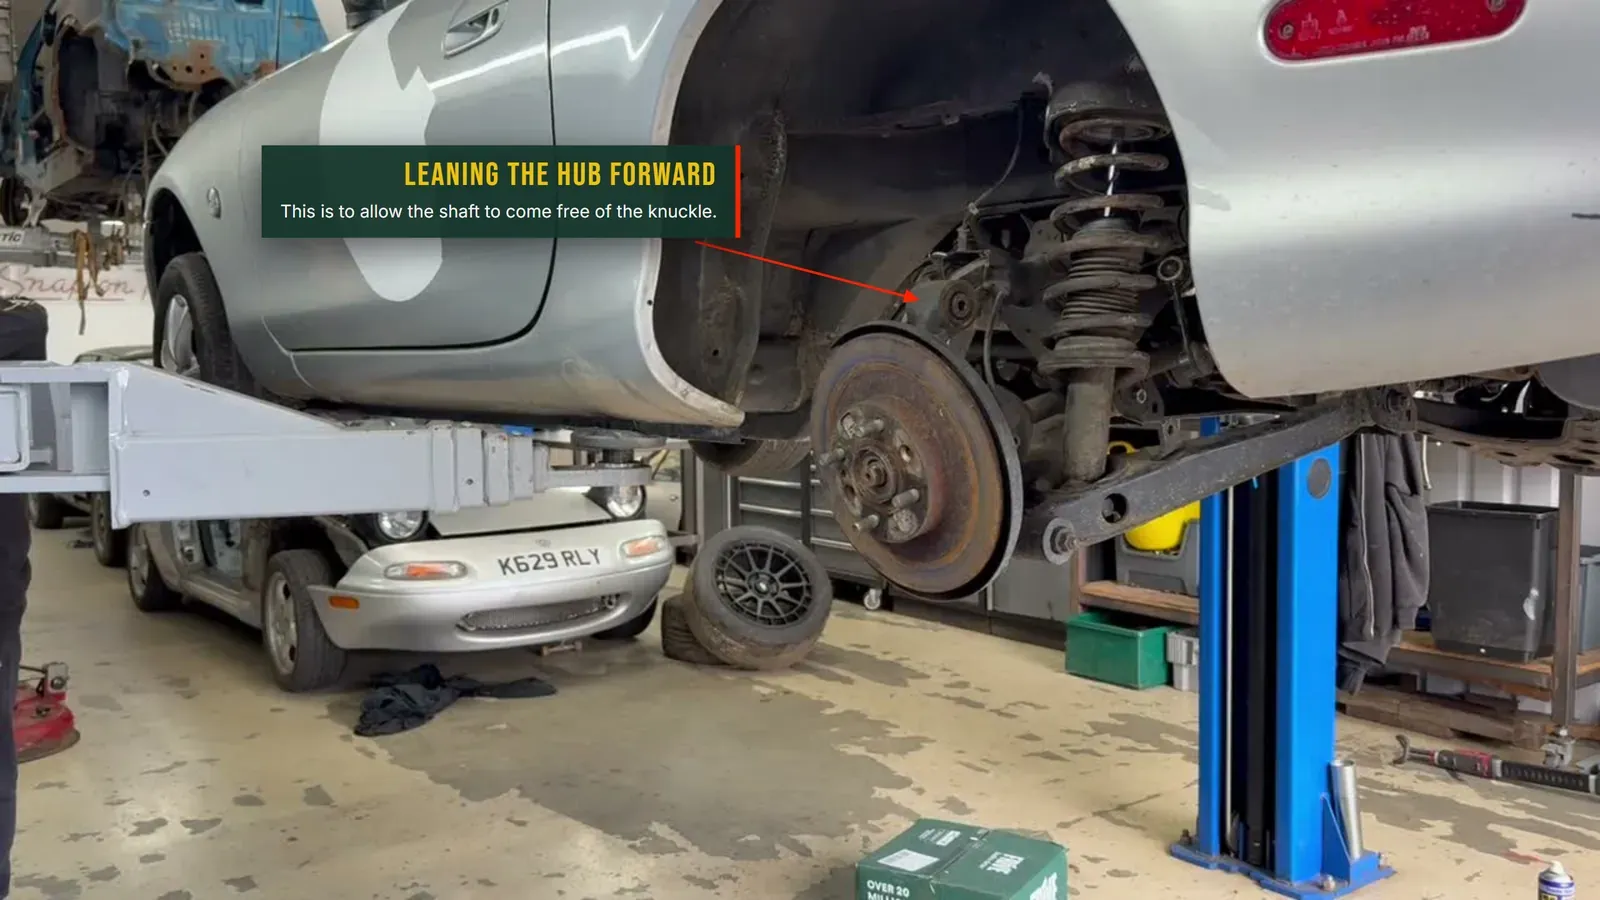
- With the top arm free of the hub, loosen the bottom arm bolt and lean the hub forward. The outer end of the shaft comes out of the hub entirely. Push it aside, clear of the hub, with the other end still in the diff.
- Finally, lever or knock the shaft out of the diff. It is held by a circlip and pops when it frees. You drained the diff before you started, so nothing follows it out; with the car level the shaft sits below the fill line anyway.
2. Exhaust and brace off. Drop the exhaust to get at the mounting points, and remove the brace that runs under the diff (17 or 19mm, but it varies by car). This clears the access you need for everything else.
3. Propshaft and PPF. If you are only doing the diff you can undo the prop bolts, leave the PPF, and fish the prop out. We were pulling the gearbox on this car too, so the whole PPF came off:
- The four prop bolts at the diff flange come out, then a knock with a hammer frees the prop to pull out of the gearbox.
- The PPF bolts at the top thread into press-in nuts, so tap those up through to free them.
- There is a dowel collar that locates into the diff for alignment. It needs chiselling and pulling out.
- Watch for a grounding strap on the PPF, it has to come off too.
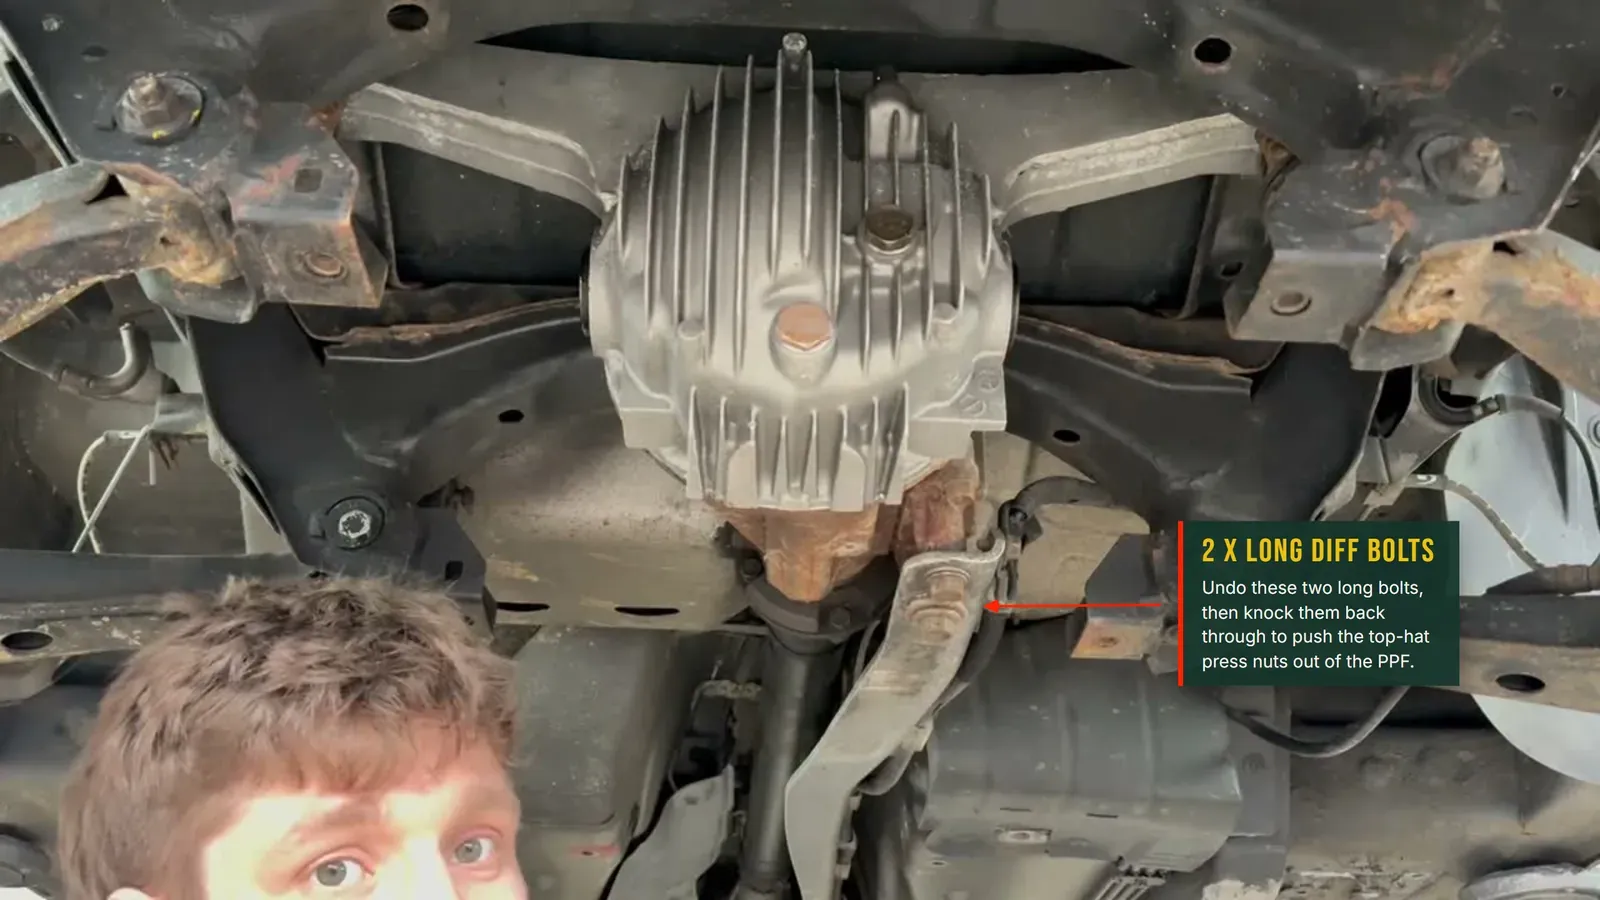
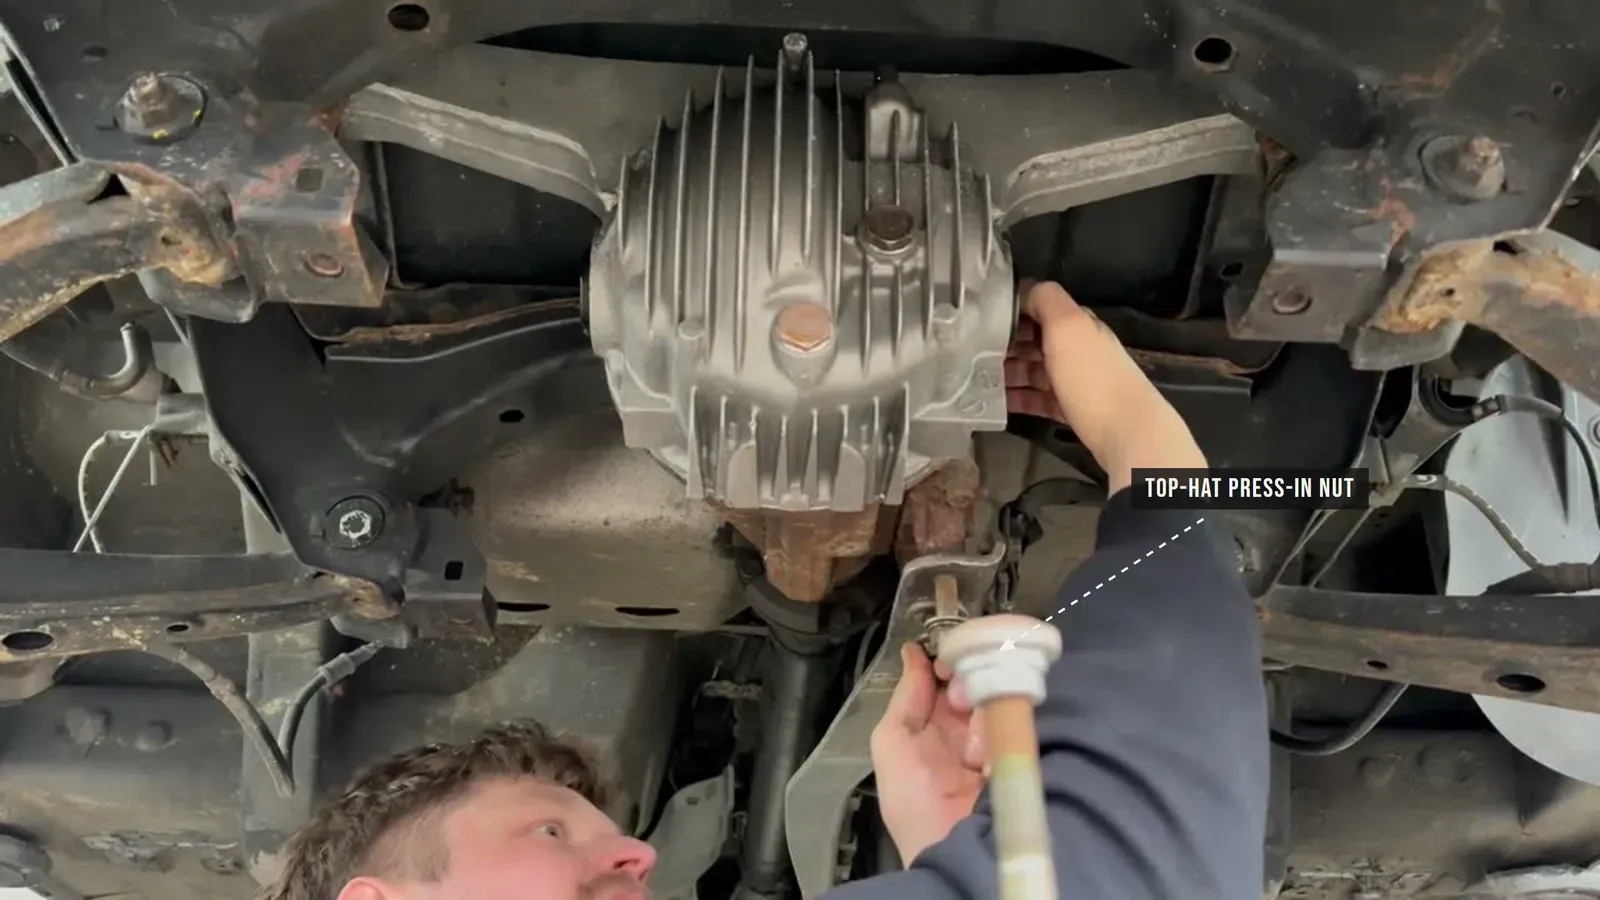
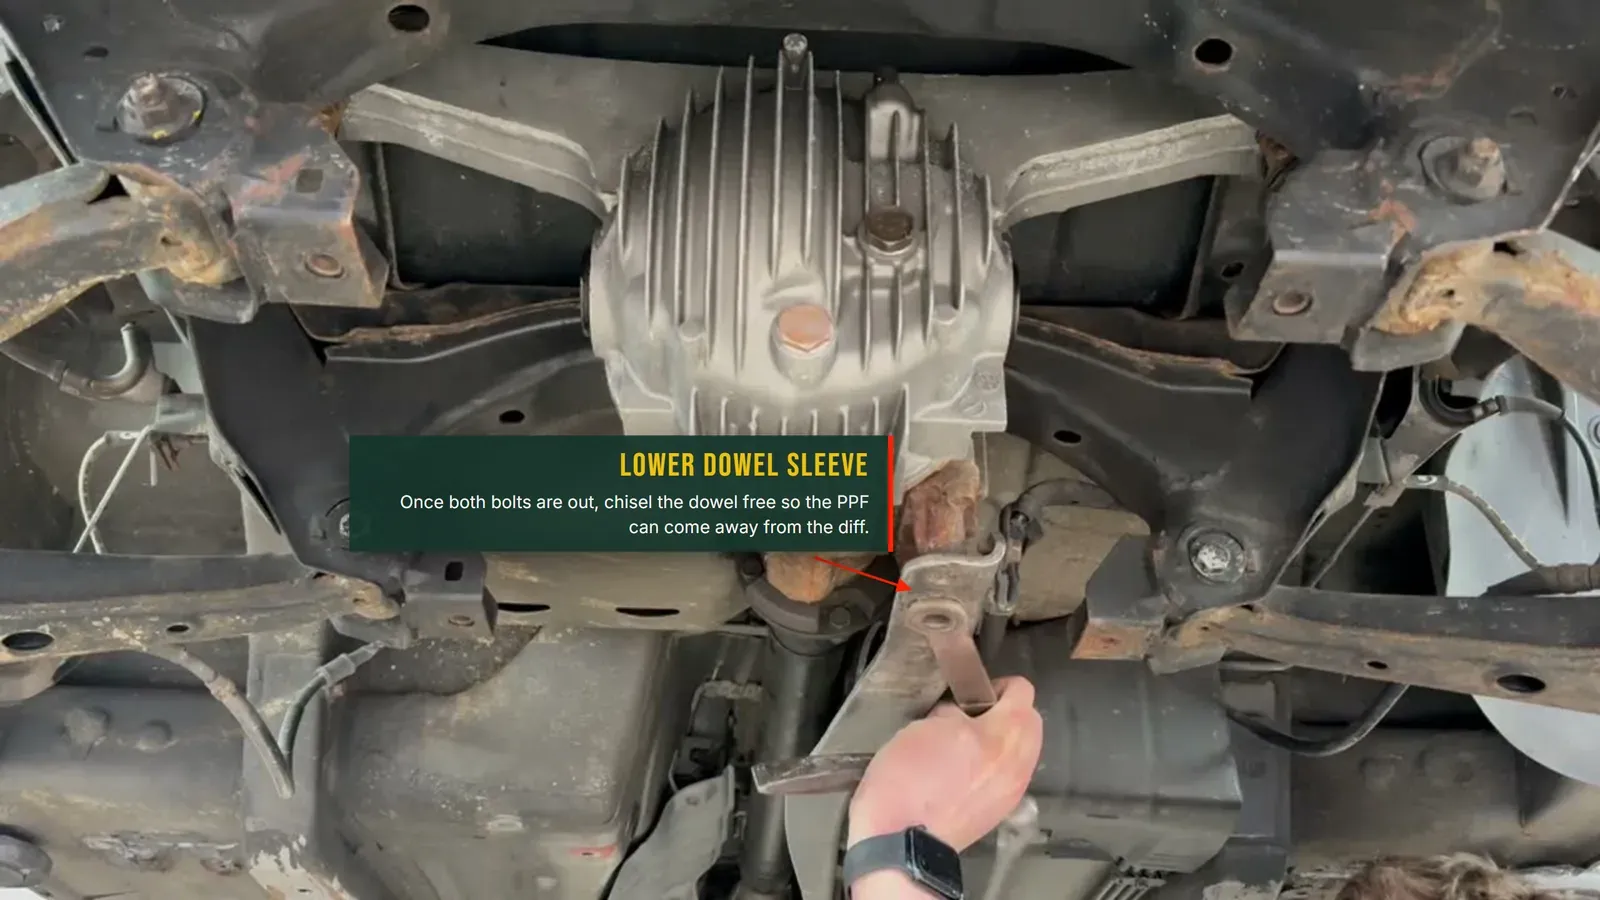
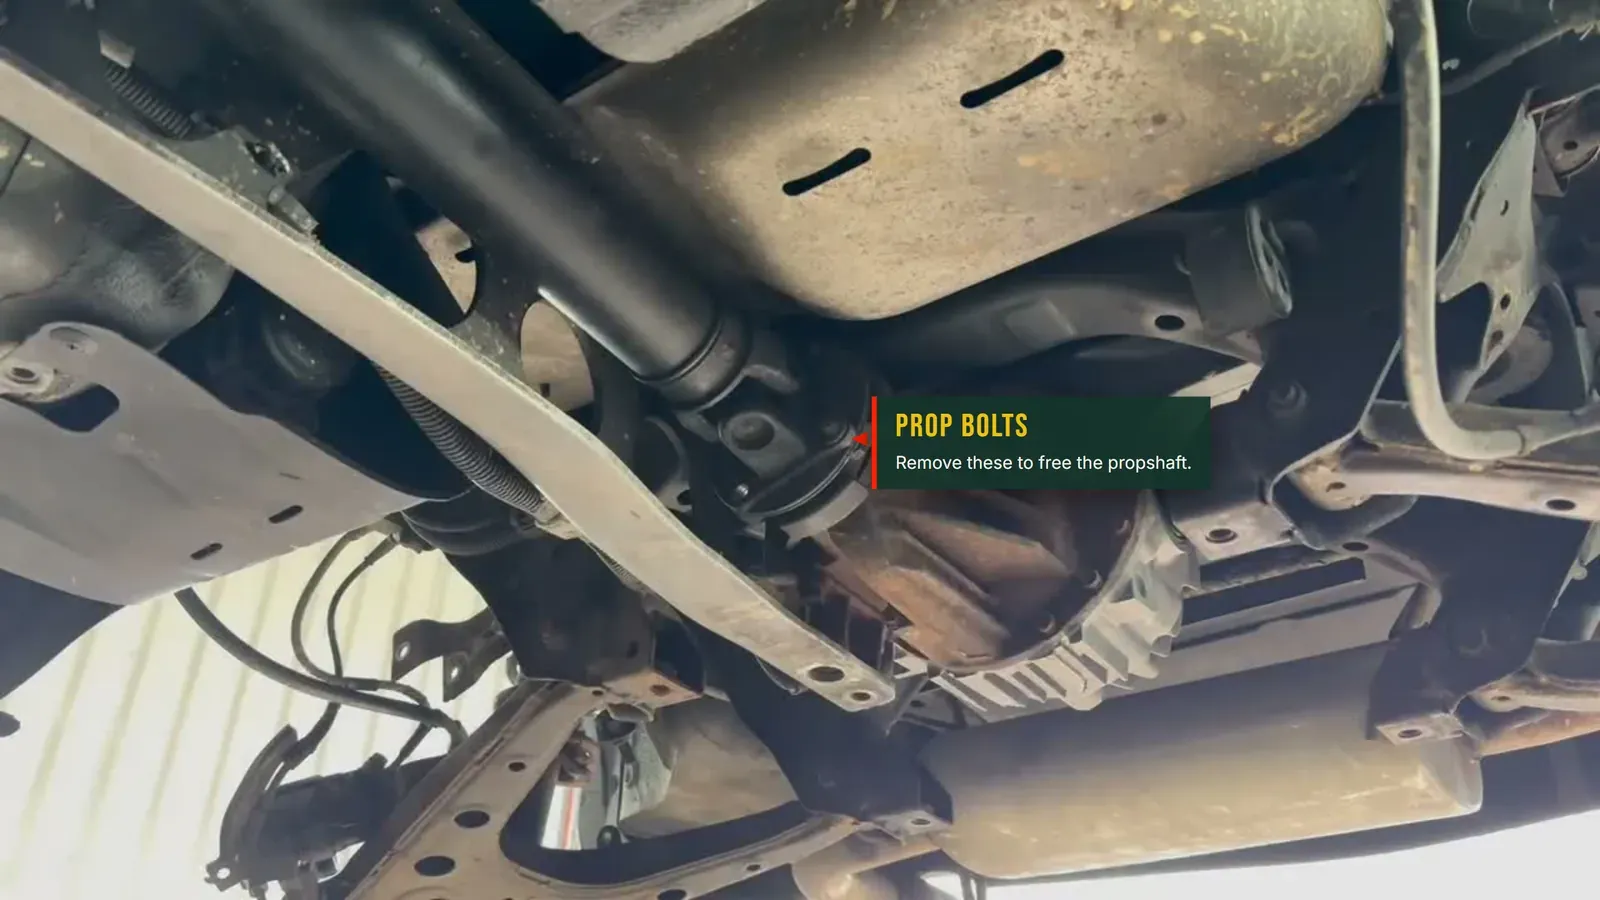
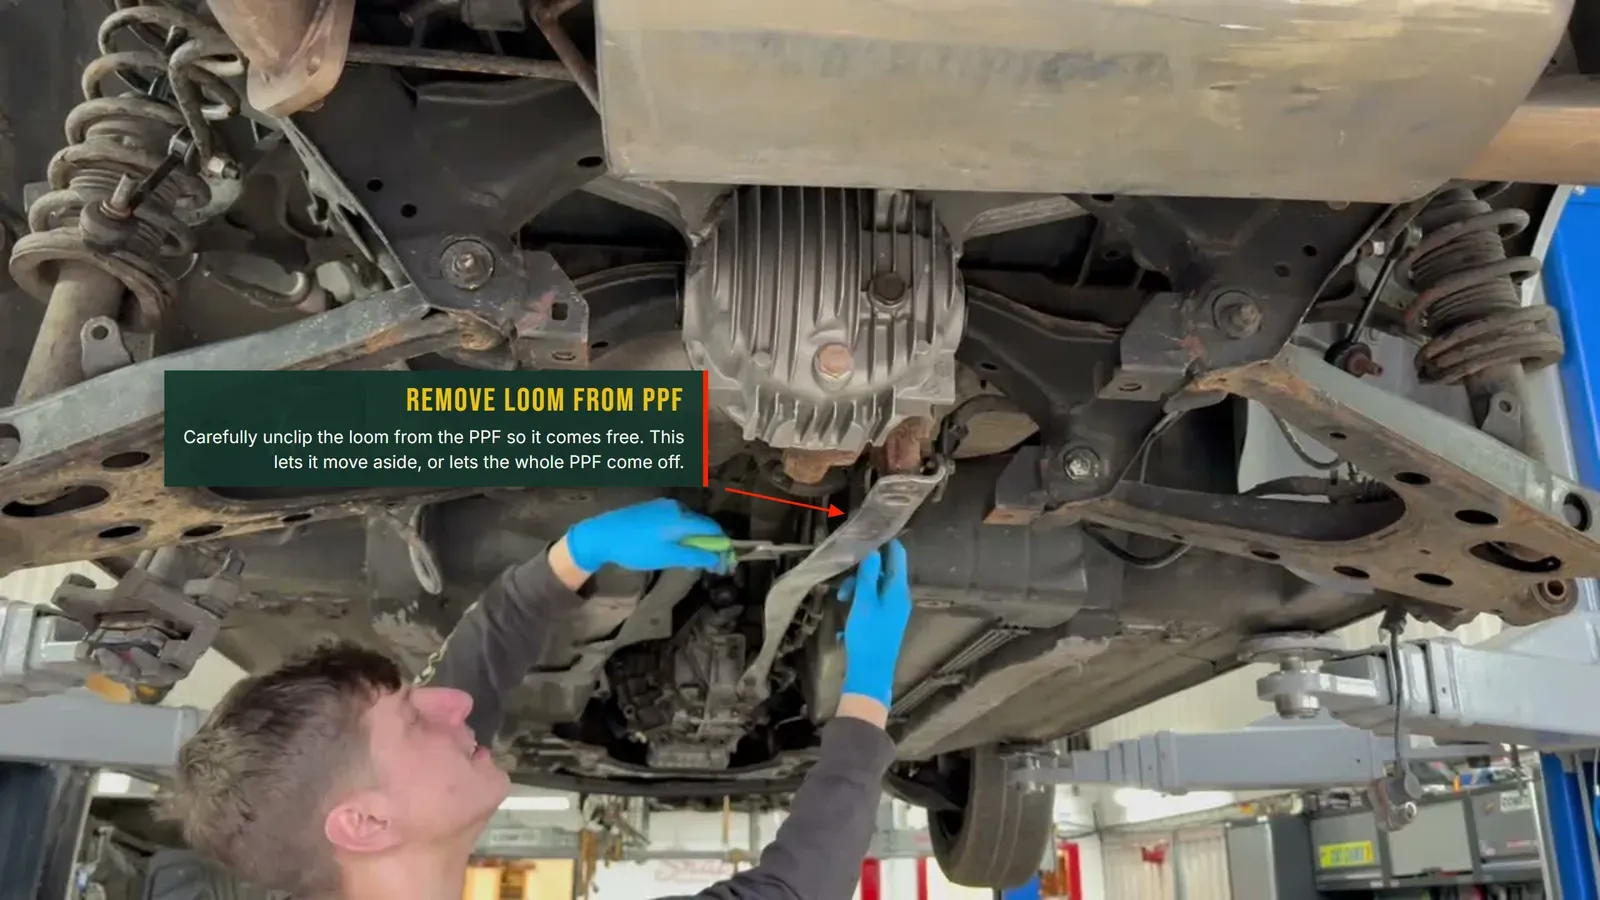
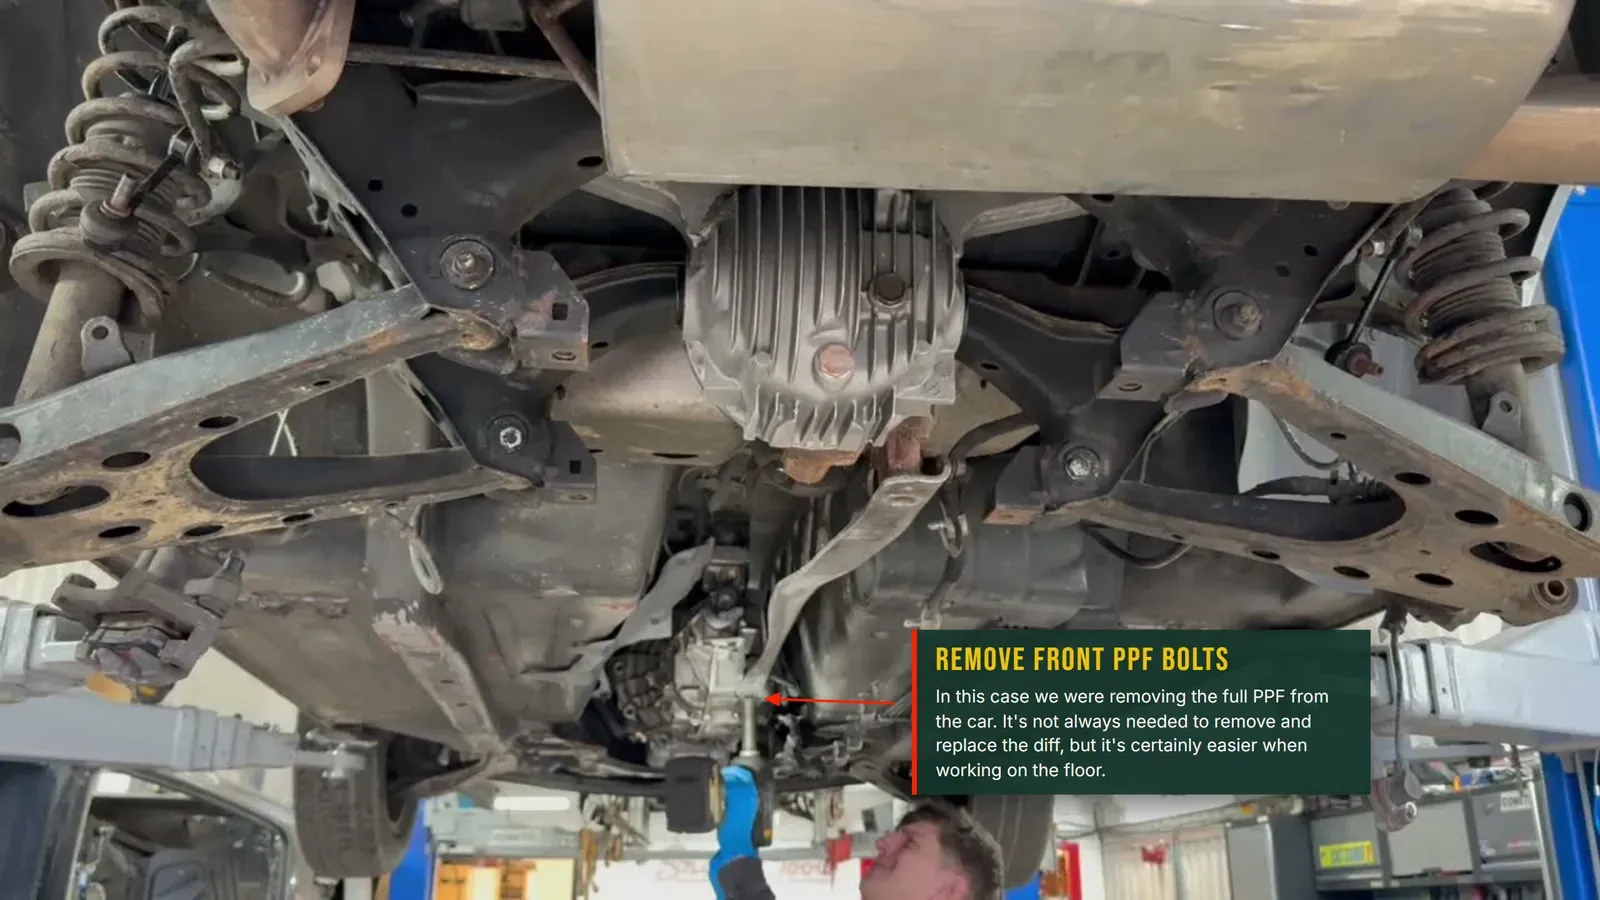
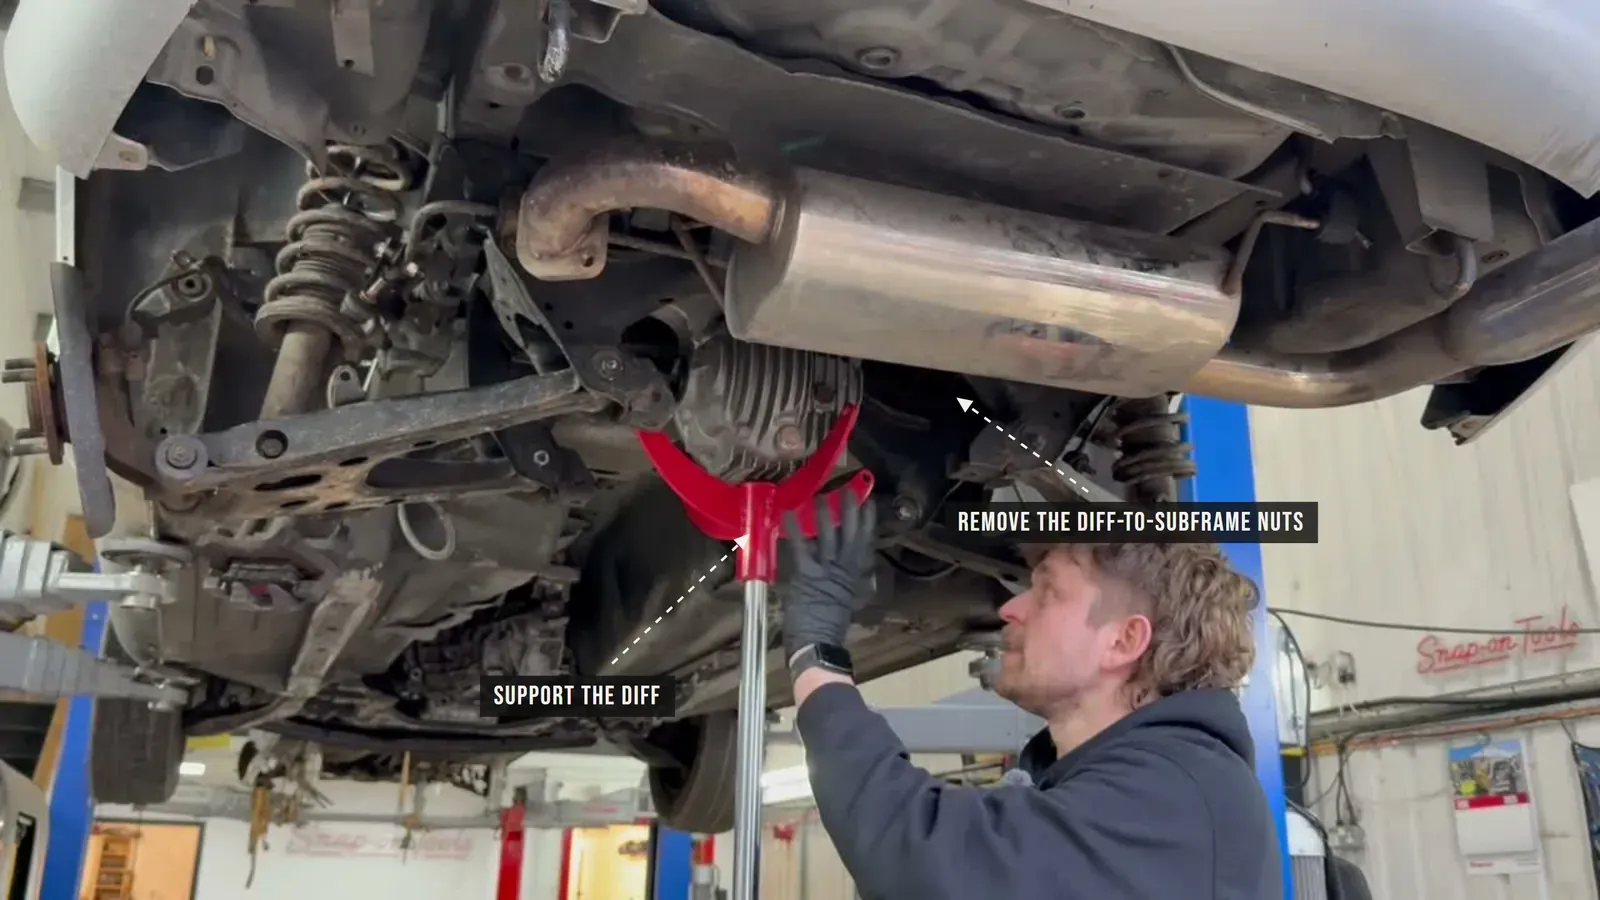
4. Drop the diff. Get a transmission jack, or a trolley jack if you are on the floor, under the diff and take its weight. Then remove the two larger 17mm mount nuts, which need a 17mm socket on an extension to reach rather than a spanner, and the two 12mm nuts that hold the mounting cups. With those out, the diff lowers down, sometimes with a wiggle, and comes out of the car.
Putting it back in
It goes back in the reverse order, with one step that matters more than the rest: aligning the PPF.
1. Diff up and mounted. Lift the new diff up on the jack, locate it on its mounts, and fit the two main mount nuts and the two 12mm cup nuts.
2. PPF and prop. Refit the PPF and the propshaft. Locate the dowel collar, the press-in nuts and the grounding strap as they came off, and run the four prop bolts back into the diff flange.
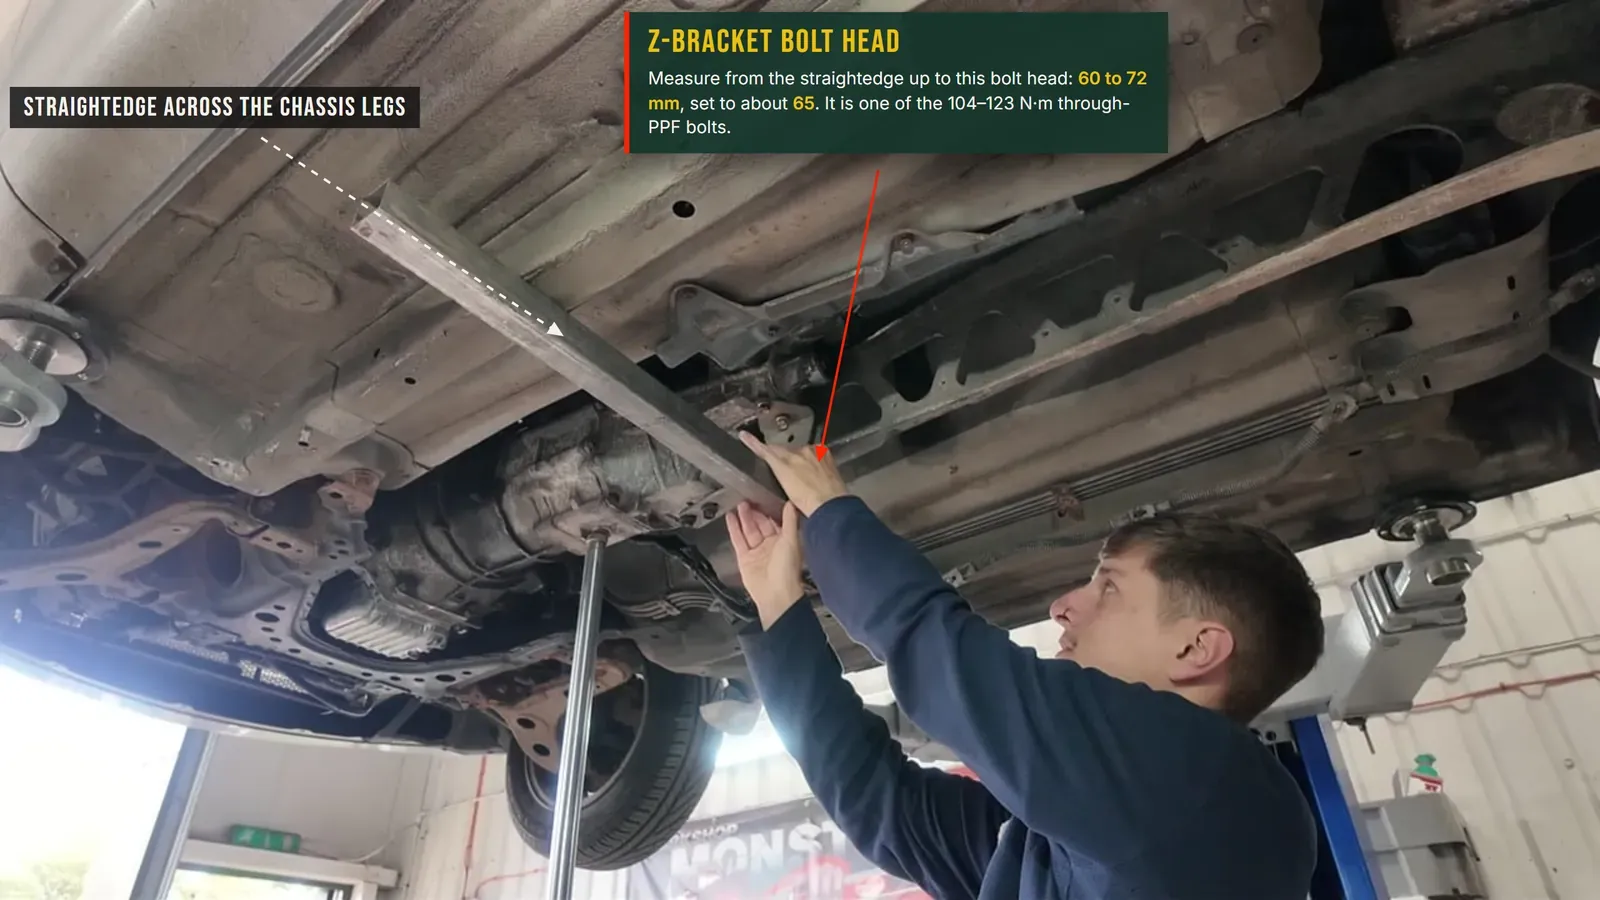
3. Align the PPF. This is the step people skip, and getting it wrong gives you a chattering, clunking driveline. The PPF sets the angle between the gearbox and the diff so the propshaft runs true, and there is no separate hard mount to set it for you. Lay a straight edge across the chassis legs, directly below the bolt head on the Z bracket. With the diff and gearbox supported, measure from the straight edge up to the bolt head: you want 60 to 72mm, and the middle of that, about 65mm, is the target. Pump the jack up to just under 70mm, tighten the bolts, let it settle back down, and check where it sits. Repeat until it lands around 65mm.
4. Driveshafts and brakes back. Push each driveshaft back into the diff until the circlip clicks home, then into the hub. Hub nut on, top and bottom hub bolts up, ABS sensor back in, then the disc, caliper and carrier.
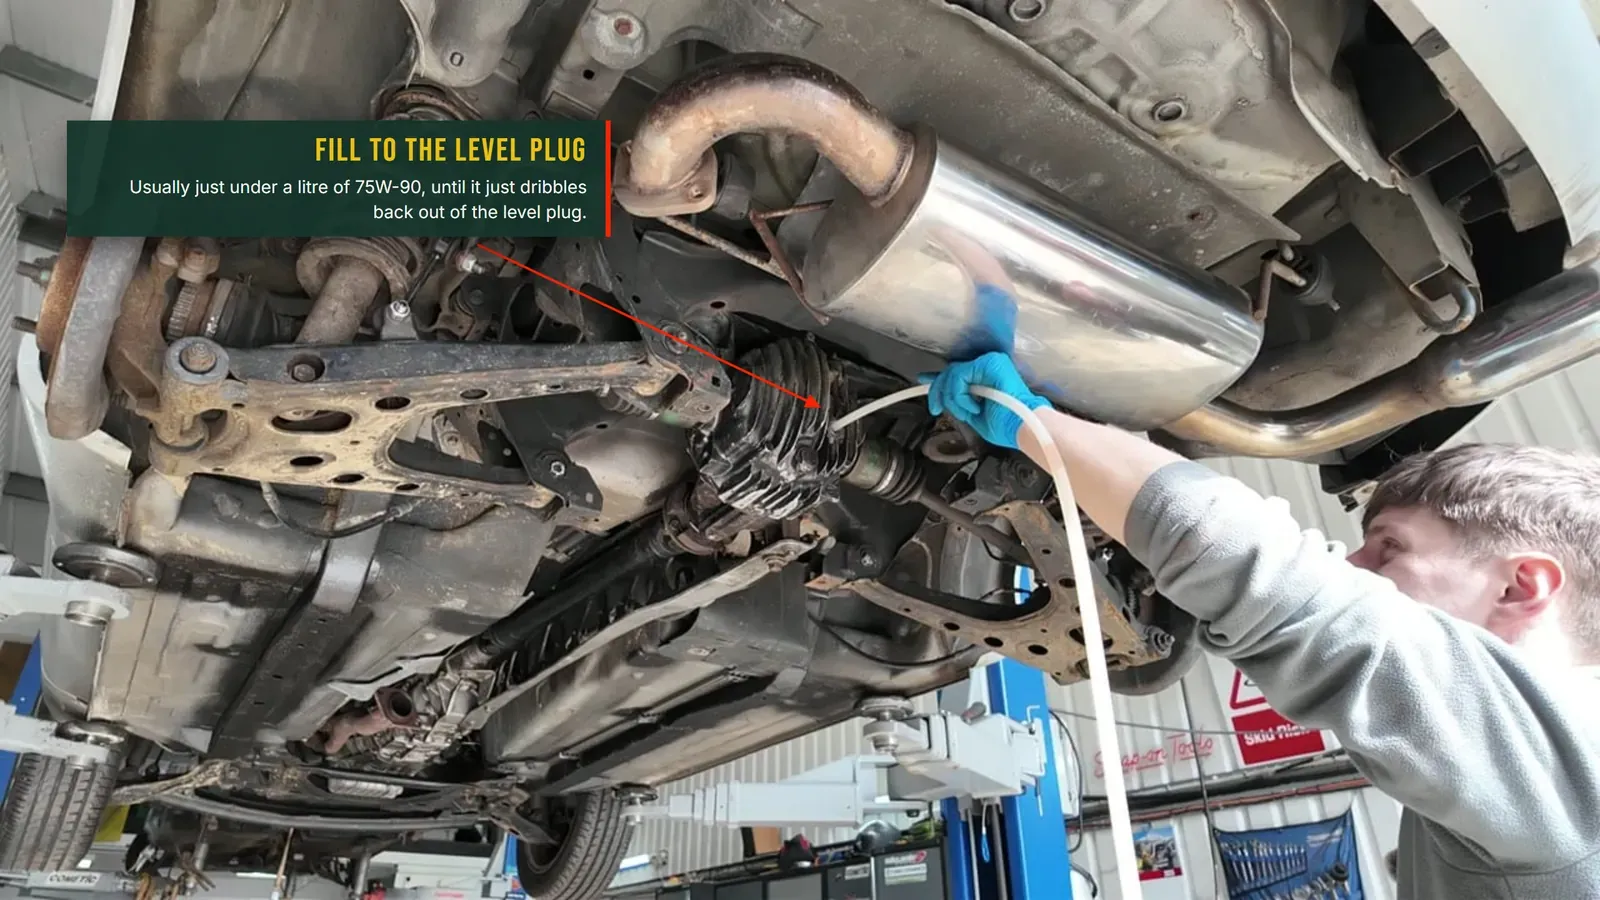
5. Fill it and finish. One habit that saves a bad day: crack the fill plug loose first, before you touch the drain plug. If you drain it and then find the fill plug is seized or rounds off, you have an empty diff and no way to fill it. Fill plug first, every time. Then fill the diff with 75W-90 GL-5 to the level plug, which takes around a litre, refit the exhaust, and that is the job.
The numbers
| Fastener | N·m | lb-ft |
|---|---|---|
| Propshaft to diff flange (four bolts) | 55 | 41 |
| Diff to subframe, centre bolt | 83–98 | 61–72 |
| Diff to subframe, outer bolts | 18–27 | 13–20 |
| PPF bolts that pass through the frame: two at the diff, two at the gearbox, plus the single Z-bracket bolt (five in all) | 104–123 | 77–91 |
| PPF differential spacer bolt (short, at the diff) | 38–51 | 28–38 |
| Z-bracket's own bolts into the gearbox (do not pass through the PPF) | 37–53 | 27–39 |
| Diff fill and drain plugs | 40–53 | 29–39 |
What each fastener is, so the table makes sense:
- Propshaft to diff flange: the four bolts joining the propeller shaft to the diff's companion flange. 55 N·m is the large-case figure (1.8 NA, NB, NB2); the early 1.6 small-case diff prints 27 to 30.
- Diff to subframe mounts: the larger centre mount and the two smaller outer cup nuts that hang the diff off the back of the car.
- PPF bolts through the frame: every bolt that passes through the Power Plant Frame takes the same 104 to 123 N·m. That is two at the diff end, two at the gearbox end, and the single Z-bracket bolt you set the alignment to, five in all. The bolt is a different length each time, but the torque is the same.
- PPF spacer bolt: the short bolt at the diff end that sets the spacing. Much lighter than the through-bolts, 38 to 51 N·m.
- Z-bracket's own bolts: the smaller bolts that hold the bracket onto the gearbox. These do not pass through the PPF, so they are not the big figure, 37 to 53 N·m.
- Fill and drain plugs: the diff oil plugs. Crack the fill plug loose before the drain plug, every time.
- PPF alignment: 60 to 72mm at the Z bracket, set to about 65mm.
- Diff oil: 75W-90, GL-5, filled to the level plug (around a litre). A Torsen runs standard GL-5; a clutch-type Fuji LSD wants a friction-modified LSD oil or additive so the clutch pack works smoothly, so check what you are fitting. Crack the fill plug loose before the drain plug.
Why the order matters
The diff itself drops out in minutes once everything around it is free. The two things that make it a good job rather than a noisy one are getting the driveshafts out cleanly without tearing a circlip or marking a shaft, and setting the PPF back in spec so the driveline runs quiet. Do those two right and the rest is just bolts.