
If your MX-5 has stock engine management, there is a small amount of power the factory left on the table, and you can have it back for nothing but your time. It comes from ignition timing. This is how the timing works, how to set the base correctly, and how we advance it for a bit of free power, including where it can bite you if you get greedy.
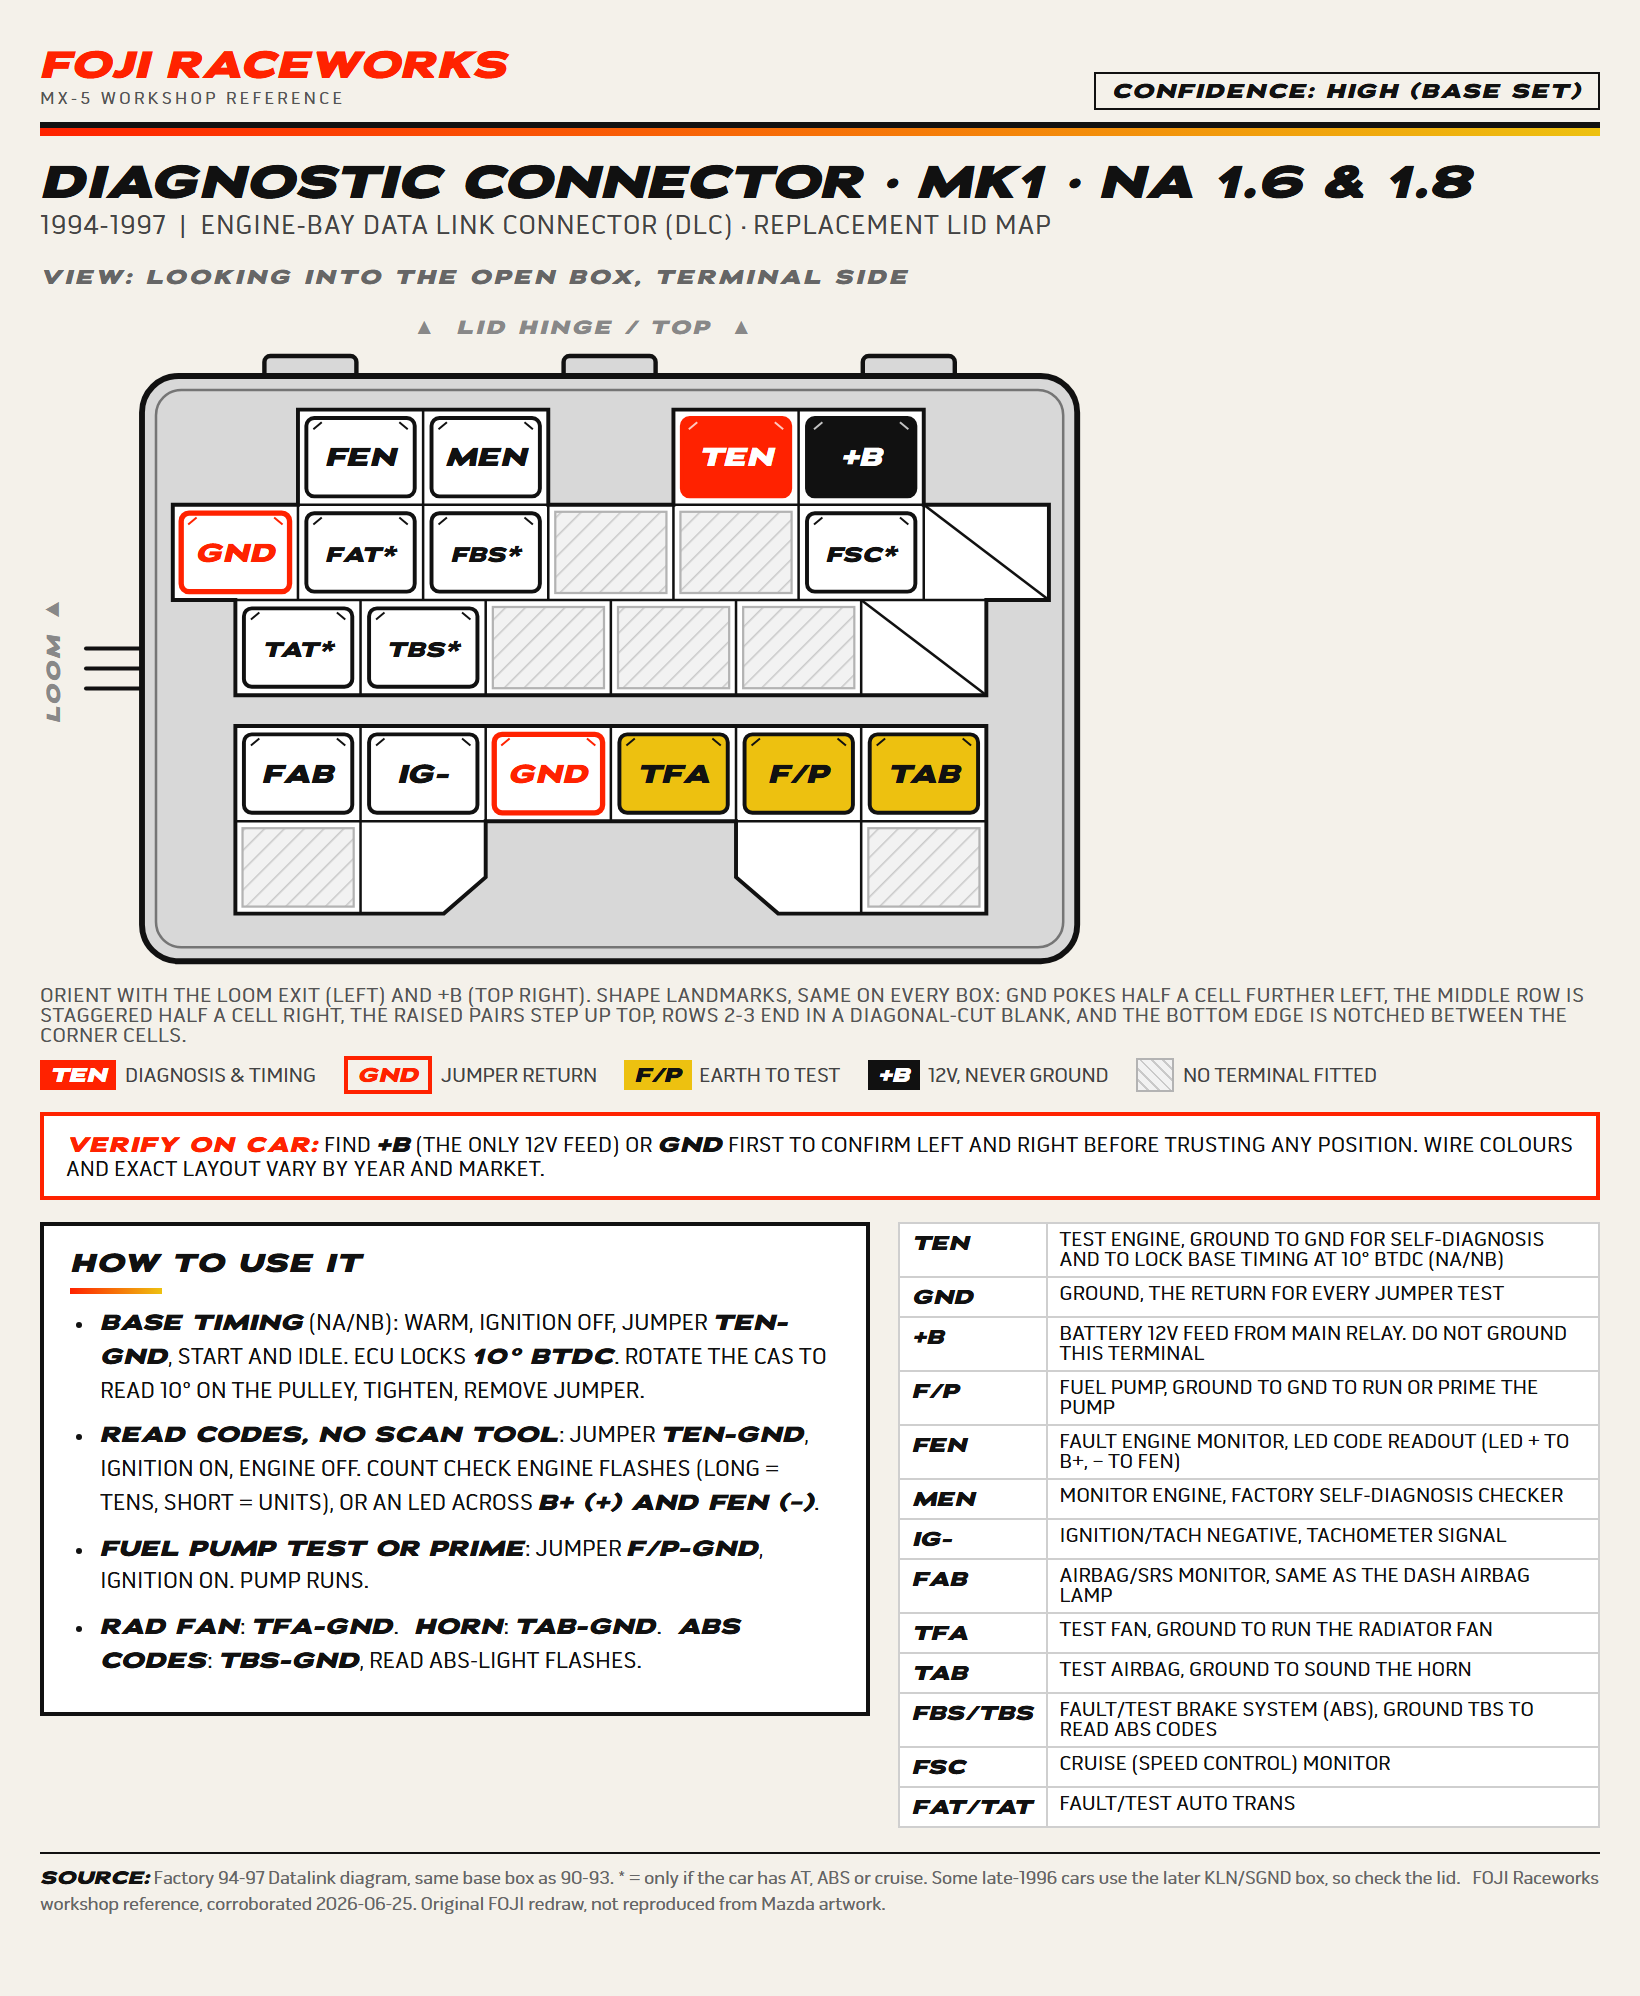
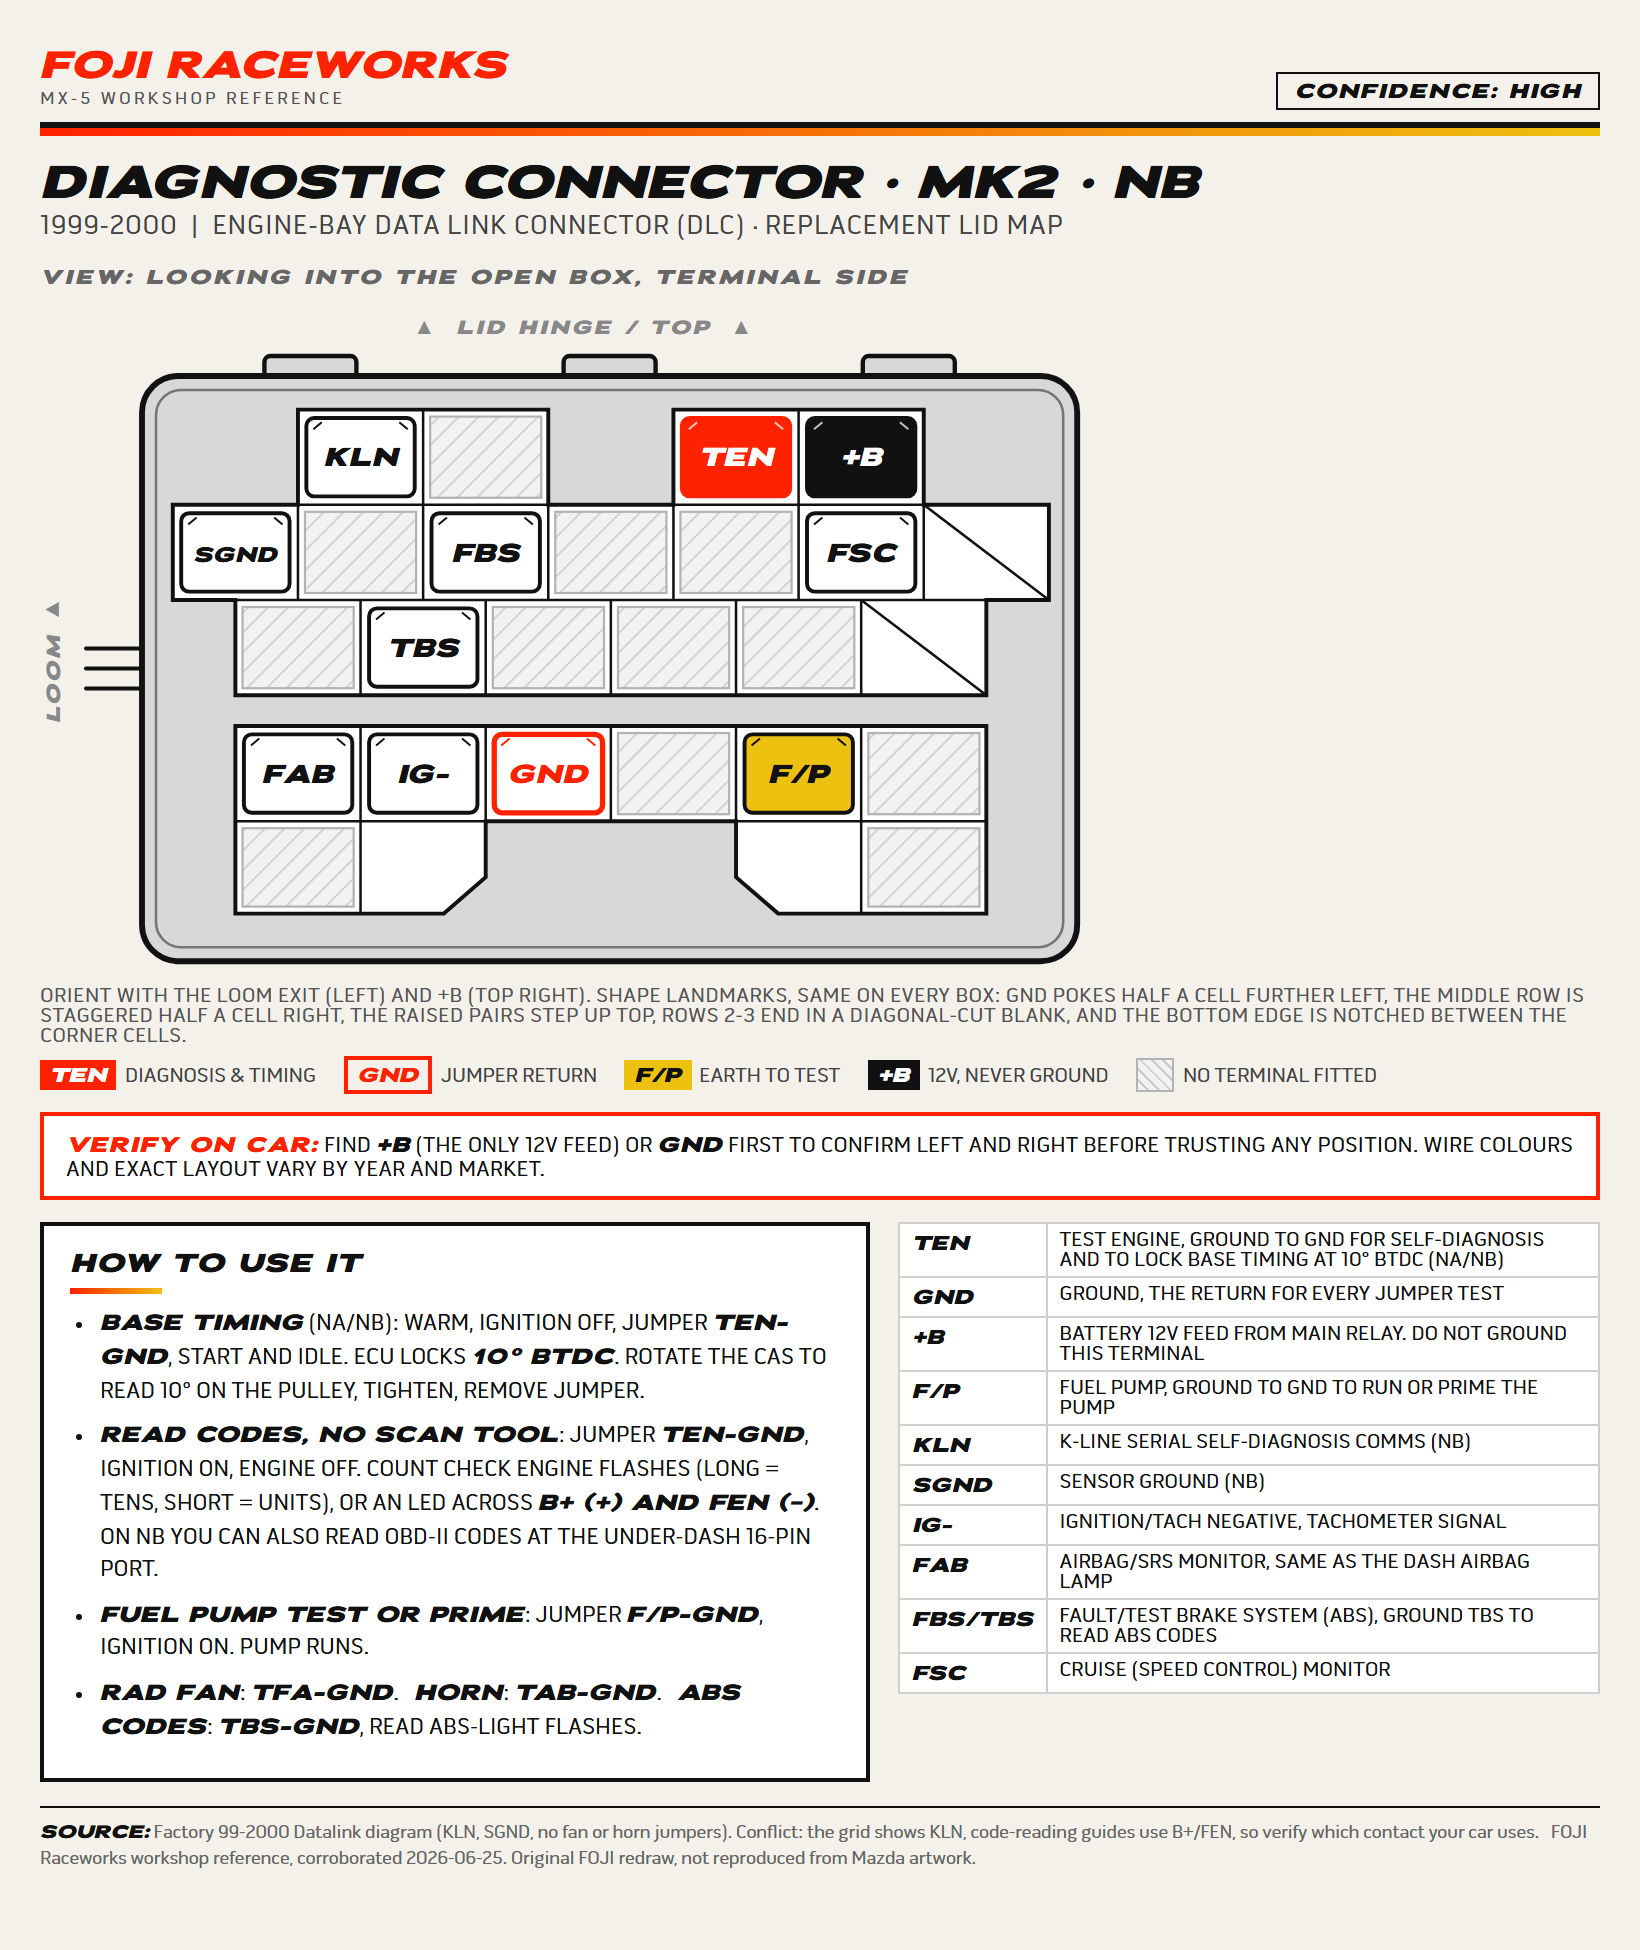
The Mk2.5 map, the printable PDFs and every terminal explained are in the diagnostic box, pin by pin.
What base timing is, and why it matters
The engine fires the spark plug just before the piston reaches the top of its stroke, so the flame has time to spread and push hardest just after top dead centre. On an MX-5 the factory base figure is 10 degrees before top dead centre. The full timing curve moves around through the rev range, but the base is the fixed reference everything else is built on. If the base is wrong, the whole curve is wrong, and that often happens without anyone realising: move, change or adjust anything near the sensor and you can shift the timing without touching it.
| Quick reference | Figure |
|---|---|
| Factory base timing | 10 degrees before top dead centre |
| Free-power advance | 14 degrees |
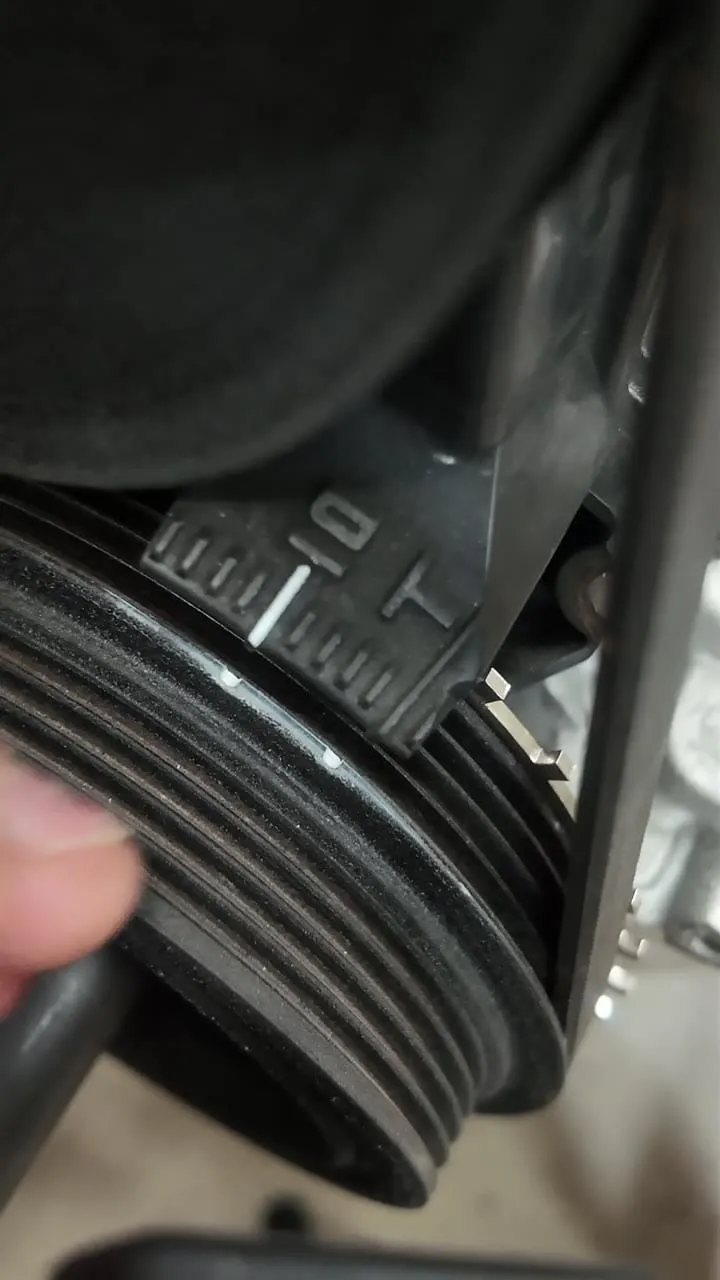
| Pulley notch value | 2 degrees each |
| Base idle | Around 850 rpm (roughly 850 plus or minus 50) |
| Fuel once advanced | 99 high-octane |
How your car reads the engine: Mk1 vs Mk2 vs Mk2.5
The three generations pick up engine position differently, which is why the adjustment is in a different place on each.
- Mk1 (NA): one sensor does both jobs. The crank/cam angle sensor sits in the back of the cylinder head, driven off the cam. It has its own triggers and a reference, and it is bolted on through a slotted hole so it can be rotated to set the timing.
- Mk2 (NB): the job is split. A crank angle sensor reads a four-trigger plate on the back of the crank pulley, and a separate cam angle sensor reads the cam wheel on the intake side.
- Mk2.5 (NB facelift): same idea as the Mk2, with the cam pickup moved to the back of the cam.
Setting the base timing
You need a 12mm spanner or socket, a timing light, and a paint pen. Use the paint pen to highlight the timing notch on the crank pulley so you can actually see it under the strobe.
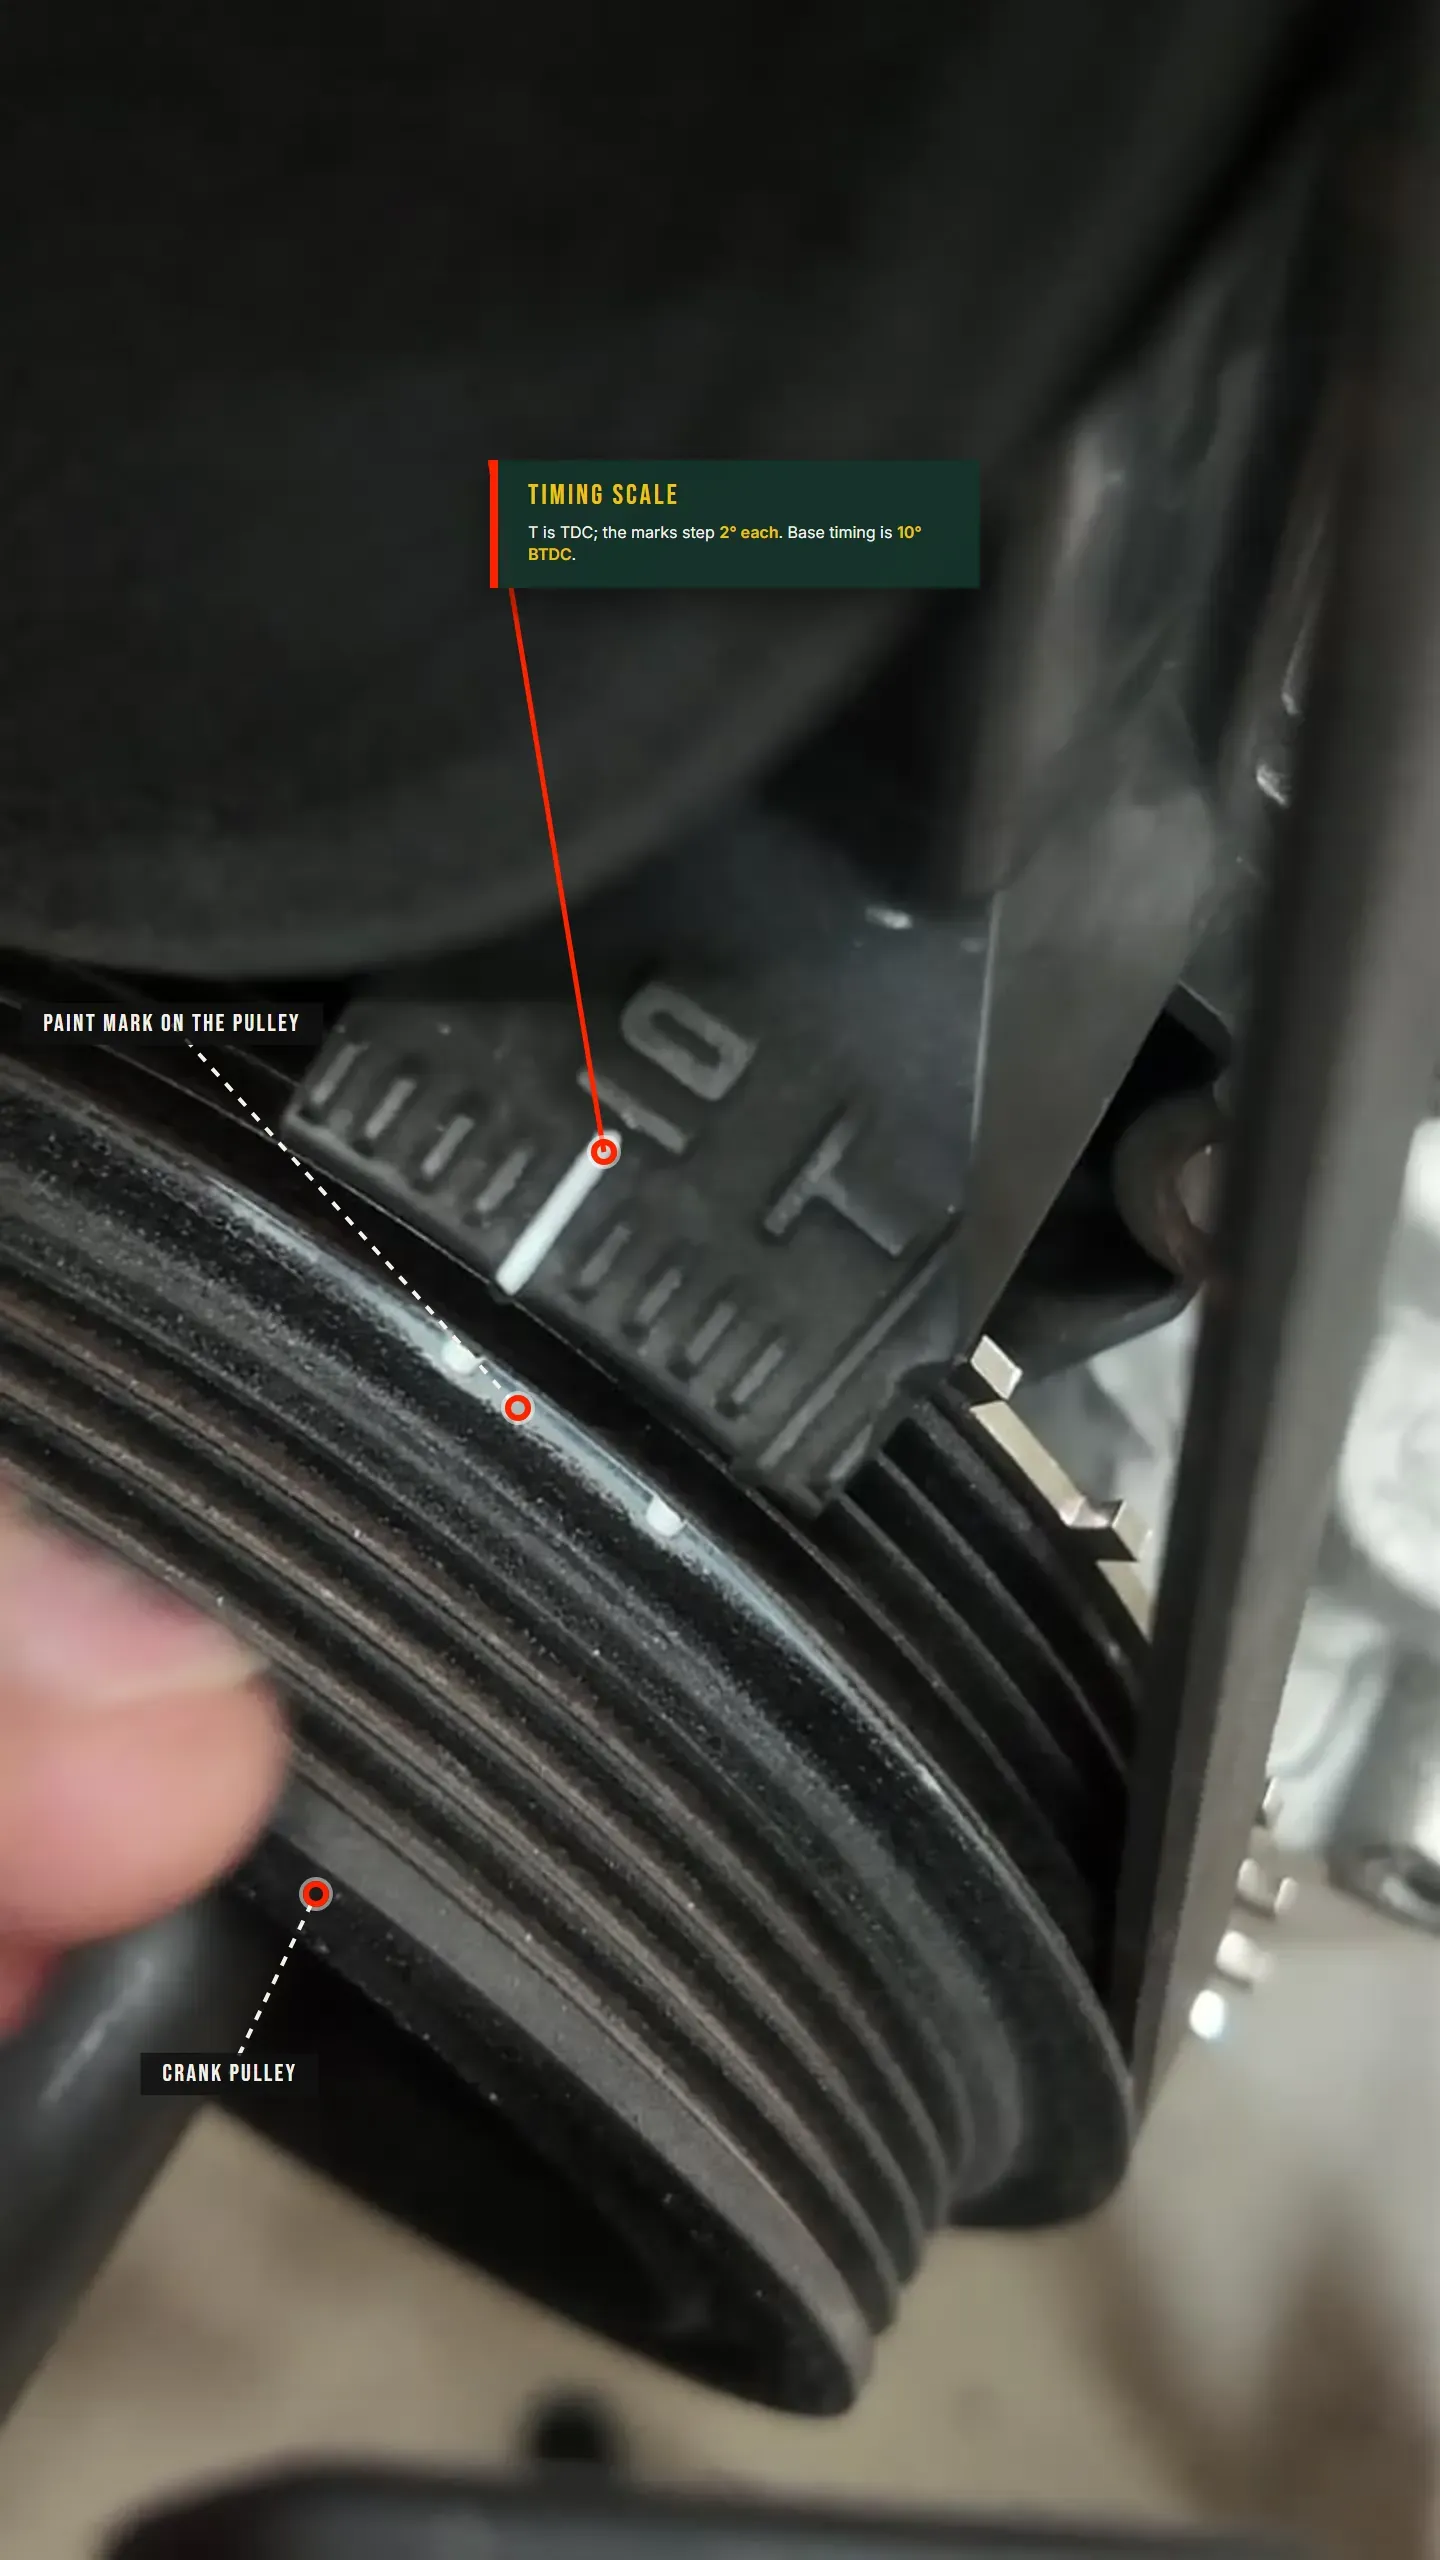
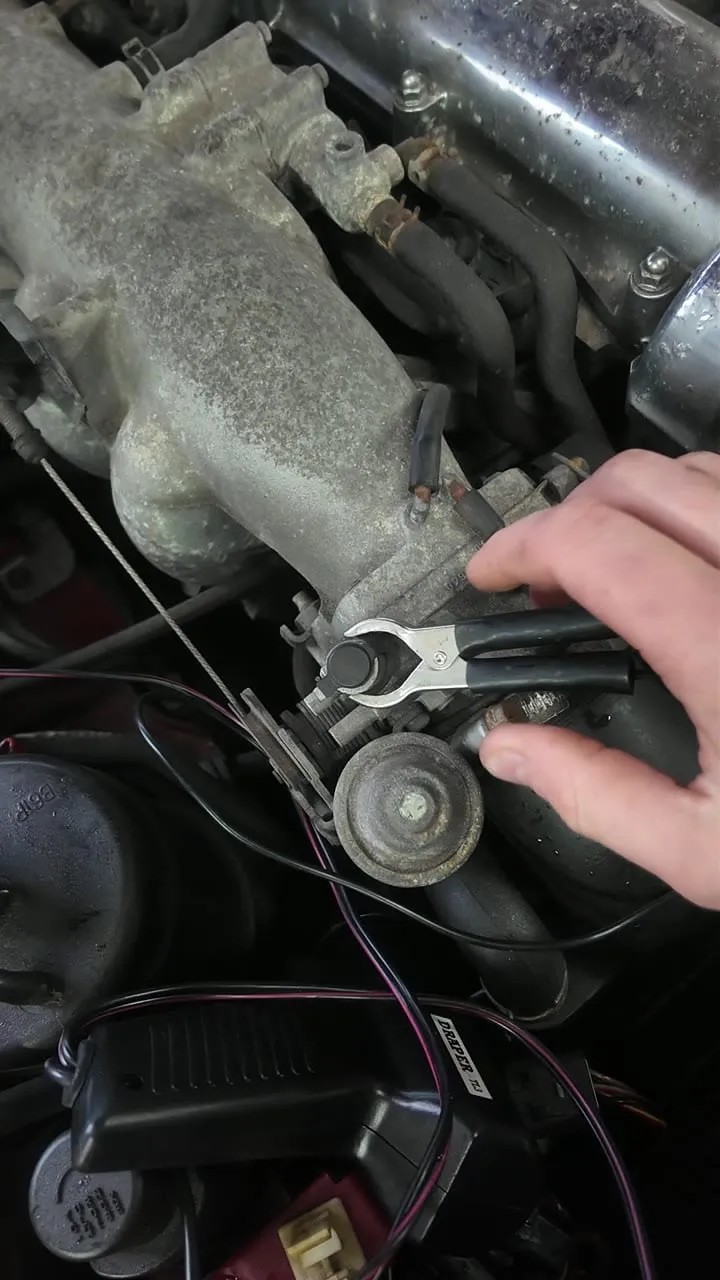
- In the diagnostic box, bridge the terminal marked TEN to GND with a piece of wire. This puts the ECU into base-timing mode and holds it at a fixed 10 degrees, with the curve taken out of the picture.
- Run the engine up to temperature, no electrical load, base idle around 850 rpm (factory spec, roughly 850 plus or minus 50).
- Point the timing light at the pulley and read where the mark falls.
- Mk1: if it is off, slacken the 12mm bolt on the slotted sensor at the back of the engine and rotate it to bring the mark to 10 degrees. Mk2 / Mk2.5: the equivalent adjustment is at the trigger plate (below).
- Lock it down, then check again. Always re-read after tightening, because the act of locking it can nudge the timing.
That is the base set correctly. For a lot of cars with a tick of rough running or a slightly off idle, this alone is the fix.
The free-power mod: advancing to 14 degrees
The reason there is anything to gain: petrol in the 1990s was not as good as it is now, so the factory left the timing a little softer than ideal to keep a safety margin against knock. With better fuel you can bring it forward a touch and recover the efficiency they gave away. The target is to have peak cylinder pressure land at the most effective point just after top dead centre.
We advance the base from 10 degrees to 14 degrees.
- Mk1: using the same sensor adjustment as above, move it forward two notches on the pulley. Each notch is 2 degrees, so two notches is the 4 degrees from 10 to 14.
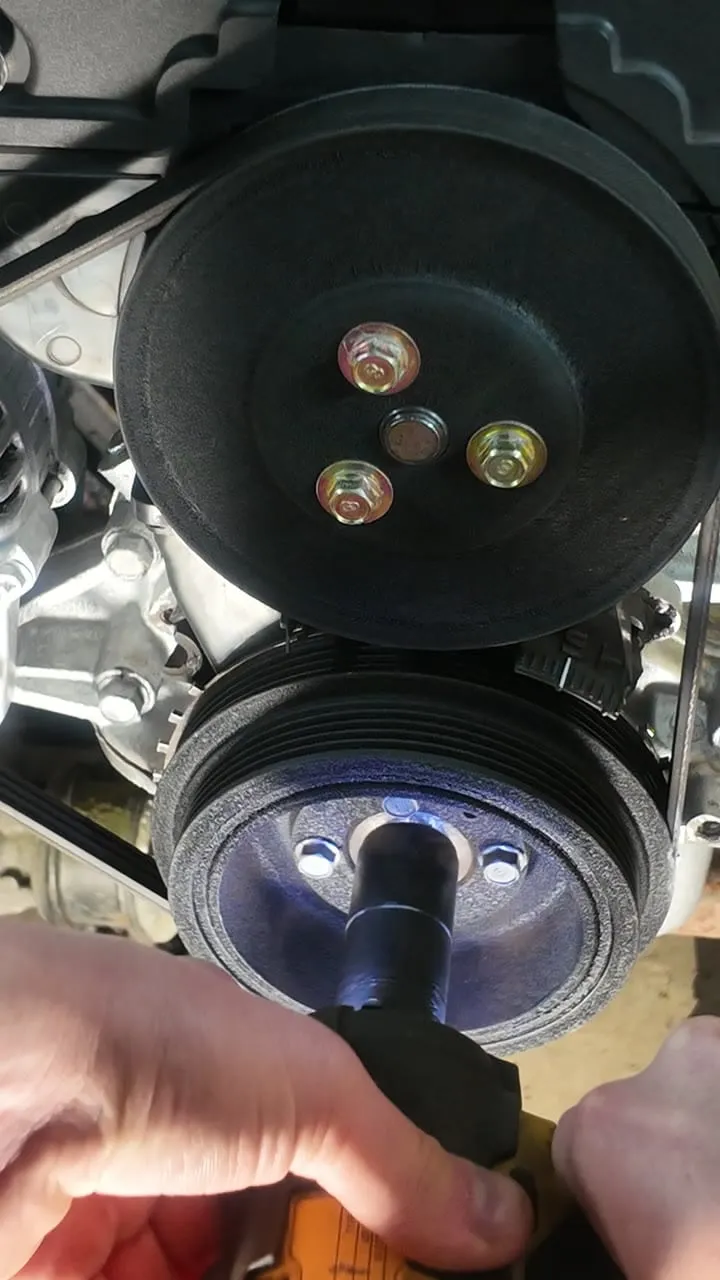
- Mk2 / Mk2.5: fit an adjustable trigger plate to the crank pulley (four M6 bolts hold the standard plate on). With the plate's slotted holes you rotate the trigger wheel, set the base back to 10 with the timing light, then nudge it round to 14. Refit the plate the same way round it came off, or the timing will be out before you start.
Where it bites
This is free power, not a free lunch. Advance the timing too far and you move from "more efficient" to detonation, where the mixture explodes instead of burning, and that is what wears or breaks engines. So:
- The car runs fine on 95, but once you have advanced it, run a high-octane fuel for the knock margin. 99 is the one to use, and keep it in the car: do not advance the timing and then drop back to budget fuel.
- Do not assume the engine management will save you. A Mk1 has no real knock protection, and although a Mk2 has a factory knock sensor it is basic and not something to lean on. Treat your own ears as the safety system: a light pinking or rattling under load, especially when hot or pulling hard up a hill, means back it off.
- If in doubt, set it back to the factory 10 degrees. Standard is never wrong.
14 degrees is a long-standing, sensible figure that plenty of MX-5s run happily on good fuel. We would rather tell you where the edge is than pretend there isn't one.